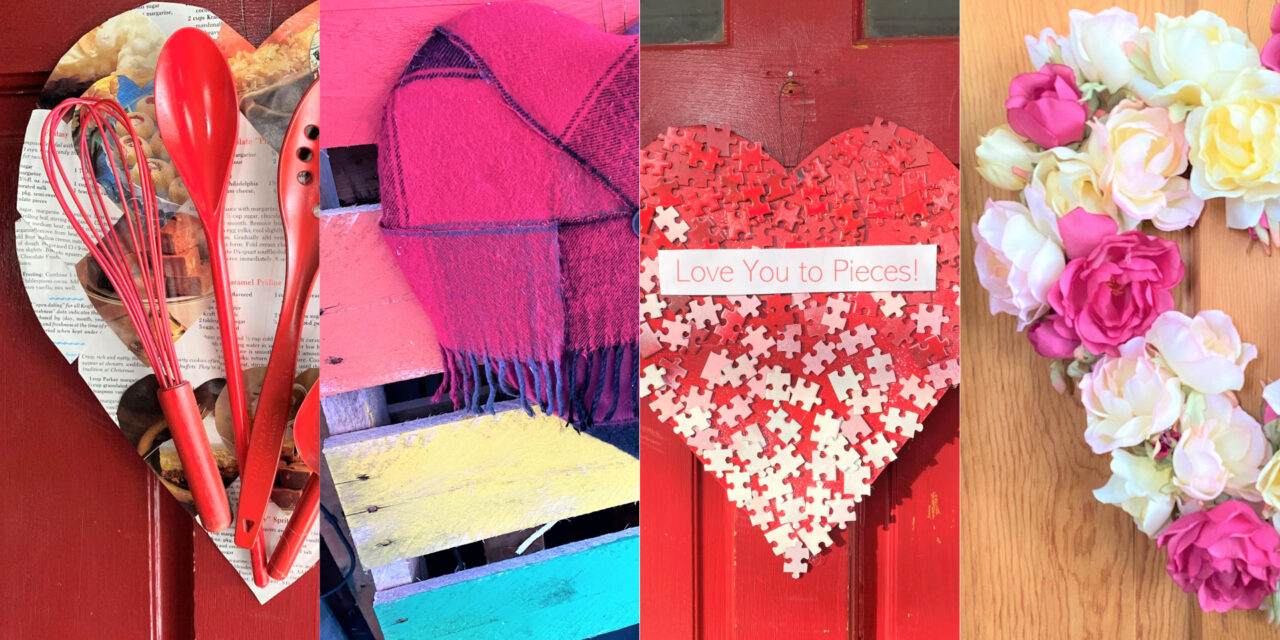
Get your front door ready for the upcoming Valentine’s Day holiday with heart-shaped wreaths/decorations. Use repurposed items picked up from Goodwill; you are keeping these items out of a landfill, so you’ll be showing Mother Earth some love too!
These easy, fun DIY projects are great for kids of all ages and will warm your heart with their charming welcome to family, friends, neighbors, and all passersby.

Items needed for the basic heart background:
· Cardboard
· Scissors
· Marker
· Scrap paper
· Floral wire
· Duct tape
Start Your Heart:
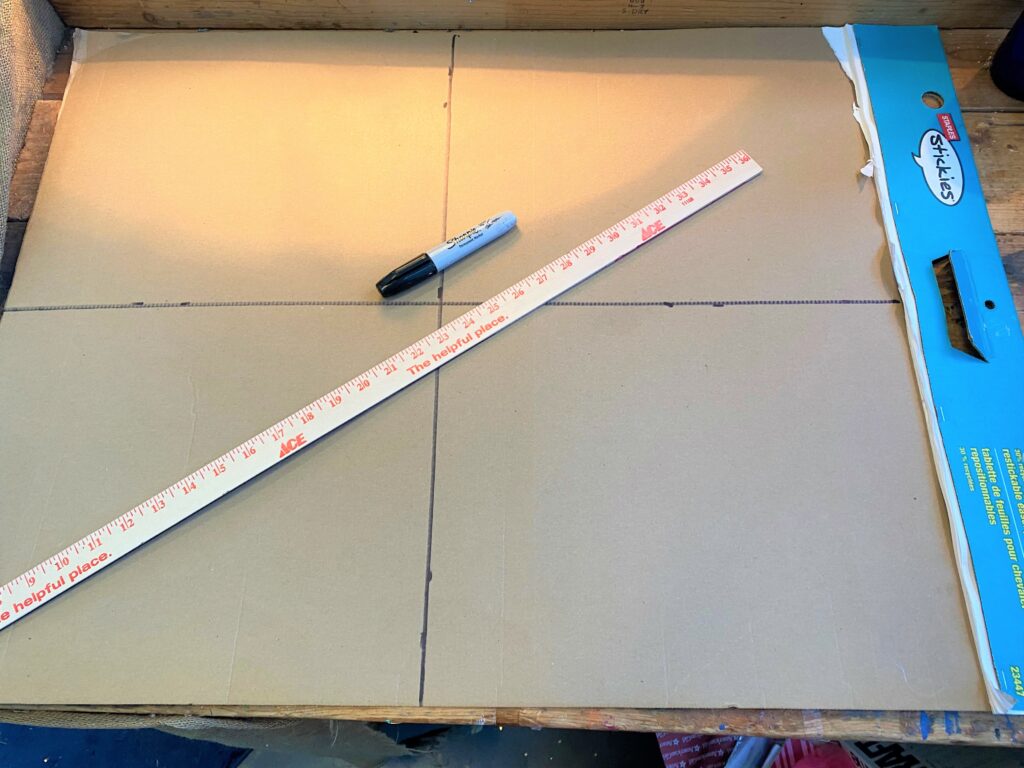
You’ll want to cut out a big heart from your scrap piece of cardboard.
- To begin, use a piece of paper to cut out a heart shape, then trace it on your cardboard and carefully cut it out. (My big piece of scrap cardboard was easily measured then divided into four pieces which meant I would have four times the fun with this project!).
- Tie a piece of thin wire in a loop and tape it to the back with heavy tape; this will be your heart’s hanger. Your pulse will start racing because you are now ready to begin!
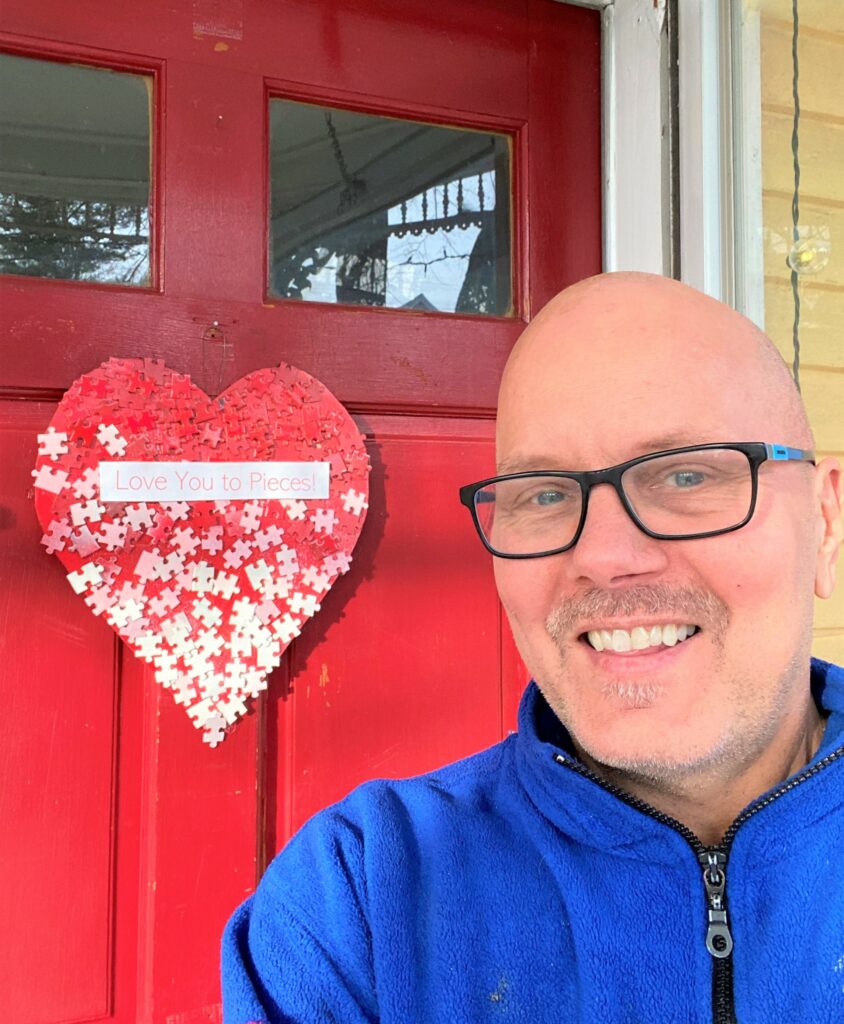
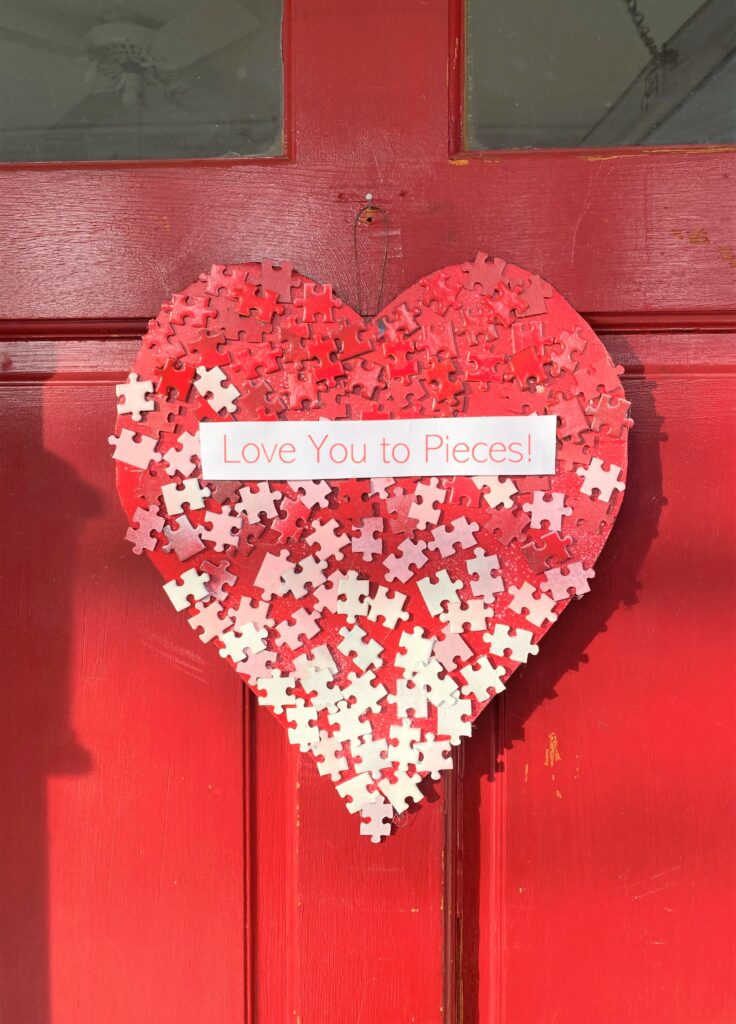
Heart Design Idea 1: “Love You to Pieces”
Here’s How:
Stop by your nearby Goodwill store and pop over to the Toy Section. You are certain to find lots of puzzles to transform for this heart-warming design. For just 99 cents, you can get a puzzle with 1,000 parts which means you can make lots of heart wreaths this way.
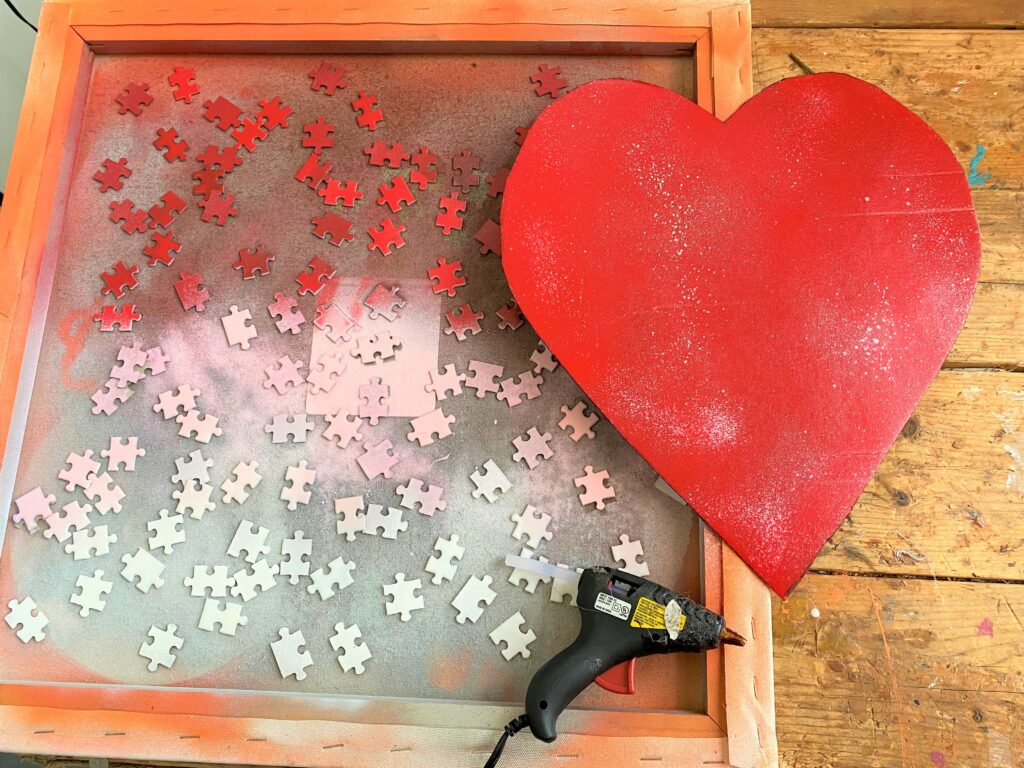
- 1. On a drop cloth and in a well-ventilated space, give your cut-out cardboard heart a good, solid coat of red spray paint. Also, with your pink paint, you might consider giving your now red heart a “spritz” of it to add a little more visual interest. Let it dry well.
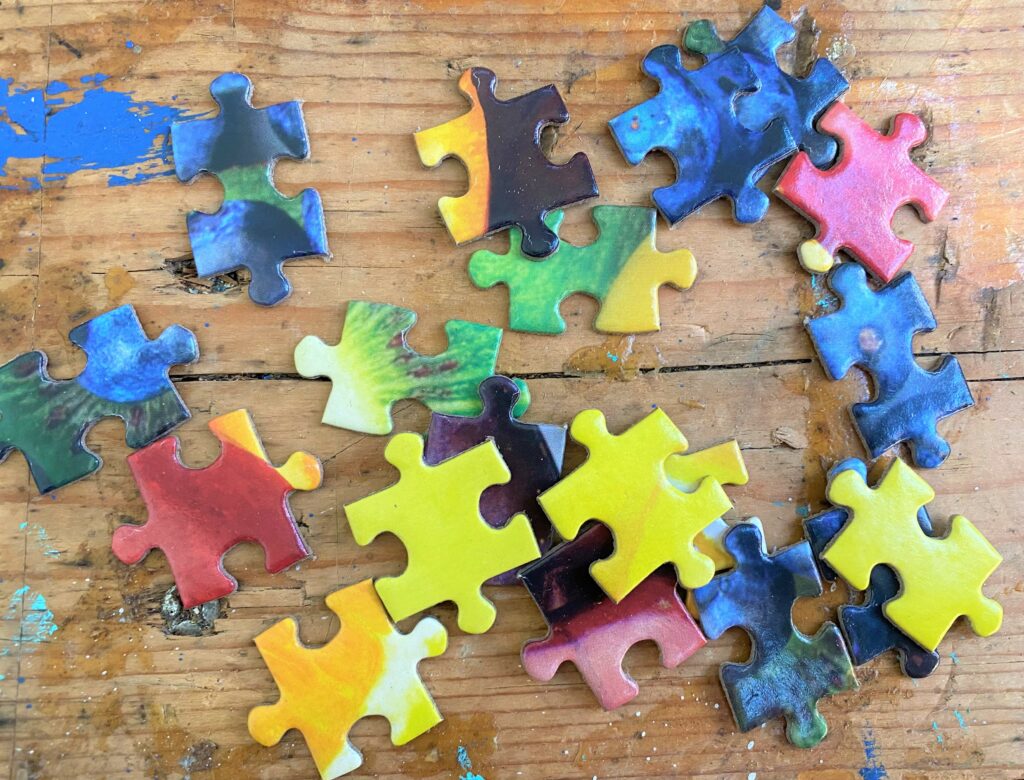
- 2. On another drop cloth, spread out your puzzle pieces so they are flat on the surface and not stacked up or overlapping. Spray some of them red, a handful of them pink and a few of them some white. Let these pieces dry well.
- 3. You may want to create an “ombre” look; Ombre is literally “shaded” in French and is the blending one color to another usually moving from light to dark. With your glue gun, start securing the white painted puzzle pieces on the bottom, moving your way up. At the top, glue gun your red painted pieces moving down. In the middle, your pink puzzle pieces will find their new home after you glue them in place, too. It is now okay to overlap pieces and to have the three colors meet then flow together.
- 4. If you have easy access to a computer and printer, type and print out the phrase, “Love You to Pieces!” If you don’t have a computer handy, you could use a red marker and write out that message too. Cut away access paper and secure this friendly message in the center section of your heart, again with your glue gun.


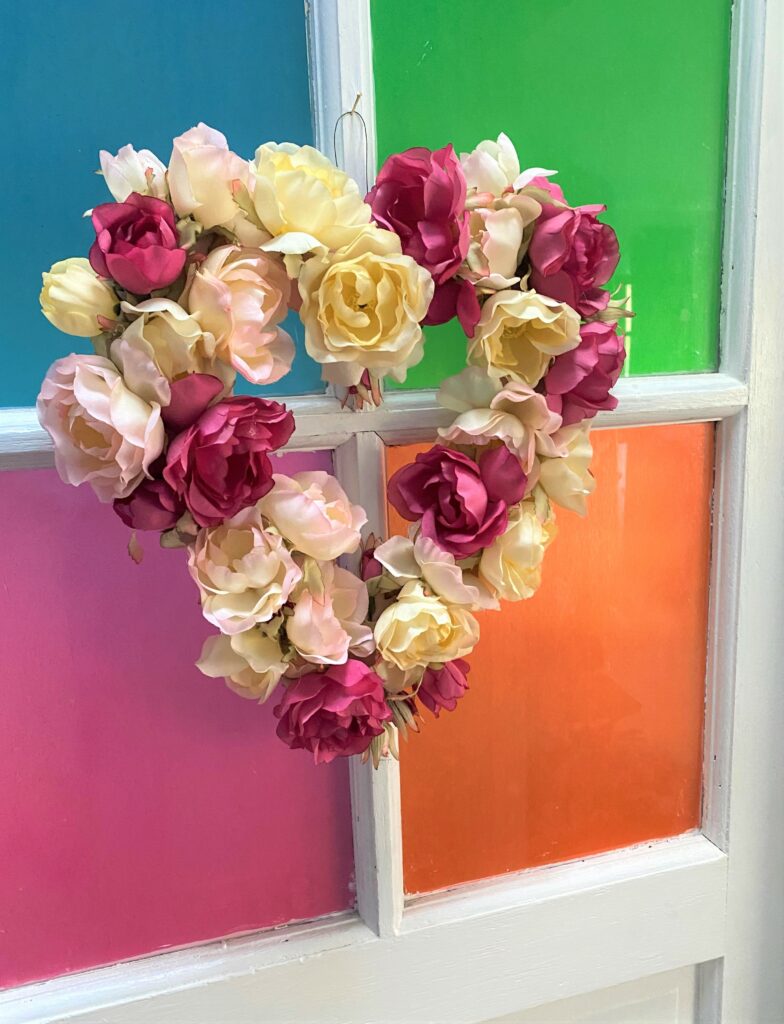
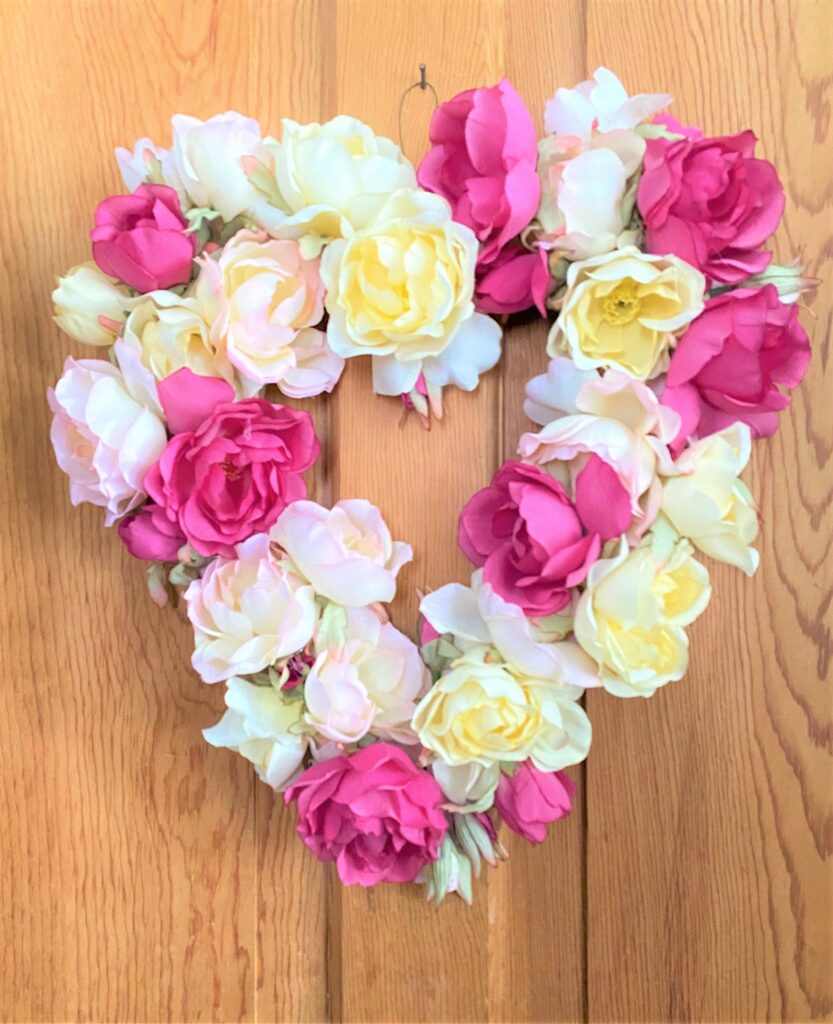
Heart Design Idea 2: “Love is Blooming Here”

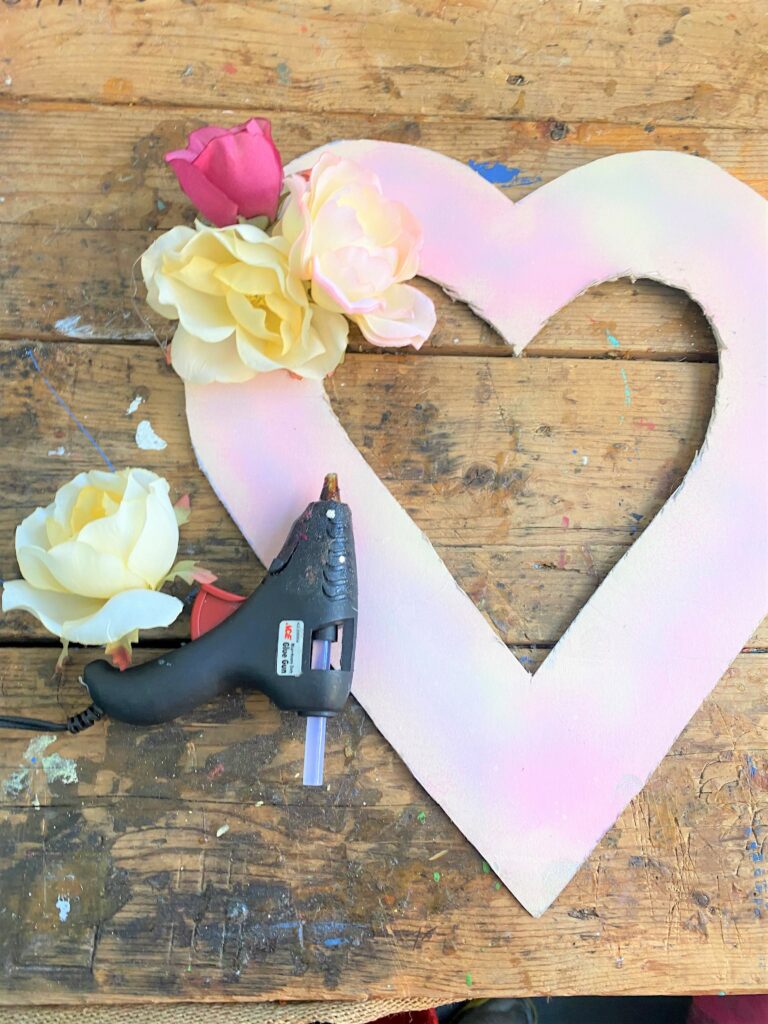

Here’s How:
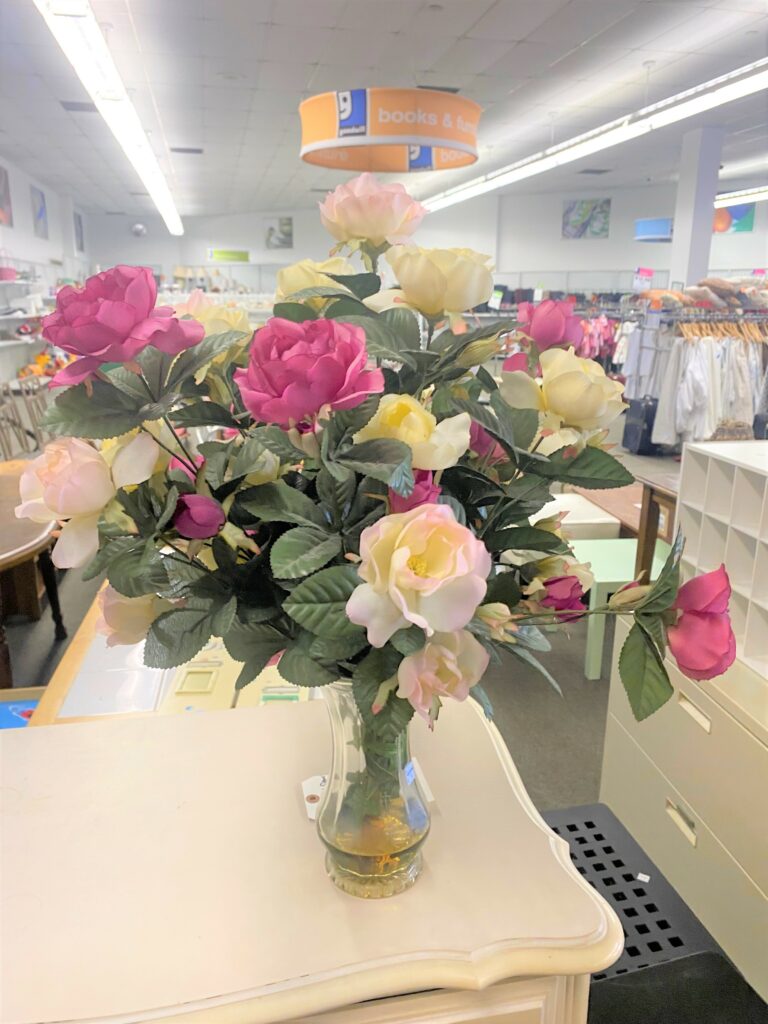
A vase of silk flowers in pinks, creams, and whites was picked up for pennies at Goodwill for this next heart wreath. If you find silk/artificial flowers but they are not the color you want, you can easily spray paint them in the hues you desire. I suggest reds, pinks, creams, and whites since those colors are very prominent in Valentine’s Day decorations.
- 1. Cut out the center section of your cardboard heart so it looks more like a wreath.
- 2. Give your flowering heart a nice backdrop by spray painting it in pink and cream. (Place on a drop cloth and give a light coat or two. Let dry.)
- 3. Cut the blooms from the stems of your silk flowers and secure in the positions you like with your glue gun.
- 4. Based on the flowers you are using, be sure to mix up their colors and sizes for a final look that makes your eyes want to move around it and admire your creative talents!
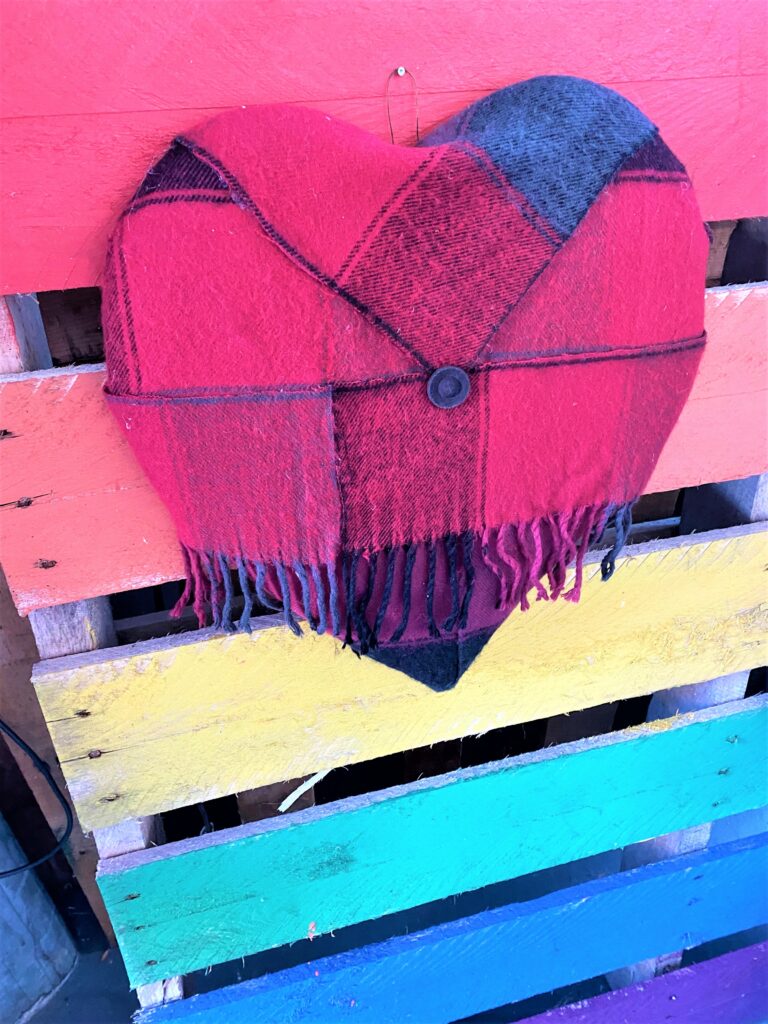
Heart Design Idea 3: “A Cozy Corazon”


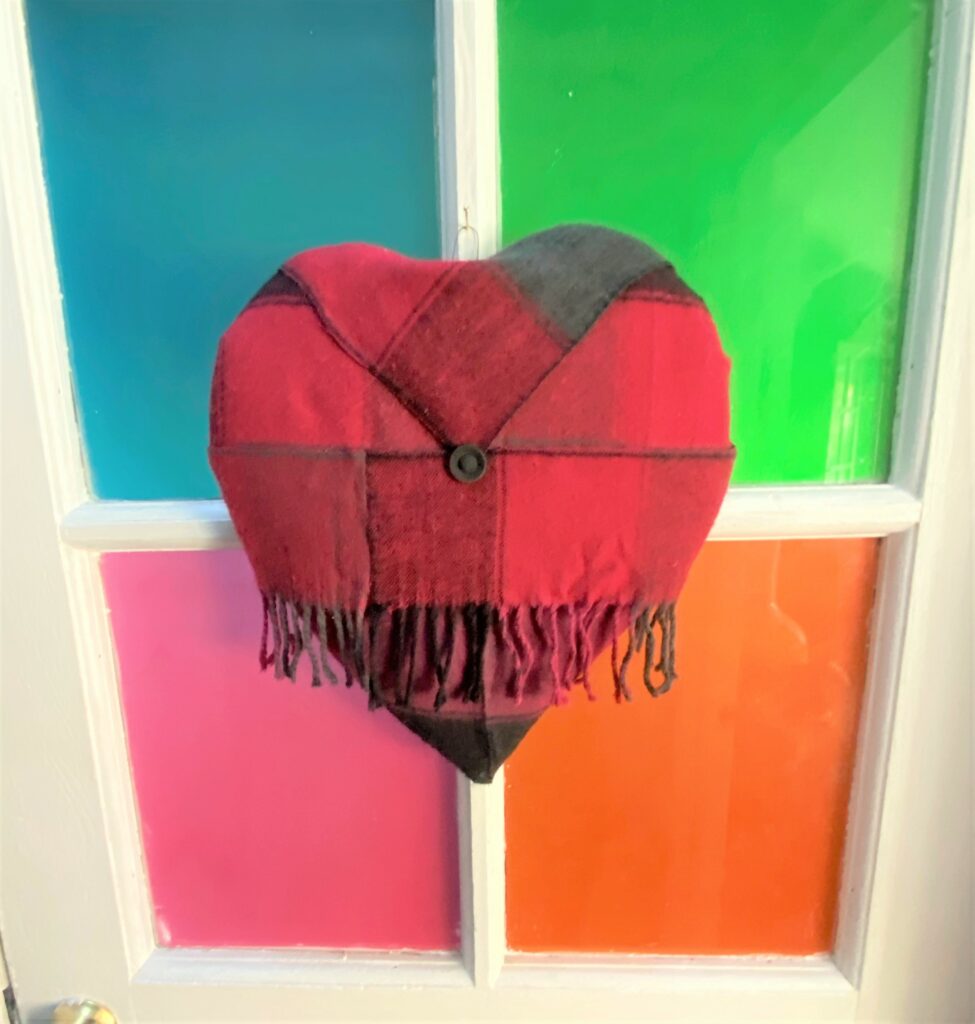
Here’s How:
On your next Goodwill excursion, check out the racks which hold scarfs and look for a warm-looking one in reds or pinks. You want one that is soft to the touch for this cuddly and cozy “Corazon,” which is Spanish for heart. I scored with this plaid one because it had the right colored tag on it, so it was half off its already low, low price. Such a sale makes my heart beat faster for sure, what about you?
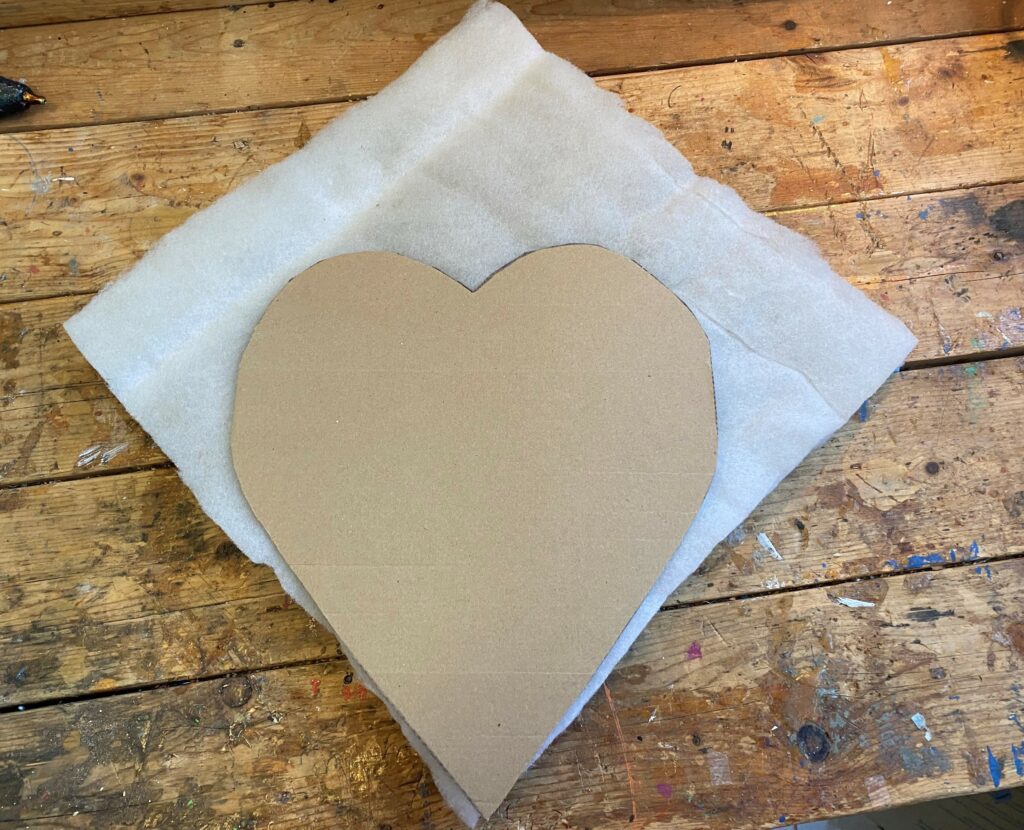
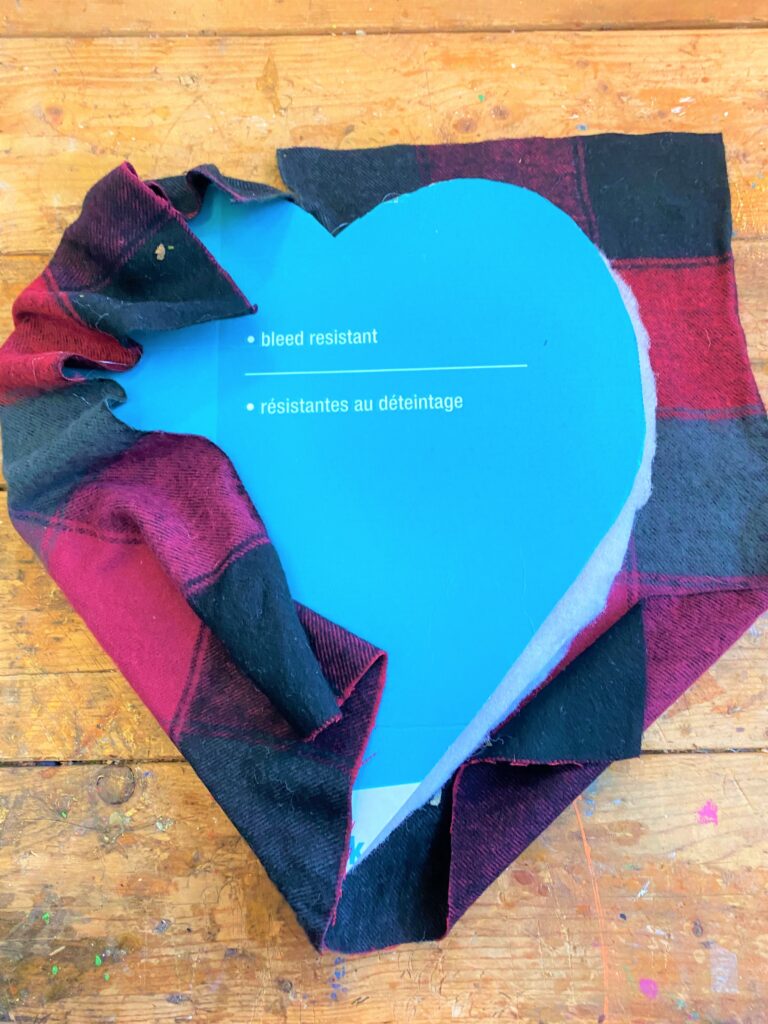
- 1. You will need a piece of fabric padding to give your heart some depth. Craft and fabric stores sell them; you could also pick up a small pillow from Goodwill and use its stuffing.
- 2. Trace your cardboard heart on your padding then cut it out. Secure your heart-shaped padding to the cardboard with your glue gun.
- 3. Cut your scarf in half at the middle and along the short edge so you have two pieces with which to work. If your scarf has fringe on it, even better!
- 4. Lay the first part of your cut scarf over your padded heart. Glue it in place then flip it over and add more glue along the back edge to secure it. Cut away any extra material. Flip your heart back over and repeat the step of gluing, flipping, cutting. When you are done with this step, your entire padded heart should now be completely covered in your scarf material.
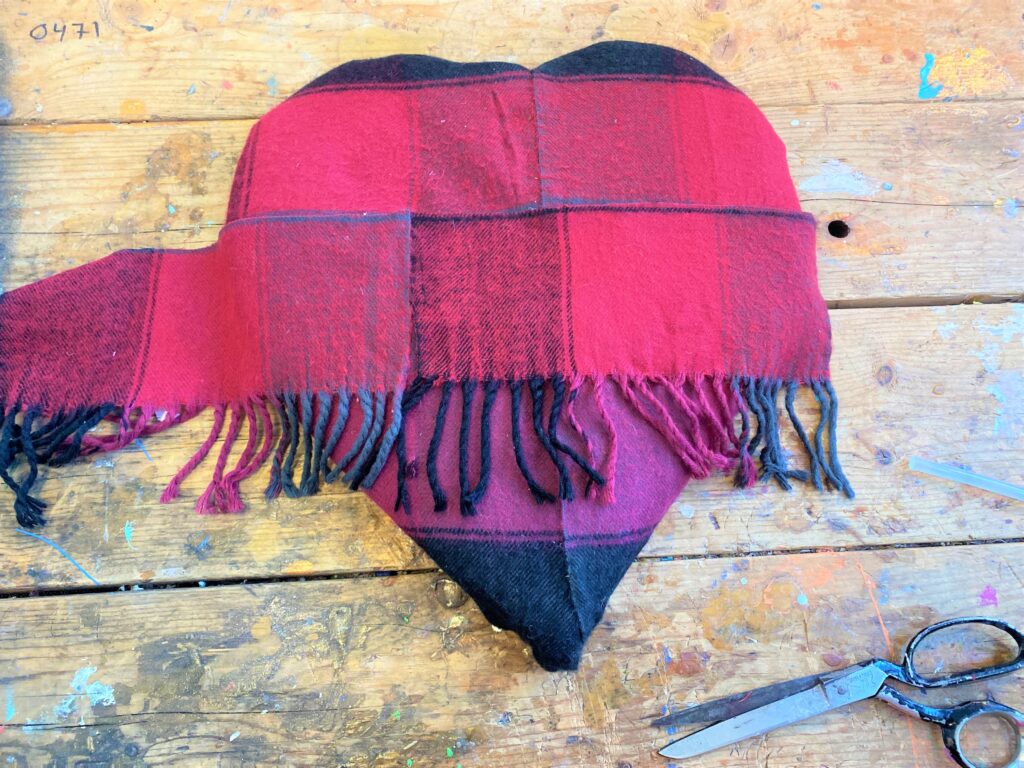
- 5. While you could have stopped there, consider taking these next steps to make your cuddly heart super cute. I wanted my heart to have some of the scarf’s fringes on it, so I cut pieces and glued them in place on top of the covered heart but along the lower portion. Another piece of scarf fabric was cut in a square the glued diagonally to reflect the heart’s sides. Again, access material was trimmed away. How might you use your scarf’s fringing parts?
- 6. Glue a button in the center where the diagonal piece ends. This button made it look like a piece of tailored clothing which I loved!
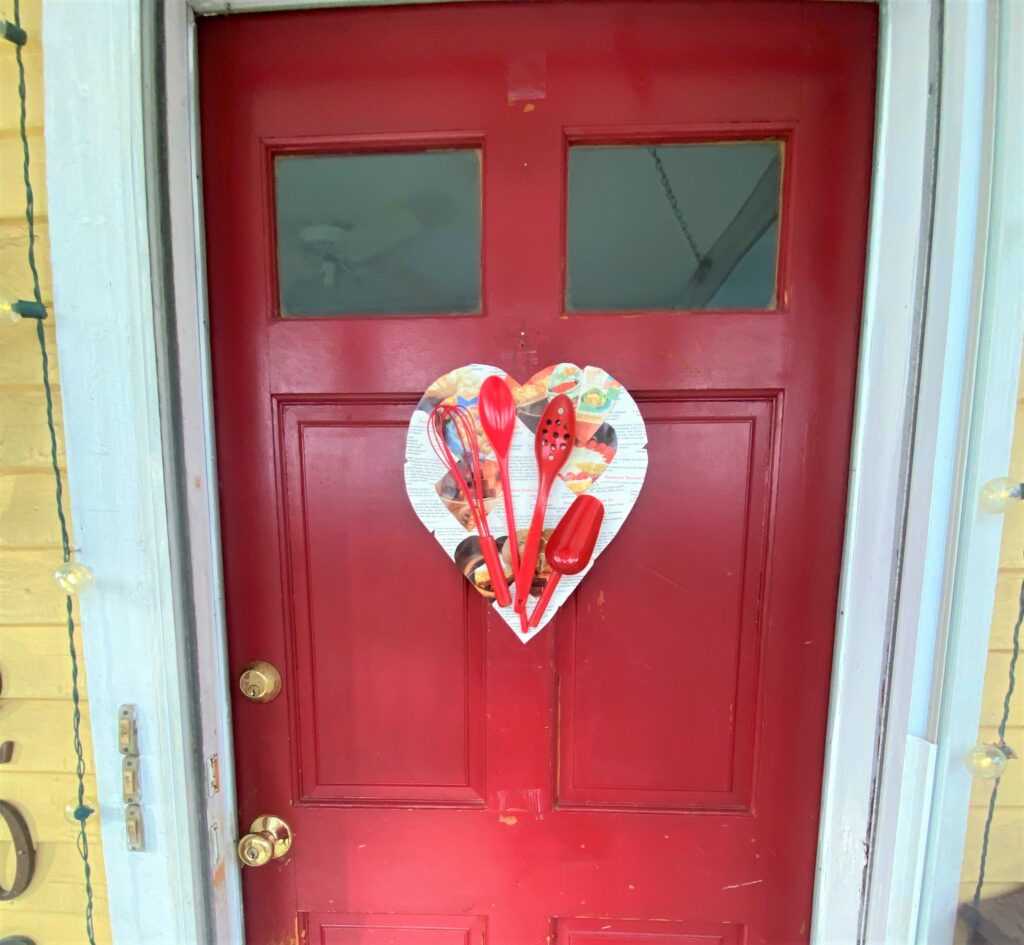
Heart Design Idea 4: “Love is the Best Ingredient”
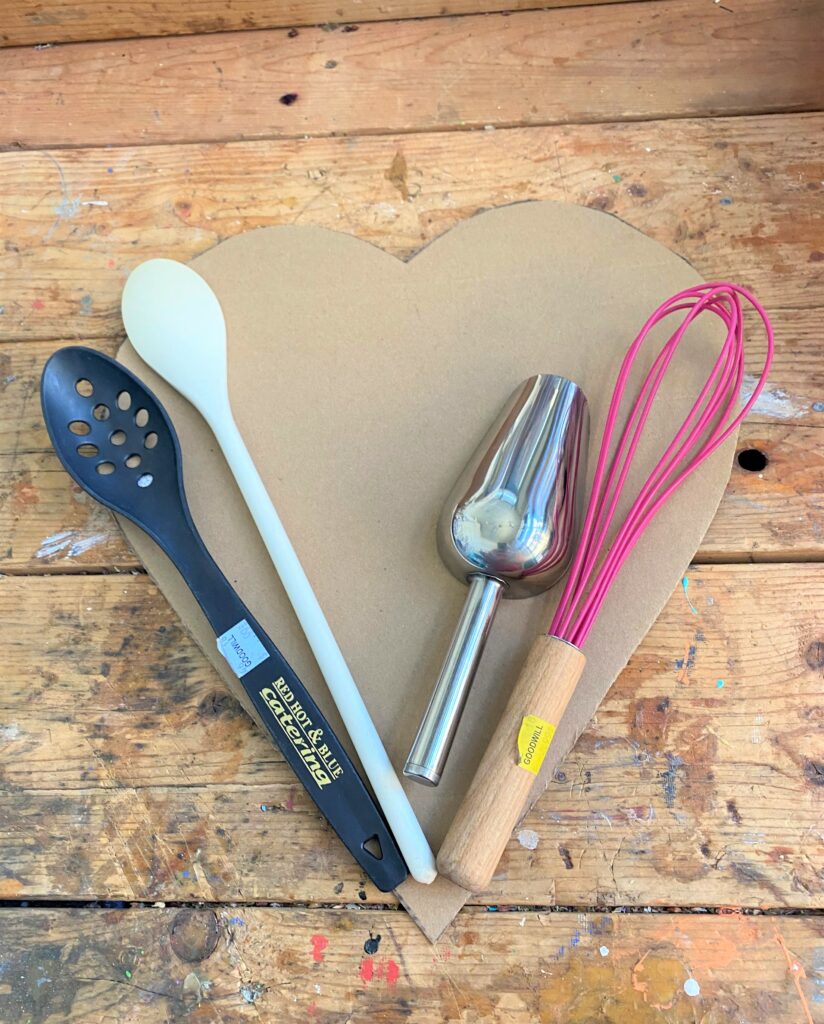


Here’s How:
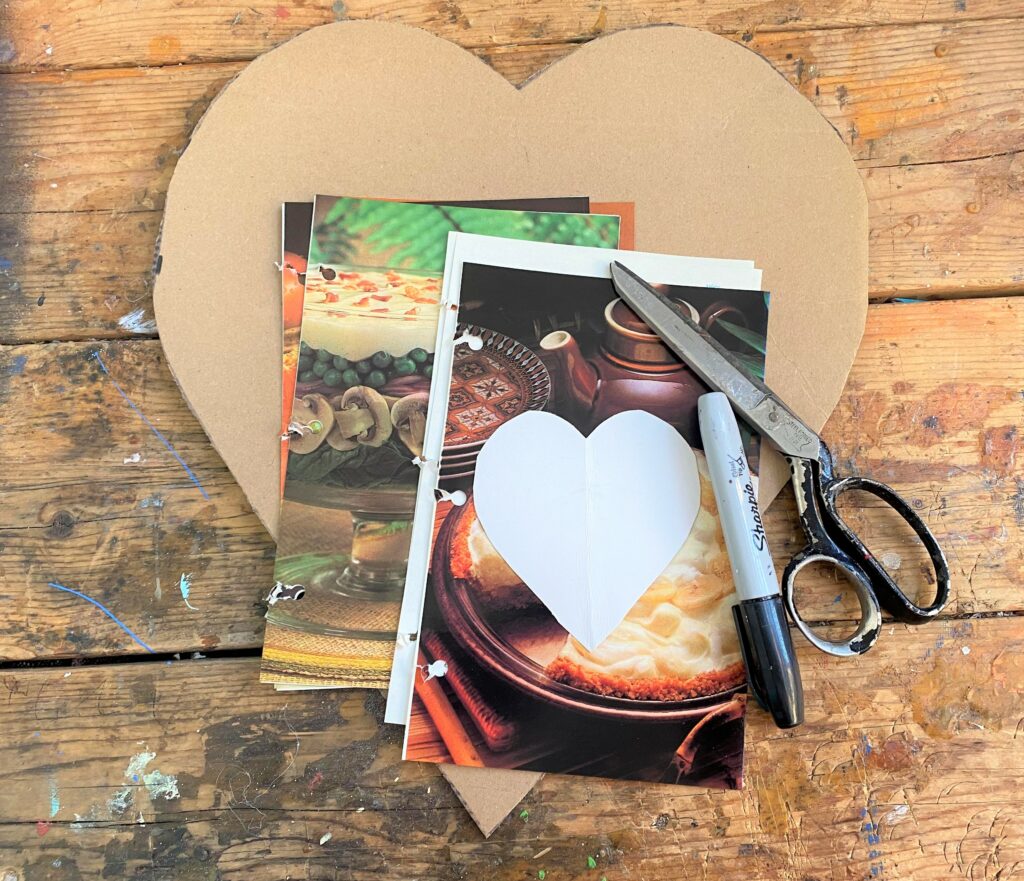
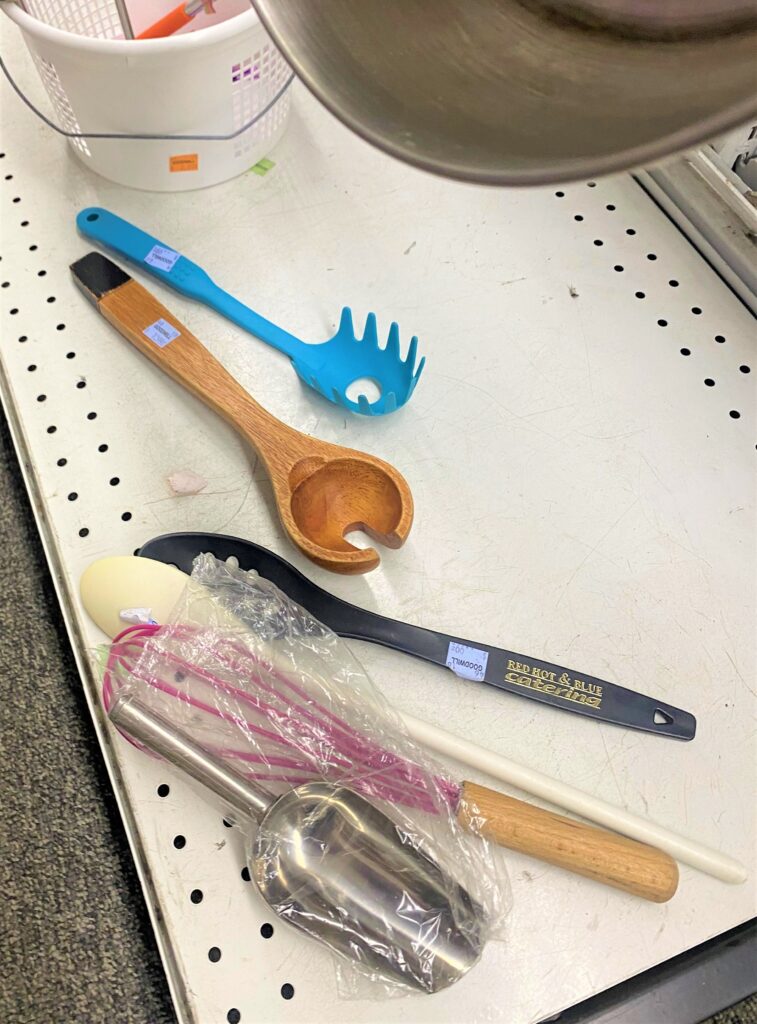
Goodwill always has a great collection of cookbooks on hand as well as kitchen utensils. Select several lightweight, plastic utensils in any color for this yummy heart design.
- 1. Trace a small heart on pages of your cookbook and cut them out so you have lots of hearts with which to work. Ideally, you will have a cookbook with colorful images, too, to add visual interest to your bigger heart. I selected pages that had desserts on them, given the sweet nature of this project and of Valentine’s Day. Glue these in place covering your entire heart ensuring none of its cardboard color shows through between them. Trim away extra paper to ensure you are able to see the bigger heart shape through the smaller ones.
- 2. Place your kitchen utensils on your drop cloth and spray them with bright red paint. As you know, red is a color which they say triggers your appreciate and it also matches the look of this love-filled holiday. Once dry, turn them over and add another light layer to get their backsides, too. Let dry well before touching.
- 3. Position your red utensils on your recipe covered heart. Think of them as flowers and you are arranging them with the handles (stems) downward and the spoon/whisk/etc. parts (flowers) upward. Have the handles all come together at the bottom of the heart. Secure each on in place adding a good helping of glue to hold them in place well.
This DIY project was so much fun and will make you happy inside!

What items do you have on-hand or might you pick up at Goodwill to upcycle as part of a happy heart for your home? As always, we love to see your creations inspired by our Finding Your Good projects. And we thank you for your heartfelt care of each other. Thanks to Goodwill and Finding Your Good for all the ways you make our community even more lovable!

Tim Kime
Artist, Motivational Speaker, Life Coach