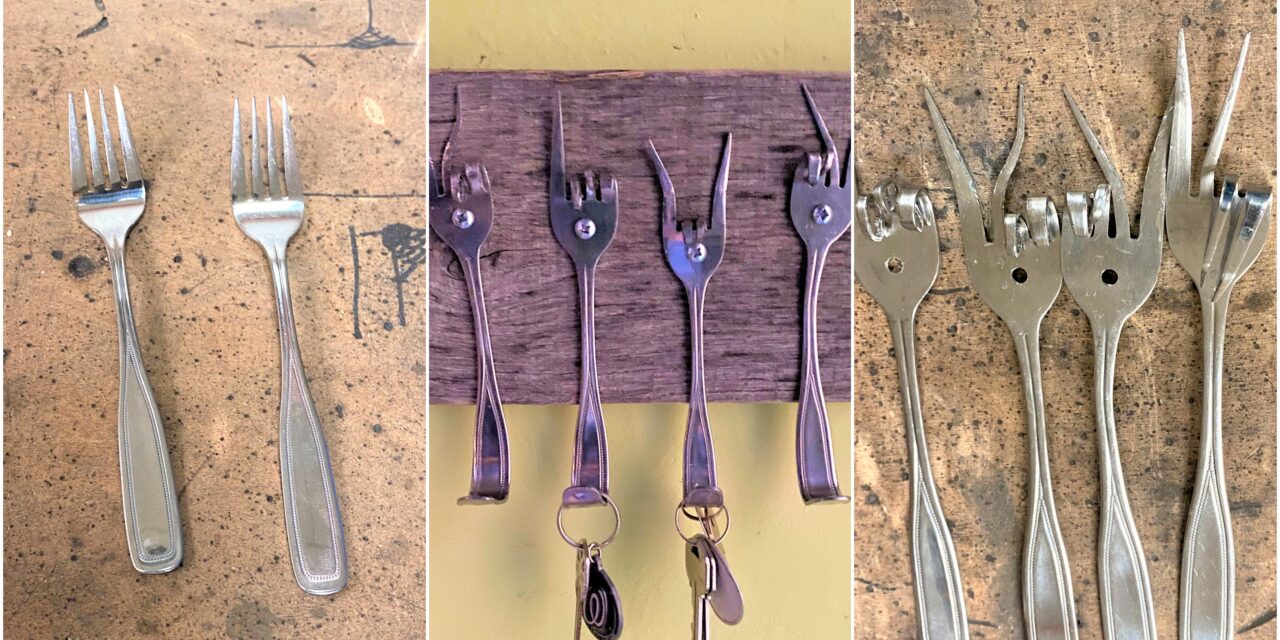
Now that Thanksgiving is behind us, don’t pack away Grandma’s old silverware used once a year for the holiday. Transform it by turning old place settings into cool hooks with a bend and a twist or two! Combine these fork & spoon hooks with scrap wood to create a unique and memorable rack to hold keys, caps and more. This way, you will use those pieces from Granny all year long!
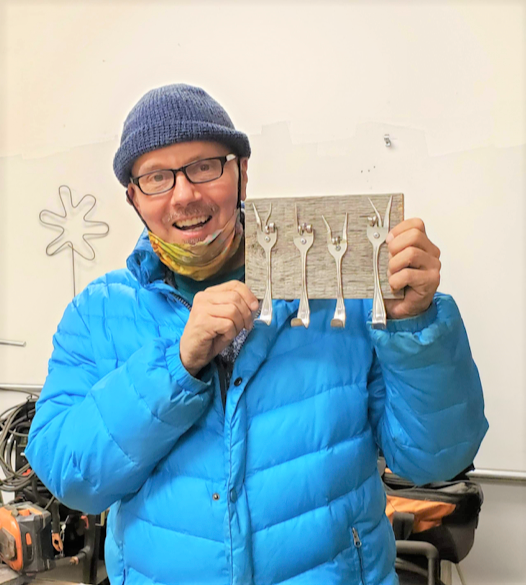
Thanks to my totally creative and talented brother Todd for this project idea and for hosting me over the holiday for some artsy upcycling fun! We joked that we’ll be using plasticware and chop sticks soon because we want to enlist all of our silverware for this easy DIY project—that makes a funky and unique holiday gift.
Supplies:
1. Old metal or silver forks & spoons
2. Small and other sized pliers
3. Scrap wood
4. Small wood screws
5. Drill
6. D-shaped picture hooks
7. Sandpaper
8. Hammer
9. Vice
10. Work gloves
1. Shop for your settings
Scoot on over to your nearby Goodwill and go to the Housewares section. In it, you are sure to find bags of options for this project; Goodwill puts various place setting pieces together in see-through bags with clearly low prices.
You’ll want to get there soon because after folks read this blog, they will be inspired to make these racks, too, so stock up now! While forks and spoons take center stage here, ladles and metal serving utensils are interesting options as well.
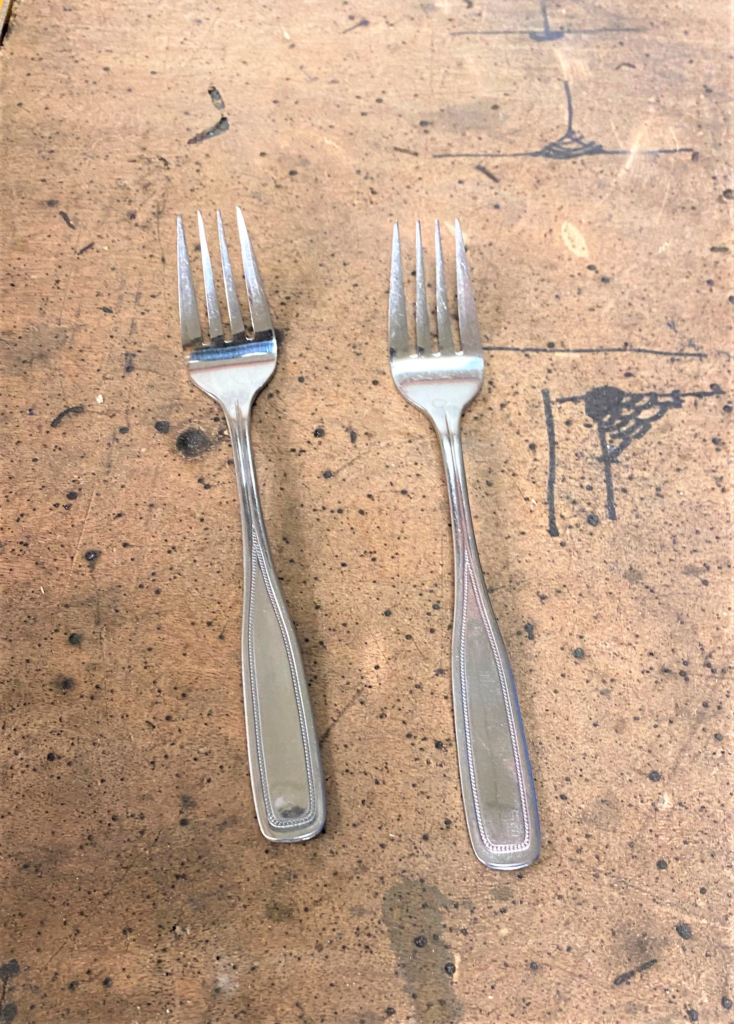
Design idea: While the ones featured here are silver and shiny, tarnished pieces would look so beautiful too. Also, combining sets or having different patterns together adds even more whimsy and charm.
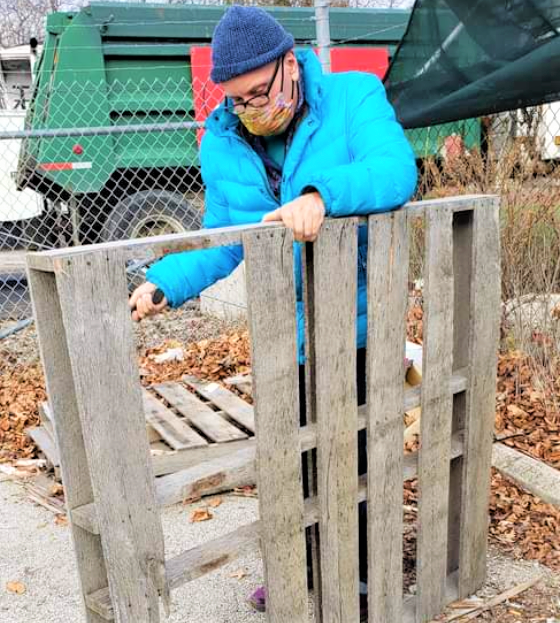
2. Pull apart a pallet
- For the wood that will be the base for your upcycled spoon and fork hooks rack, an old shipping pallet is perfect for this project. It also ties into the reuse and repurpose tone of it.
- With your hammer, remove some pieces of a pallet then cut to size.
- Use your sandpaper to smooth out any rough edges.
- Drawer fronts or parts of a dresser or table would also be great to reuse for this project.
3. Get hammered
- For most of the forks used here, the first step was to flatten them so put on your work gloves, grab a hammer and get to work.
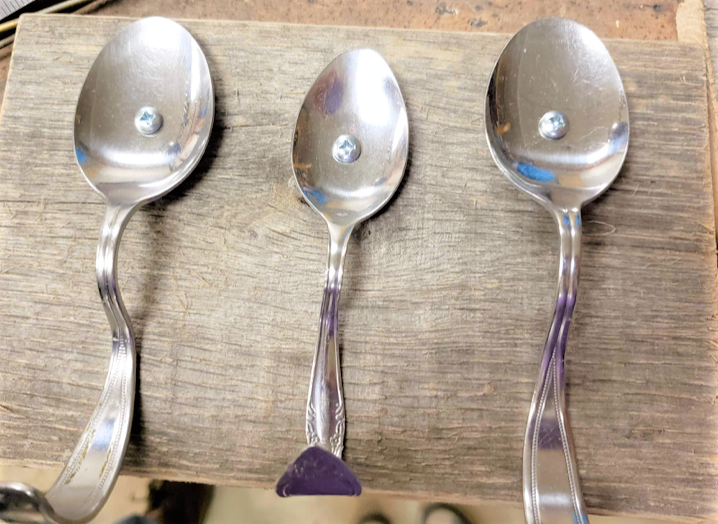
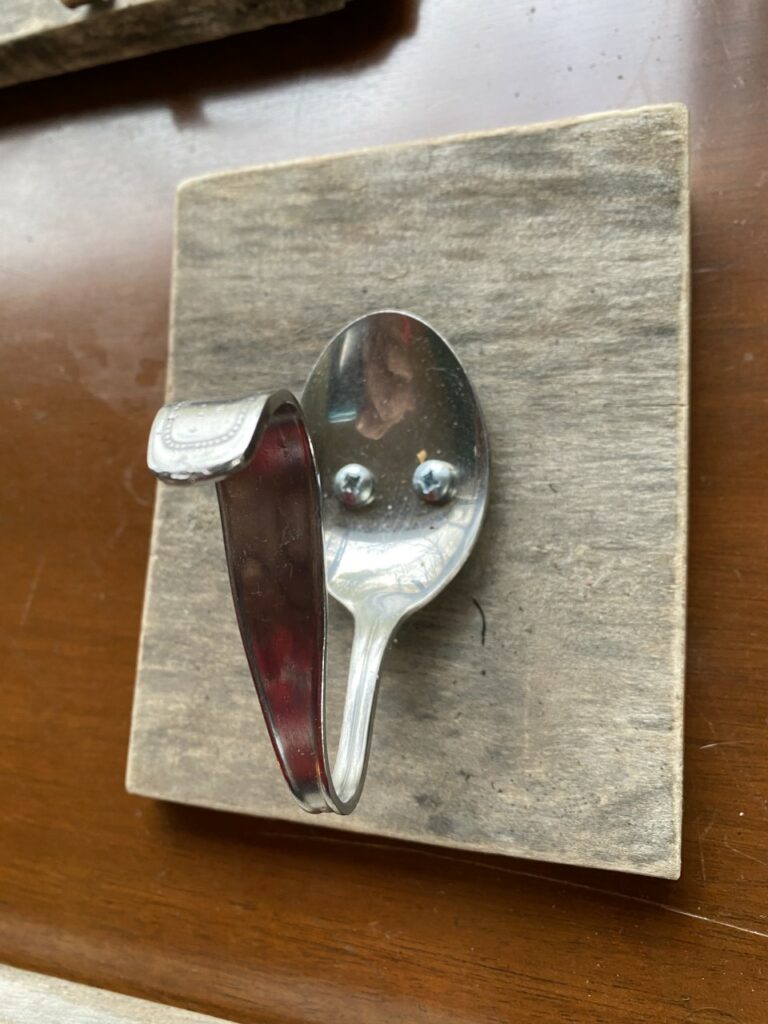
- While I have seen examples of spoons made into hooks where the spoons were pounded flat, too, I like the look of the spoon with its curves to reflect light.
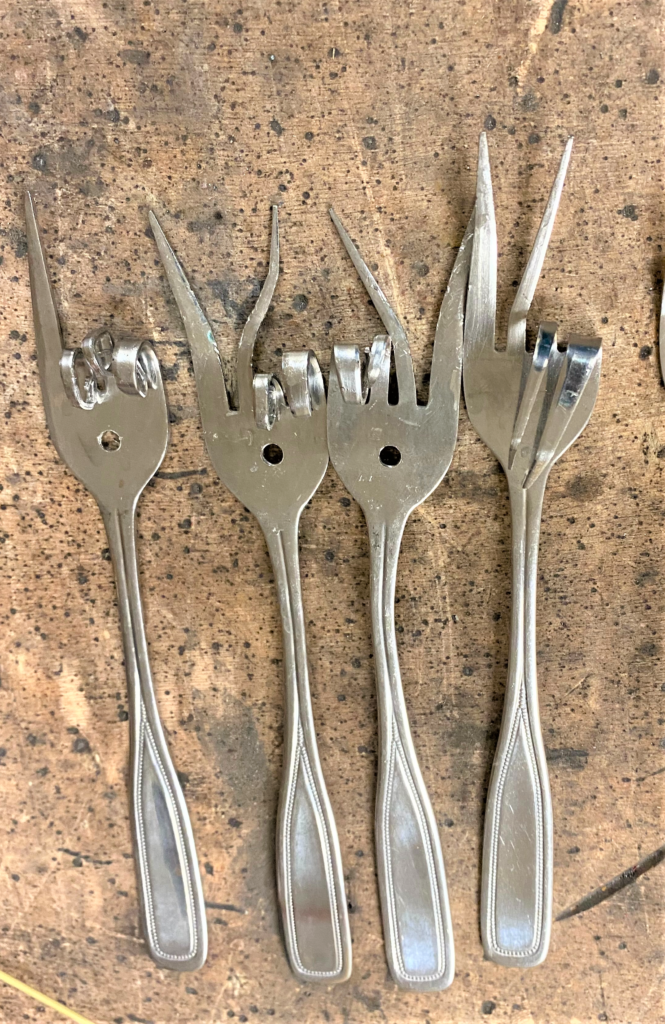
4. Drill a hole
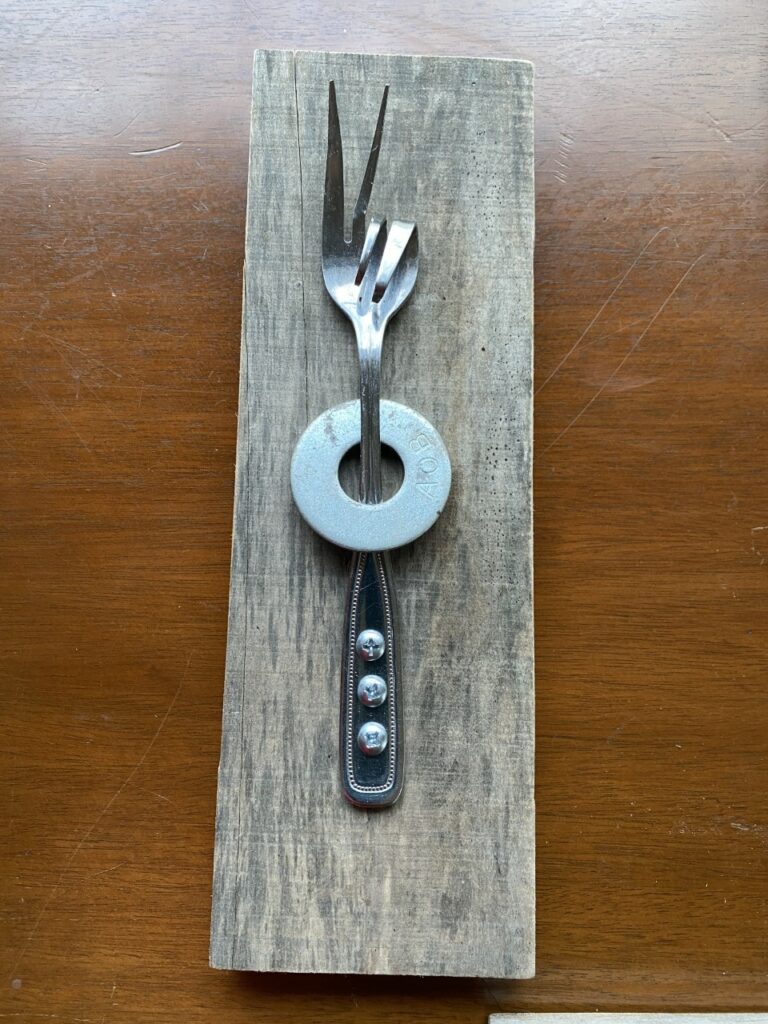
- Using a drill bit designed for use with metal, drill a hole in the center of the flatten fork, right below the tines. For the spoons, holes were made in the center of the part used for serving food.
- Be sure to check the drill bit from time to time as the small metal debris created from drilling might get stuck in the drill’s grooves.
- Use a screwdriver to remove.

Safety first: Wear glasses or safety goggles when drilling to keep your baby blues (and browns, greens and hazels) safe. Also, the silverware will become very hot near the hole after drilling due to friction, so handle with care!
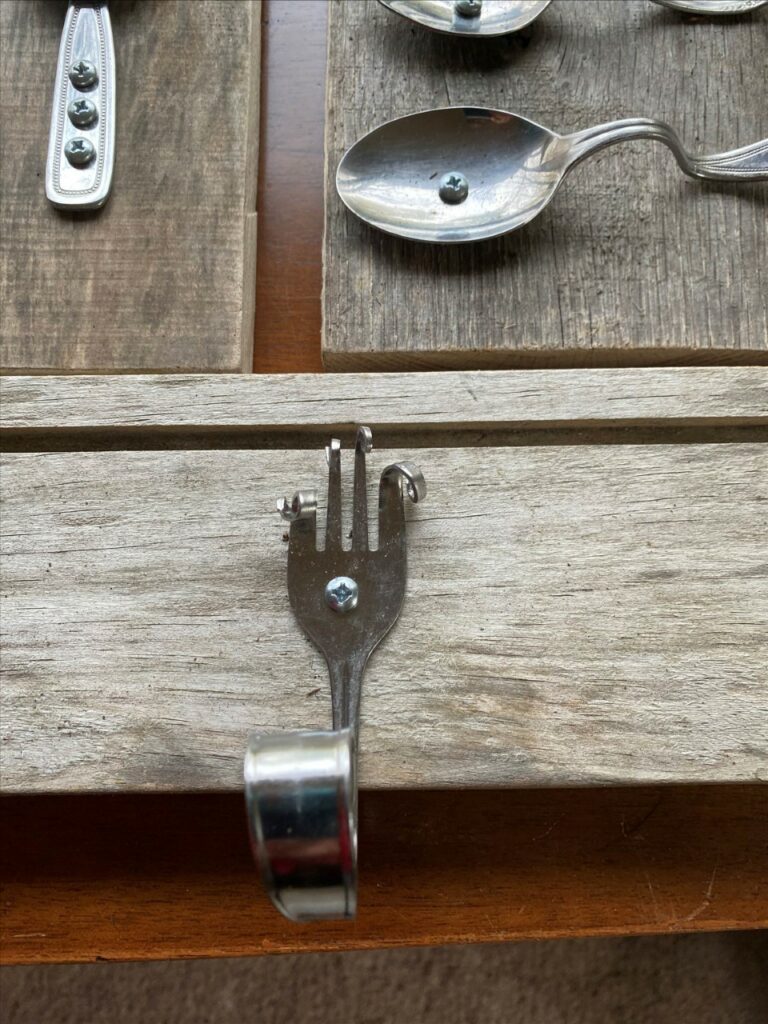
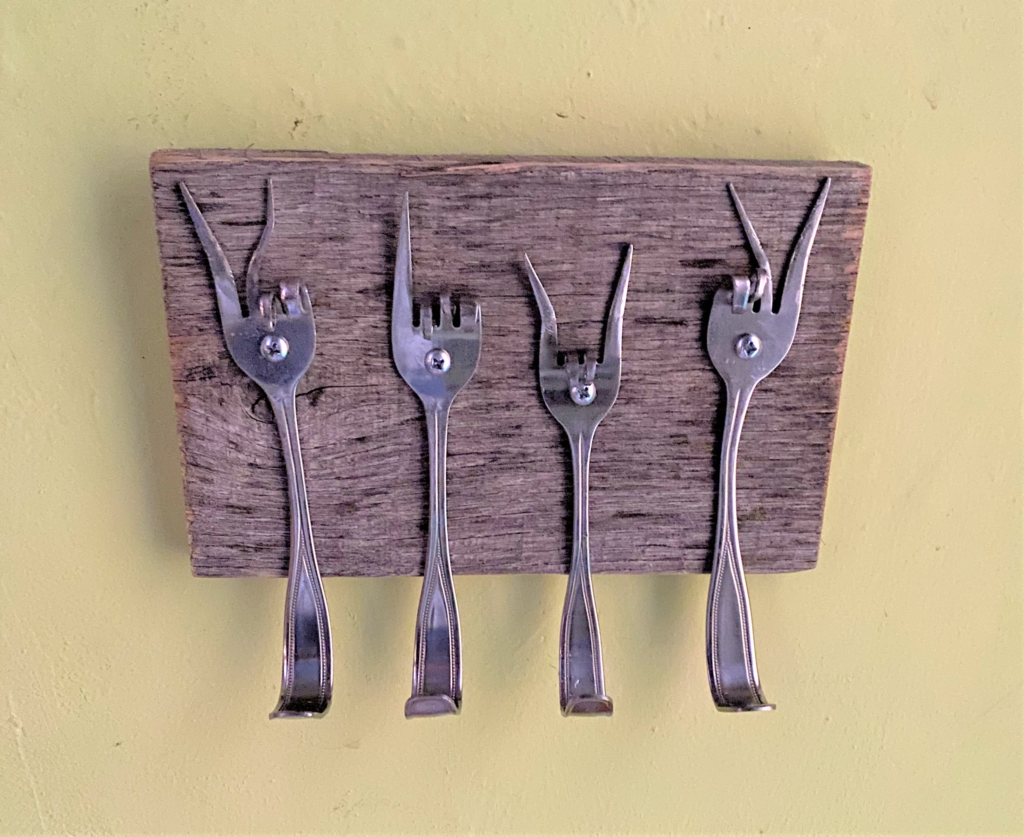
5. Do the twist
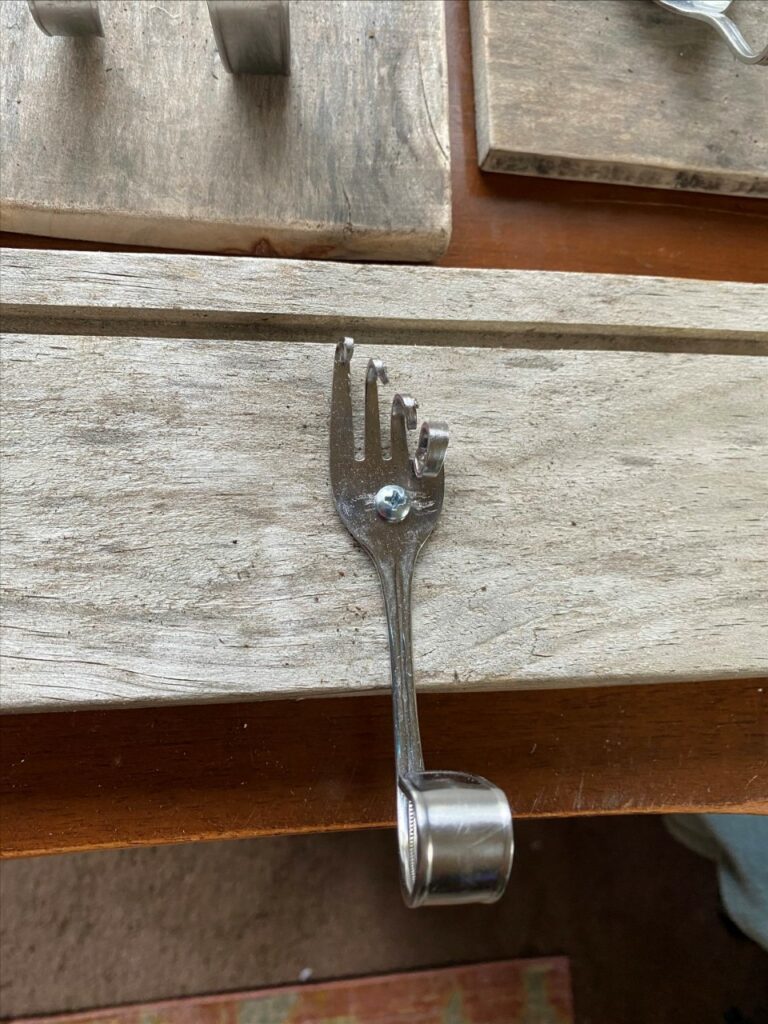
Your flattened forks almost look like hands, so let’s use their shape to have some fun!
Peace Sign
With your small pliers, twist the tines downward to make a fist, leaving two tines to be your peace sign hand signal. Use your larger pliers to slight spread apart the remaining two, so they create more of a V-shape.
Number 1
Twist and roll down three of your tines, leaving the end one up signifying Number 1.
Love
Roll down the two center ones leaving the outer two tines up for a version of “love” in sign language.
Another option is to create curls with the tines by using your pliers to roll them down. As you are able to see by some of the photos of this project, I left several forks flat then made a right angle with their handles to make the hooks part. This looked really nice and sharp! There are so many ways to make these pieces whet your appetite for more!
6. You’ll get hooked
- Place the handle of your spoon or fork in your vice then near the base, bend it down gently curving the metal as you go.
- You may need to do this several times. Use a hammer and a round metal object (like the scaffolding in my brother’s studio) to pound it and round it out. The silverware pieces used here were pretty strong as they were relatively new. I am sure your late relative’s old silverware will be much easier to bend the way you want.
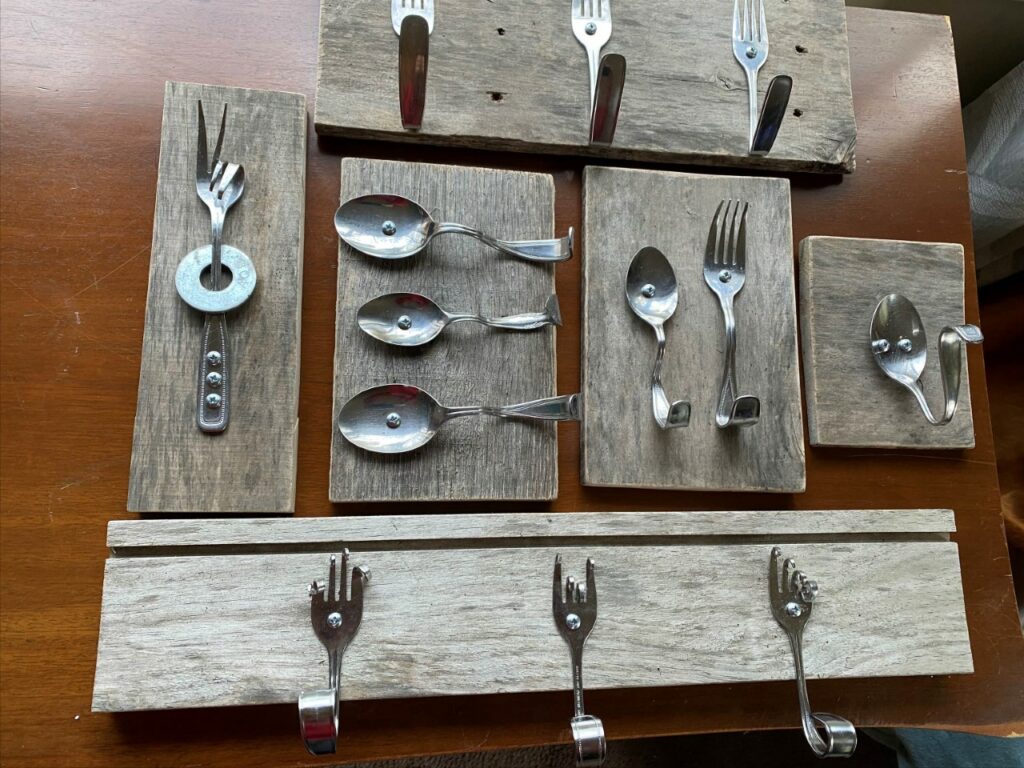
7. Secure them to the base/wood piece
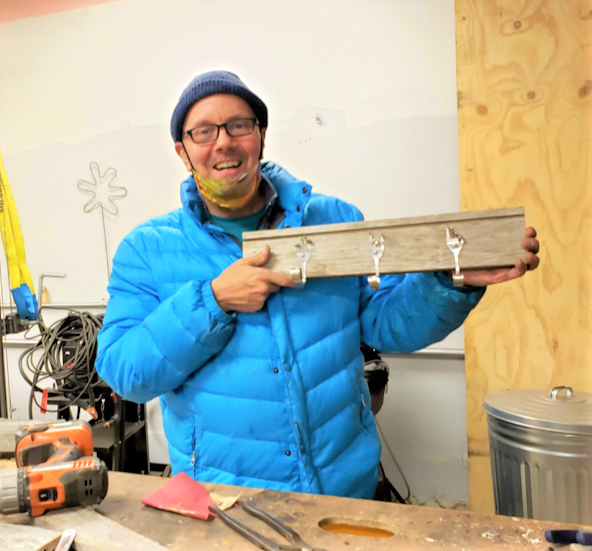
- With small wood screws, secure your forks and spoons to the pieces of reclaimed scrap wood which will hold them as a “unit” or rack to put on your wall.
- Once in place, you may want to use your hands or pliers to tweak the bends and curves.
8. Add hooks
- Add two D-shaped hooks to the back of your rack using your drill, screws and screwdriver.
- While small picture frame hooks would work, I like the D-shaped hooks because they will allow you to put heavier (relatively speaking) items on the rack while also keeping it straight on the wall.
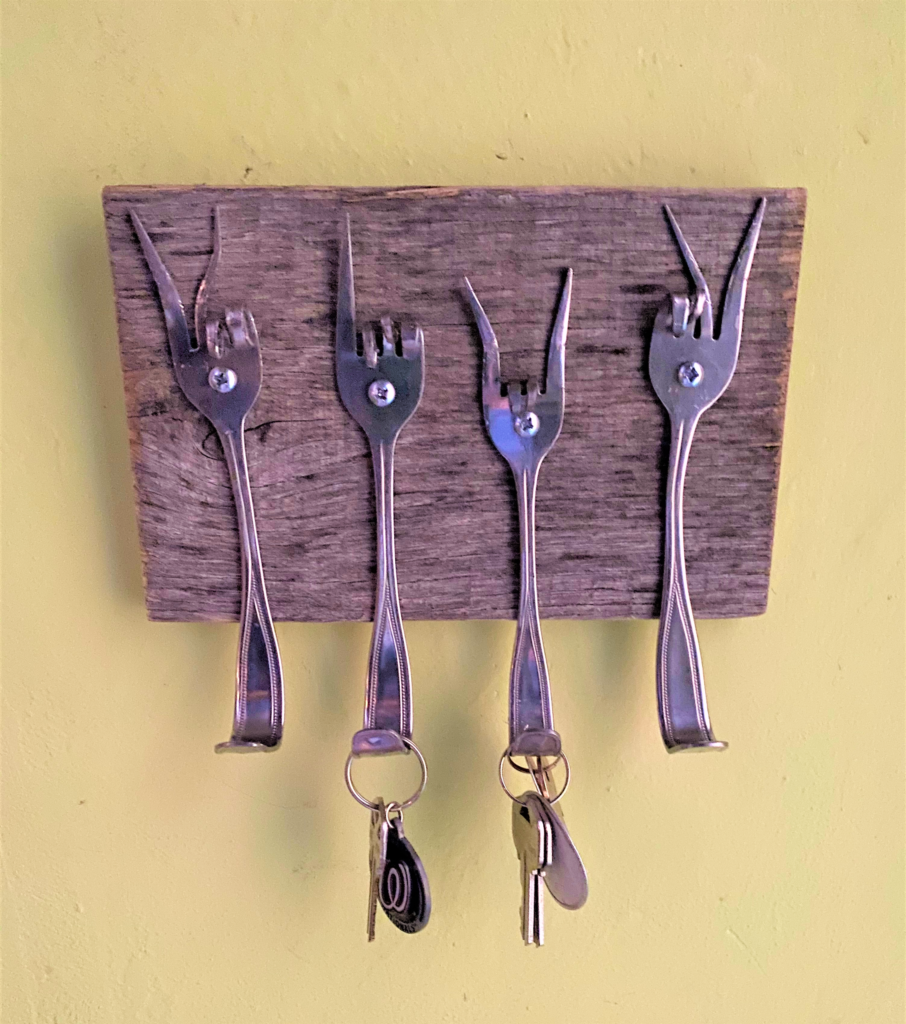
Where will you hang your fork and spoon rack? In your foyer to hold keys? Maybe in your kitchen to hold other utensils or your apron? Several such racks would look fun in a kids room, too, holding jackets or coats.
Show us the ways that you use this unique hooks that will be well loved and well used!

Tim Kime
Artist, Motivational Speaker, Life Coach


