Okay, to all the Grandmothers out there: Please cover your ears and eyes now. To everyone else: Let’s be candid. We all have an item or two passed down from generation to generation. And while they may have lots of sentimental value, we really don’t like or want them. They have a family history yet don’t fit into our life or design styles.
Here’s an idea that will have you look at all those items with fresh eyes. Repurpose an old travel trunk into a funky and fun coffee table that will make your Grannie smile. And bring a tear to her eye by making it a family-friendly activity!
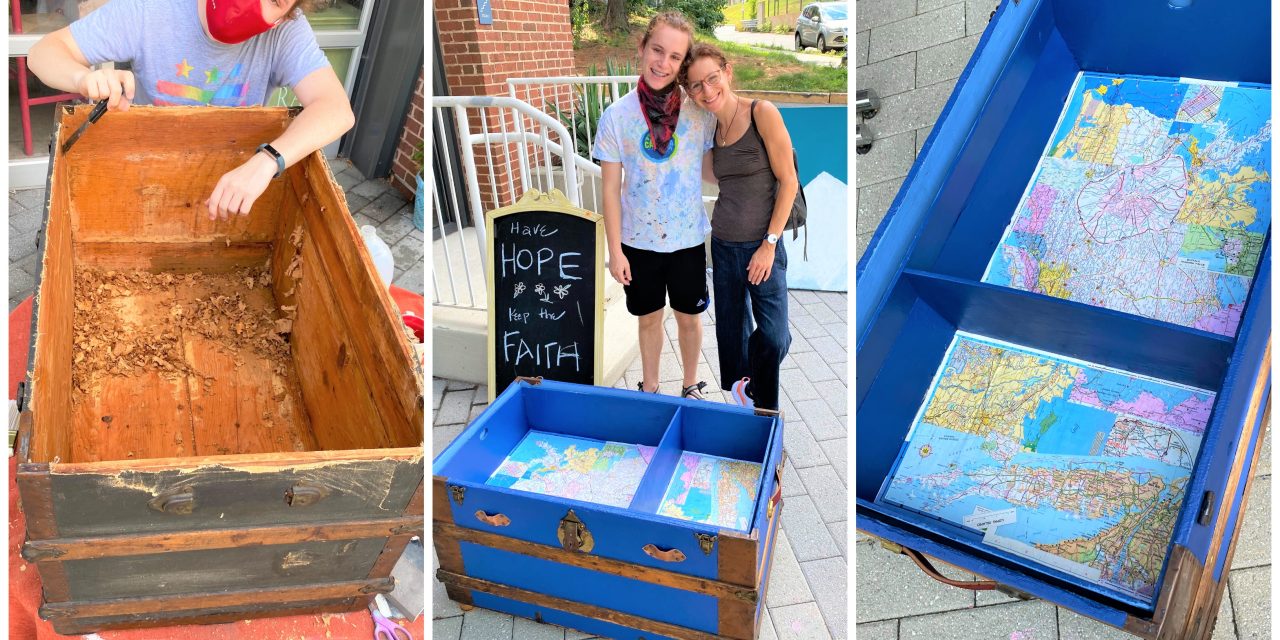
In this blog, Laura and Liam gave me the chance to guide them through the upcycling process to create a unique piece that is ready for the making of new memories!
Supplies Needed:
1. Old wooden trunk
2. Two colors of paint
3. Maps
4. Leather straps
5. Specially ordered, tempered piece of glass
6. Mod Podge
7. Scissors
8. Paint brushes of various sizes
9. Painter’s tape
10. Glue
11. Various tools: hammer, screwdriver, pliers
12. Small wooden legs
13. Small copper tacks
14. Polyurethane
15. Lots of patience!
Step 1: Go treasure hunting around your own place or check out Goodwill
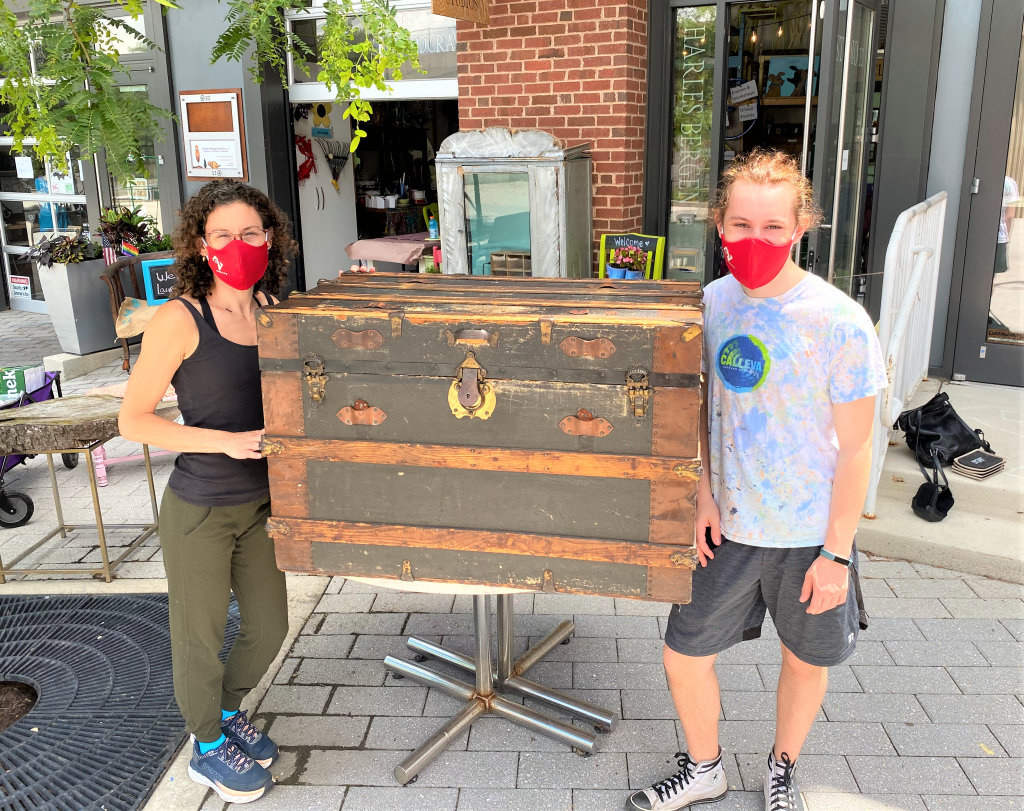
Laura and her son, Liam, were blessed to have an old trunk that was used as her family came to the United States years ago. It was super solid—and super worn out. It was the perfect size, more or less, for a new role as a centerpiece in the room where their family gathers. Thanks to them for being open to upcycle it into a coffee table that will now be the envy of all their relatives and friends!
Goodwill always has interesting and unusual items there so make shopping there a part of your routine when you are out and about. Trunks show up from time to time and, with a little vision and elbow grease, you, too, can make a cool piece of furniture that also provides tons of convenient storage.
Step 2: Clean it up to start its new journey
The trunk featured in this blog was beat up after years of use, so the first efforts were to clean it up removing layers of old paper on the inside. Lots of patience was required as we scrapped away. The end result was the raw wood and an ideal surface to give some color. The outside required some minor repairs to the canvas-like fabric which covered it. In addition, a small, removable storage shelf needed to be cleaned up and prepped for its next voyage.
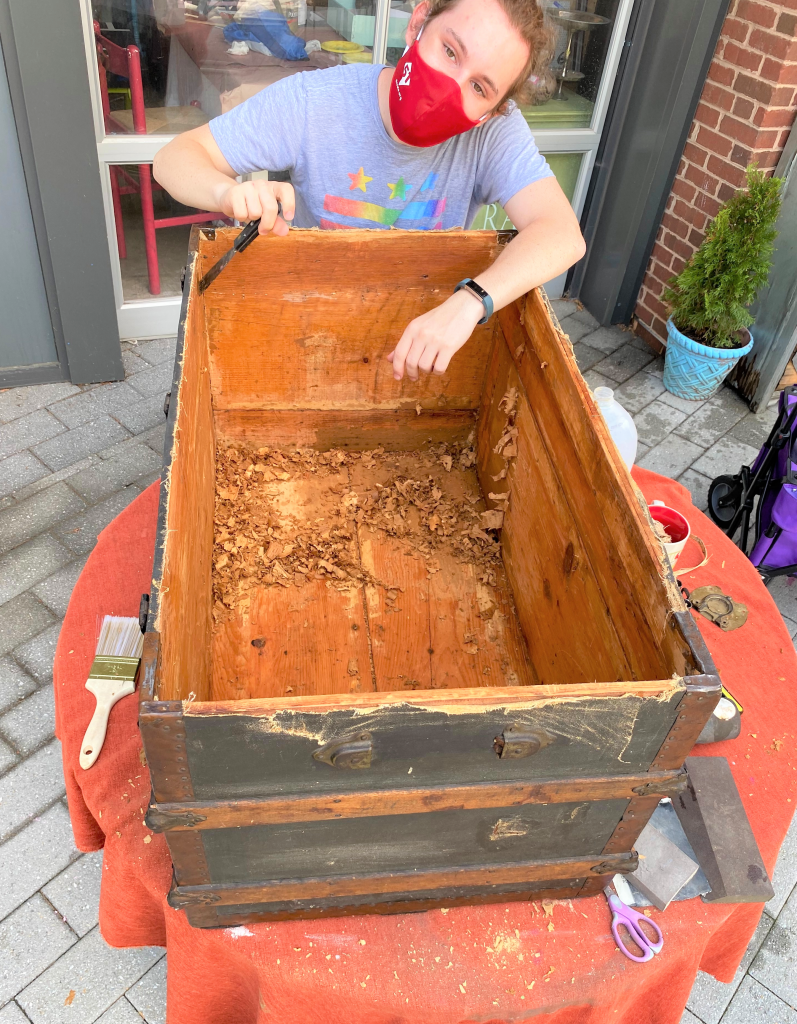
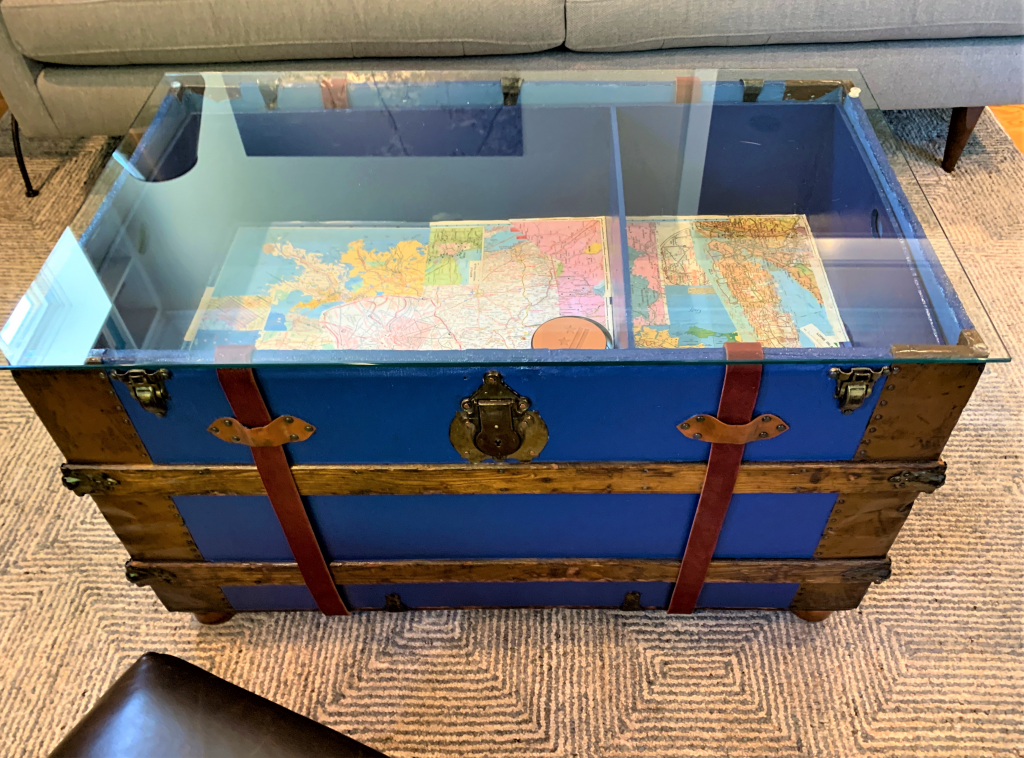
When the trunk was closed, it was felt too tall for a coffee table so we decided to remove its lid and use it for another project. This lowered it a bit for a more user-friendly height as most coffee tables are 16 inches to 18 inches high. Not having its lid meant the inside would be visible and part of the final look.
Step 3: Tell a new story with color
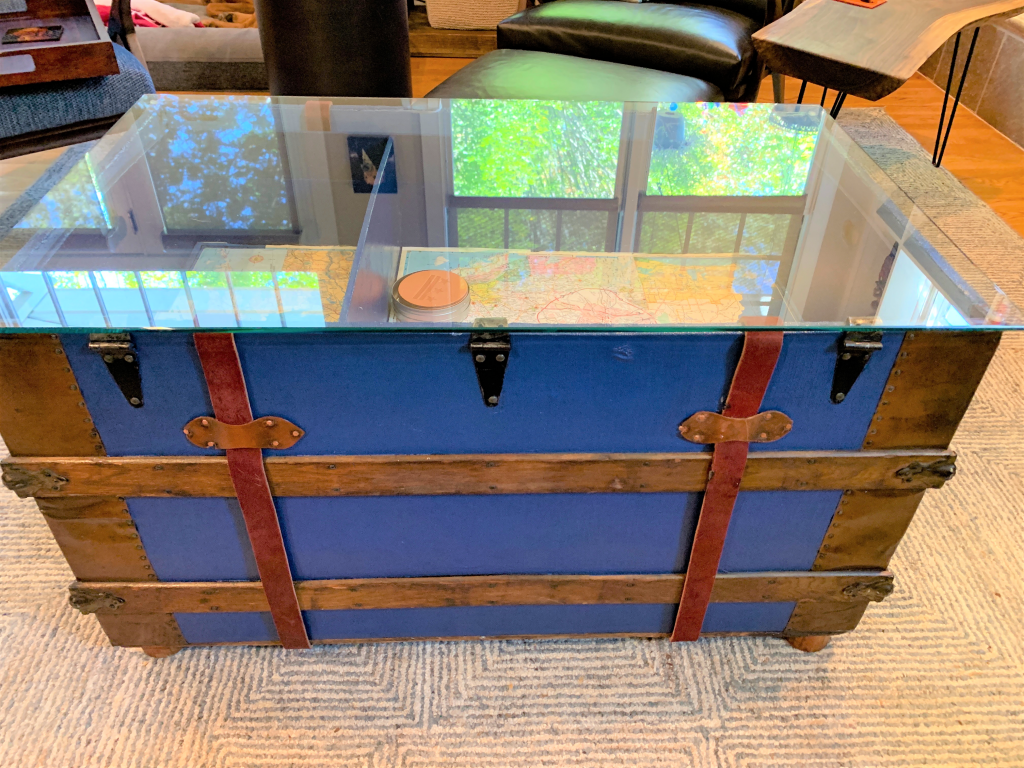
Laura’s favorite color is Indigo, so a vibrant blue for the outside and a lighter tone, also in the same blue family, were selected. Part of the beauty of their trunk is the horizontal wooden support pieces that held it securely together.
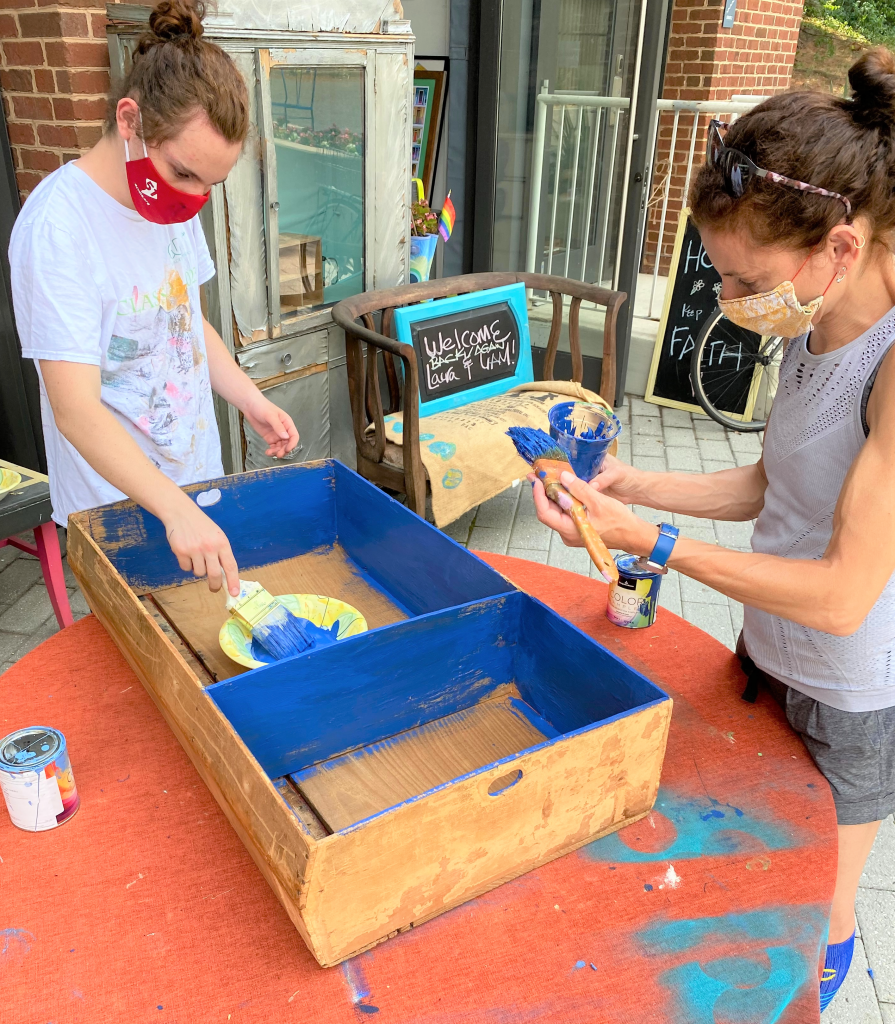
Also, the corners were covered with metal and there were other interesting elements so we covered them with painter’s tape. This would allow them to stand out and add visual interest to the future coffee table’s appearance.
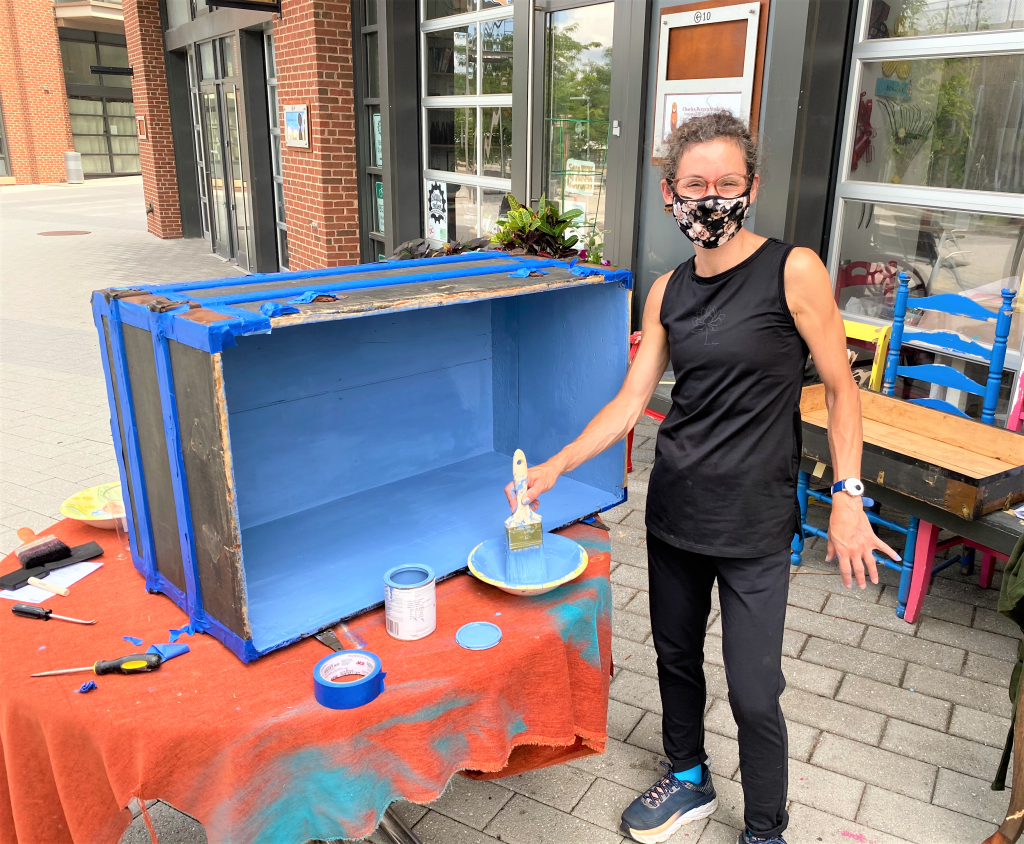
Several paint coats on and inside the trunk provided an instant update and pop of color. It was so much fun to teach them some of the tricks of the trade relating to painting and I so appreciate their openness and willing to try their hand at things. And I learned a lot from them, too, during this transformative process.
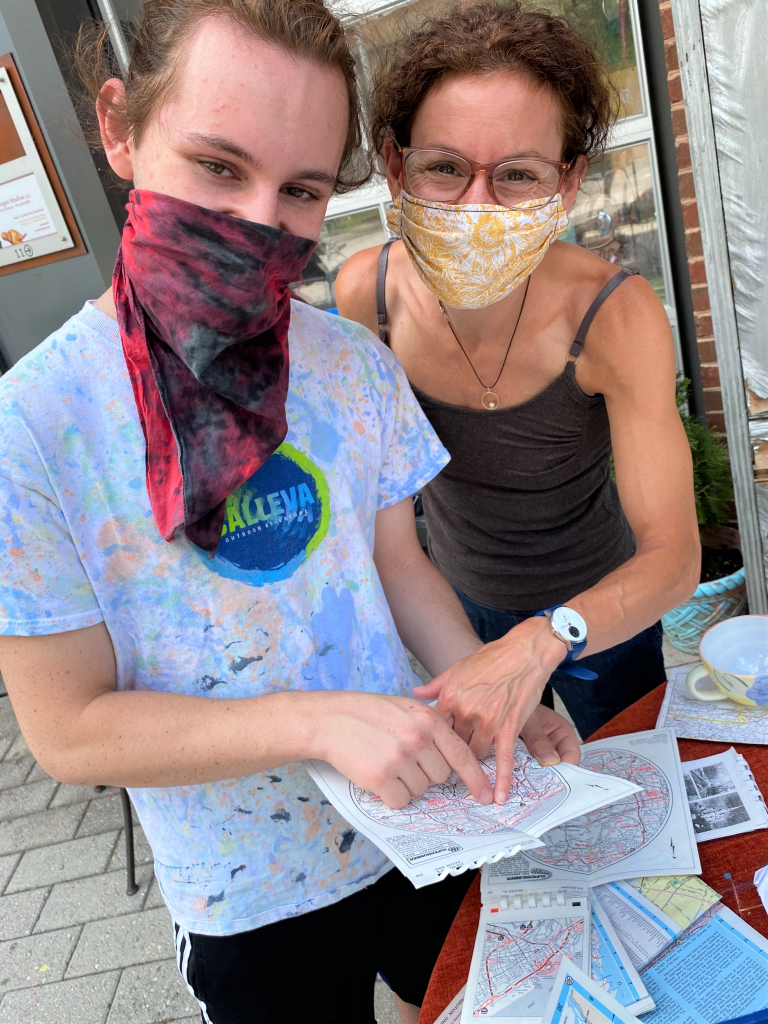
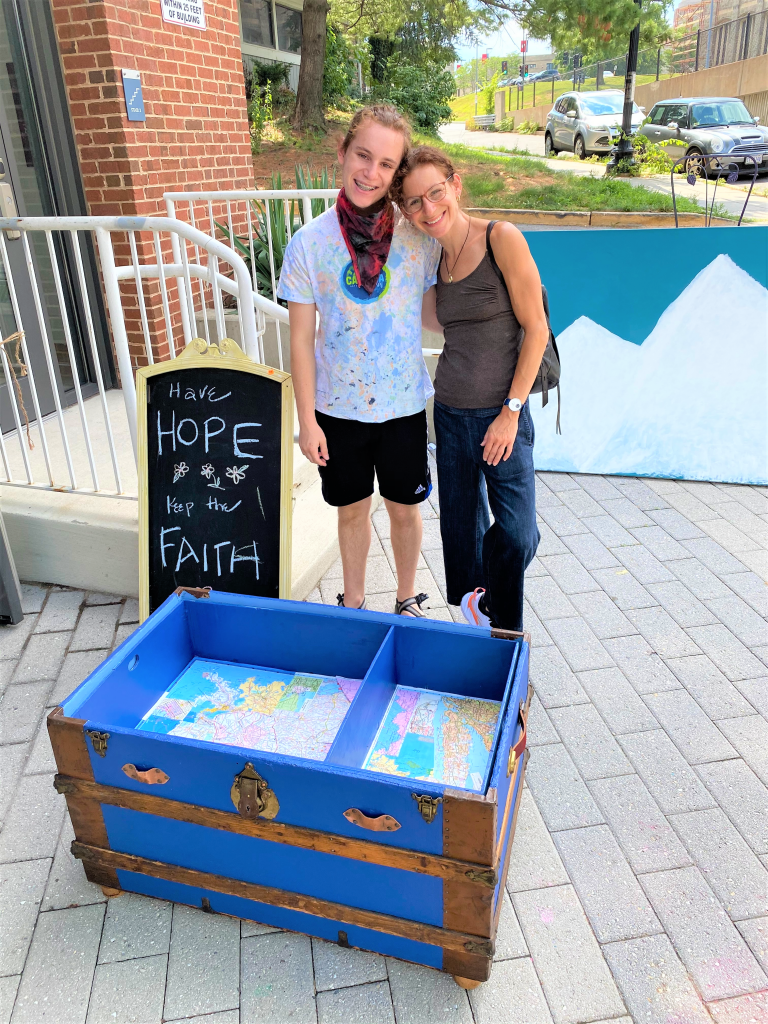
Step 4: Create a road map to success—and add more meaning
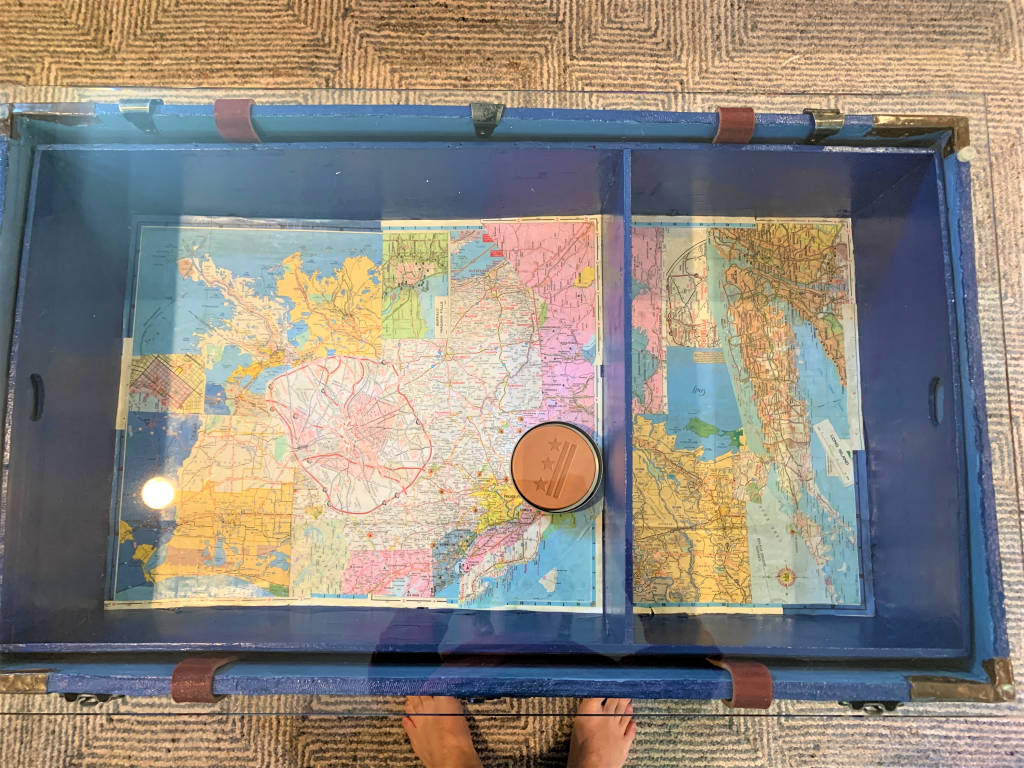
A suggestion I had was to decoupage maps somewhere to tie into the travel theme of the piece and project. They reached out to their grandfather who sent a collection of maps all relevant to their families’ travels and adventures. Together, Laura and Liam lovingly went through the maps and selected places that were meaningful to them and other relatives.
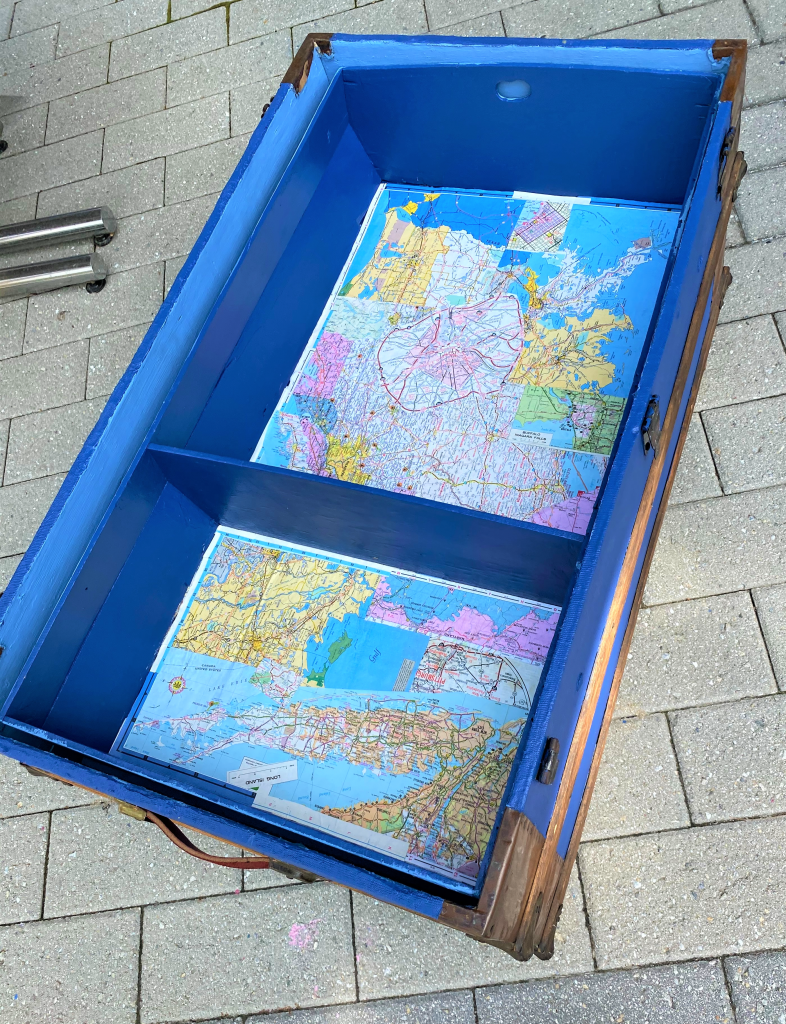
The storage shelf’s bottom which was visible (not its underside) was the ideal place to receive the maps. Using Mod Podge and foam brushes, a layer of this glue was added to the shelf and each map piece was carefully positioned and secured with another Mod Podge layer.
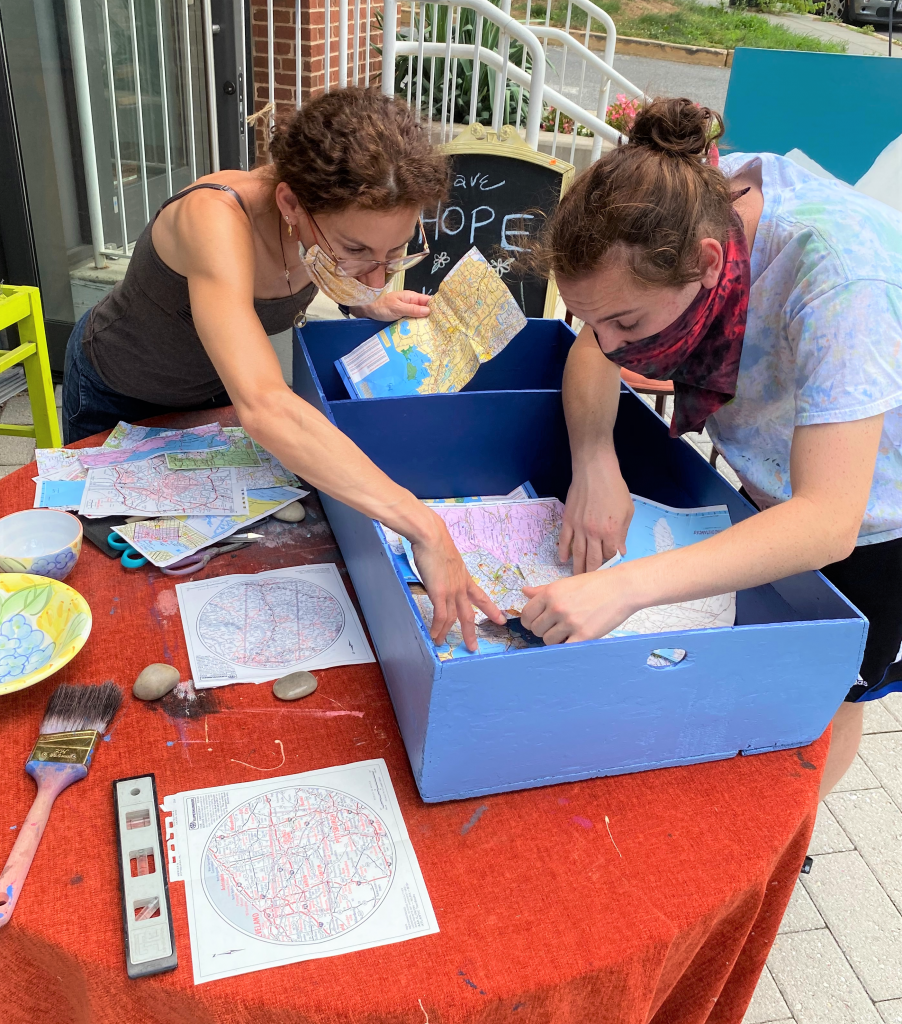

This was a messy step and one that made this piece go from good to great. I am glad Laura and Liam were up for the adventure!
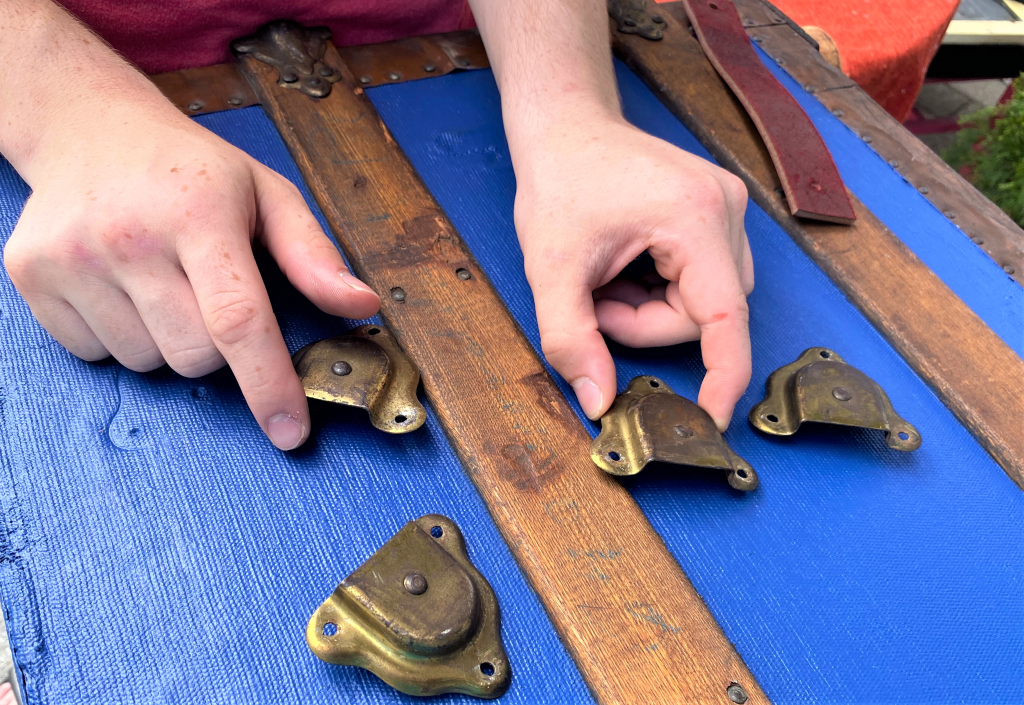
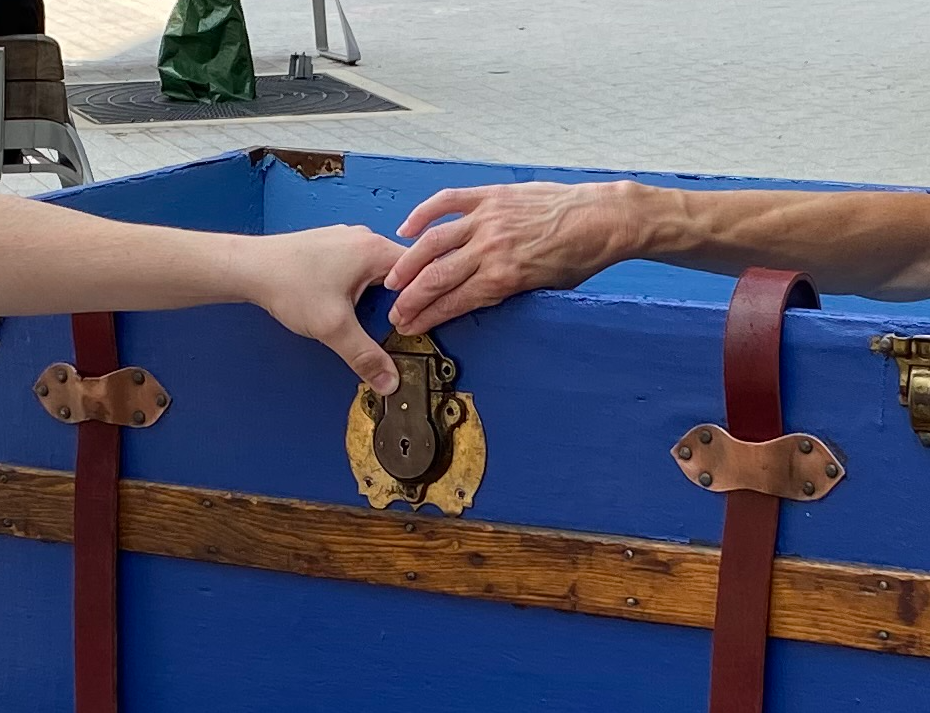
Step 5: Using existing elements and adding to them
This trunk had beautiful hinges, a big lock and other elements that served a function before and now were part of its unique design.
Liam carefully and very patiently removed certain parts earlier and they were now re-attached or remodified. For example, the hinges that held the now-removed top were kept in place but curled over to add whimsy to it.
Liam ordered new long leather pieces that were inserted into handles/bands which had weathered the storm while the old leather straps had not. Copper tacks were used to hold some of these items in place as was epoxy glue.
Hats off to Liam for his steady hands as he hammered in the copper tacks. Both the color of the tacks and the leather straps added charm to the piece and called attention to the trunk’s interesting details.
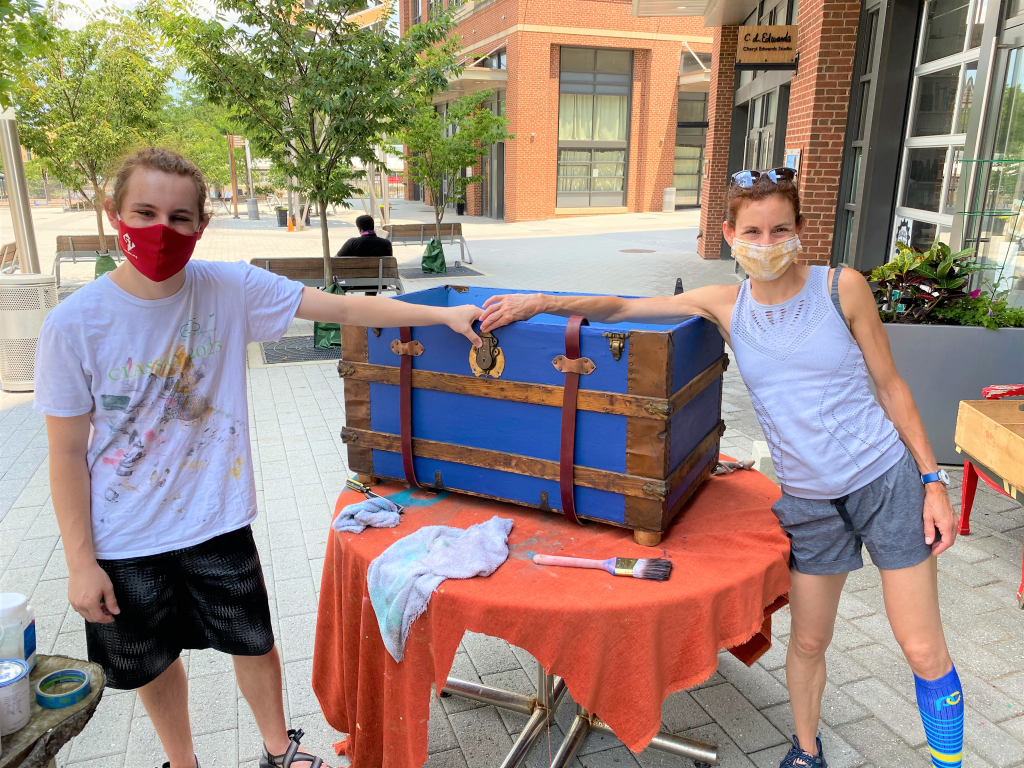
To give the coffee table a little stature and some “oomph,” short wooden legs were glued into place on the bottom. Their natural tones picked up the ones of the horizontal wooden bands and leather straps, too. Love it when a project comes together so well and each piece compliments or plays up the others!
Step 6: The icing on the cake: a glass top
To provide a flat surface on which to place a coffee cup or wine glass and to allow the interior (with its map covered shelf) to be seen, a glass top was ordered to fit perfectly in place. In addition to its functionality, the glass also gave the coffee table a fresh, vibrant and new look!
I hope Laura and Liam had as much fun as I did guiding them through this amazing transformation.
And I am sure that their relatives who used this trunk, are smiling down from above and thrilled to know this piece is now a welcome addition to their new living and entertaining space.
As Ralph Waldo Emerson once said, “Life is a journey, not a destination.”
Thanks to Laura and Liam for a wonderful voyage through this memorable and meaningful upcycle!

Tim Kime
Artist, Motivational Speaker, Life Coach