Be a part of Team Transformation’s winning season by giving your piece colorful accents. You’ll want to cheer each time you see the bold and bright hardware that will take your upcycled item from its amateur status to the pros.
Thanks to Andrea & Chris the opportunity to give their young sports fan, son Caleb, a piece that will make him feel like the team captain for sure!

Supplies Needed:
1. Desk or piece with handles/knobs
2. Yellow paint, semi-gloss finish
3. Brushes
4. Collection of bold, primary toned spray paints
5. Screwdriver
6. Sandpaper
7. Painter’s tape
8. Team spirit
Step 1: Sprint over to Goodwill
One of the big reasons why I am such a fan of Goodwill of Greater Washington is its remarkable team. Always friendly and professional, this group of dedicated folks are ready to serve you with care.
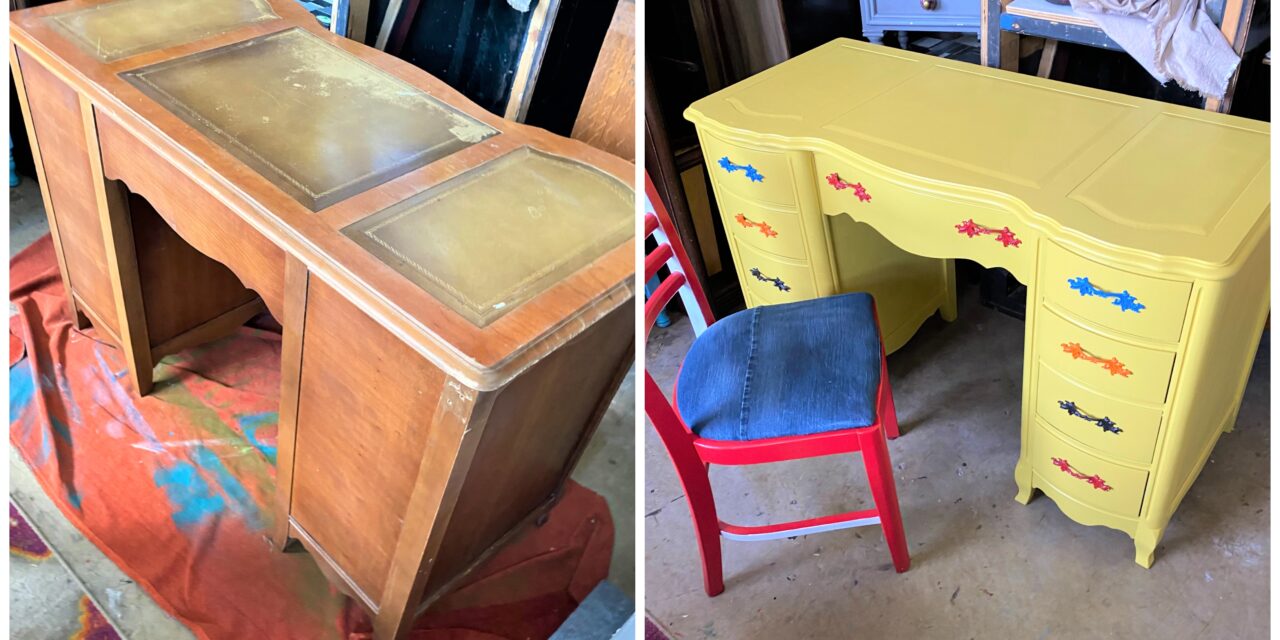
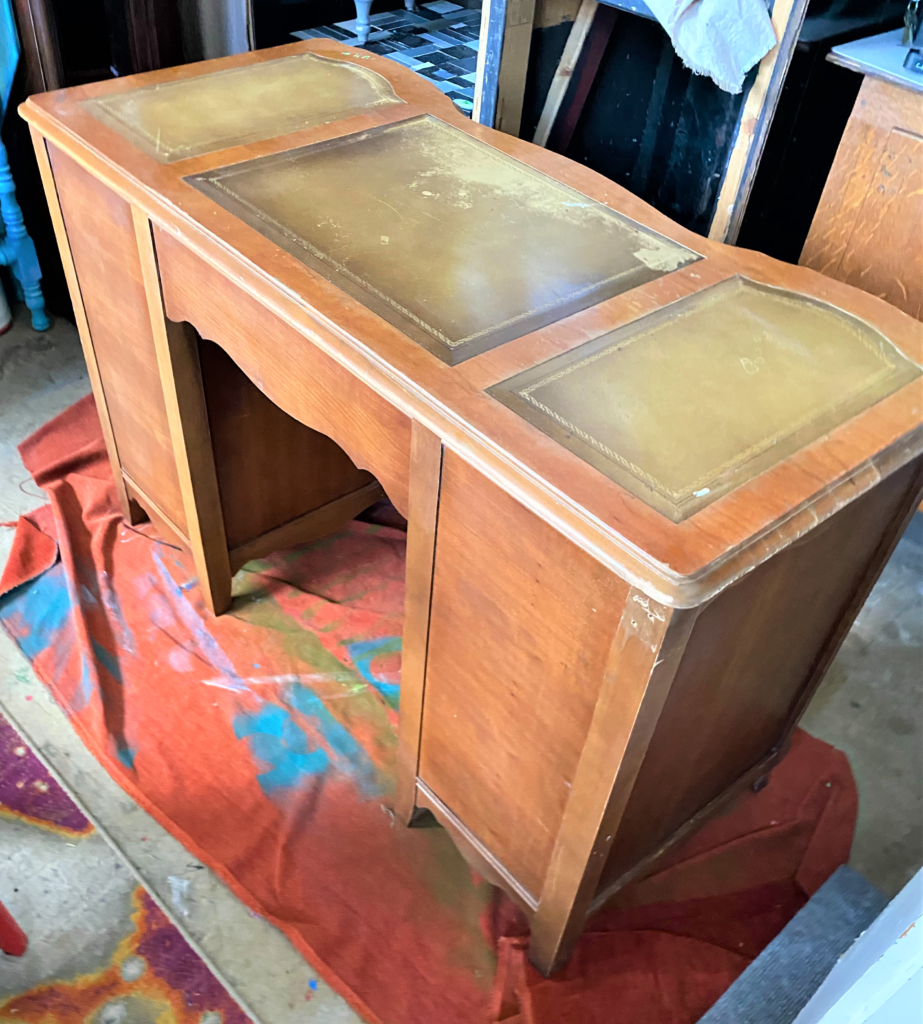
In addition, there are always interesting and unusual items in great shape that await your creative talents at every Goodwill. The desk featured in today’s blog is one we all have seen before or even might already have in our place. Solidly built, great lines and interesting accents, yet on the sidelines. What good will you find when you explore your favorite Goodwill? For certain, you will come across a great team spirit!
Step 2: Prep your piece for the big leagues
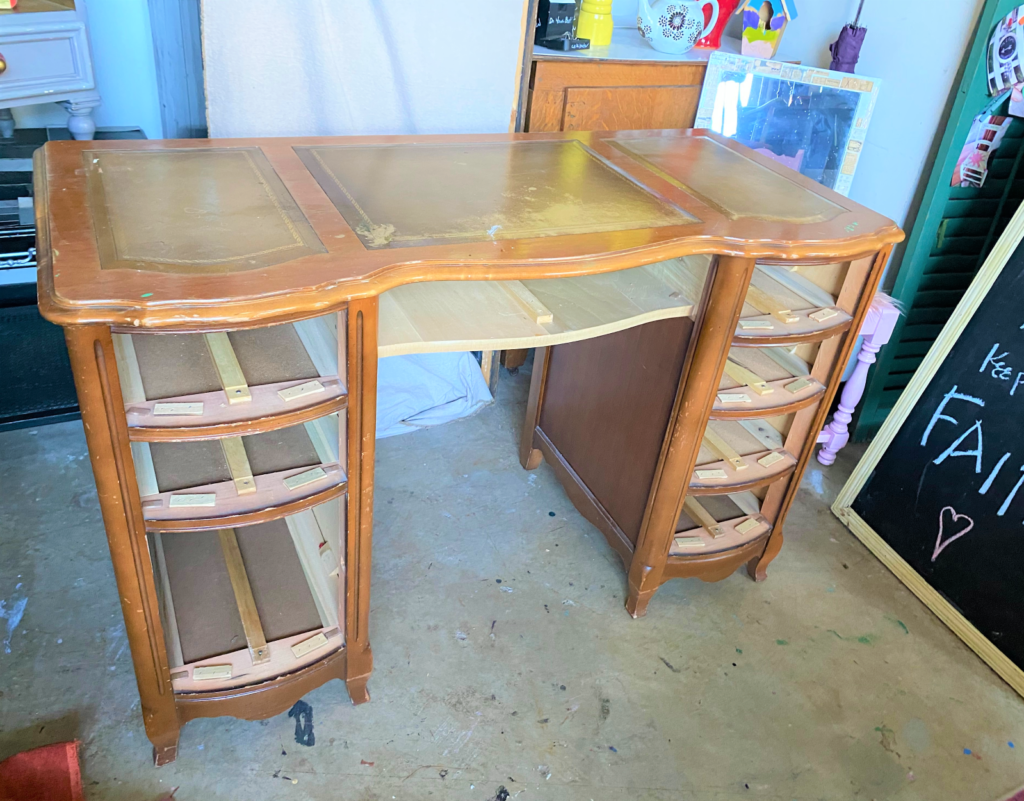
- Remove your piece’s hardware, put in a container to keep it all together then place it aside for Step 4.
- If your piece has various shaped or sized handles and knobs, you may want to make a note of where it goes on a piece of painter’s tape then adhere it to the relevant item.
- Also, as you remove each drawer, you will want to number it as well so you can easily return it to its home. Given that this desk had a bunch of drawers, I numbered each so I would know easily which one went where. Taking time to do this numbering step will save you some headaches and confusion later. To be honest, I learned this the hard way while upcycling a piece with many knobs and handles that were tricky to return to their original places when all tossed together.
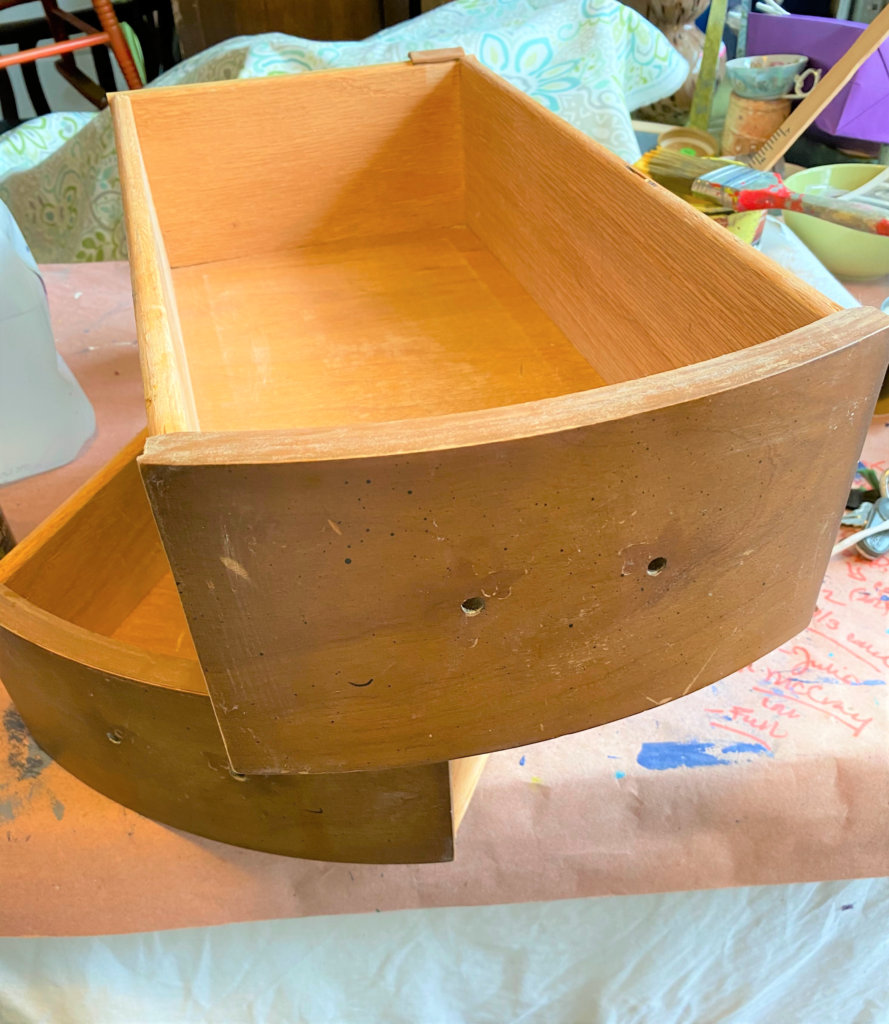
- After removing and numbering the hardware as needed and labeling each drawer, use some medium to heavy grained sandpaper or sanding blog to buff up your piece to make its smooth finish ready for painting.
- Get every edge and side that will be painted; this step will take some elbow grease and will create some dust so you might want to wear your mask during this step.
- When completed, wipe down each drawer and all piece of the piece to remove the debris created and to ensure all parts are clean and ready to go!
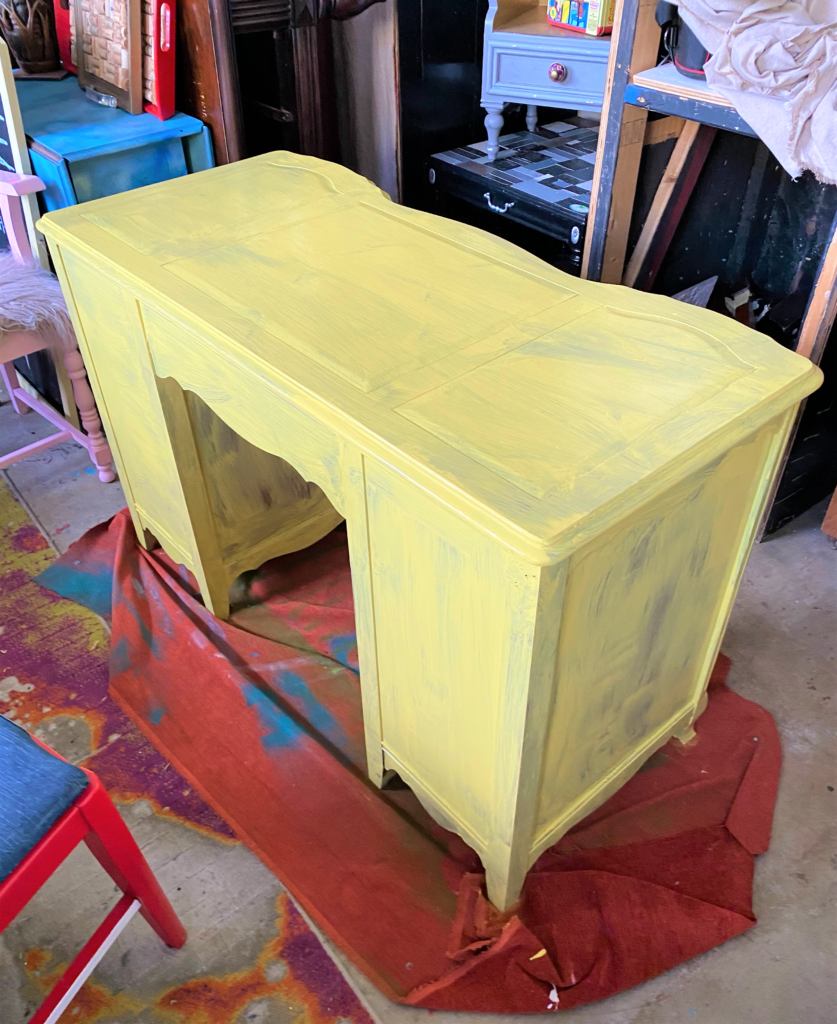
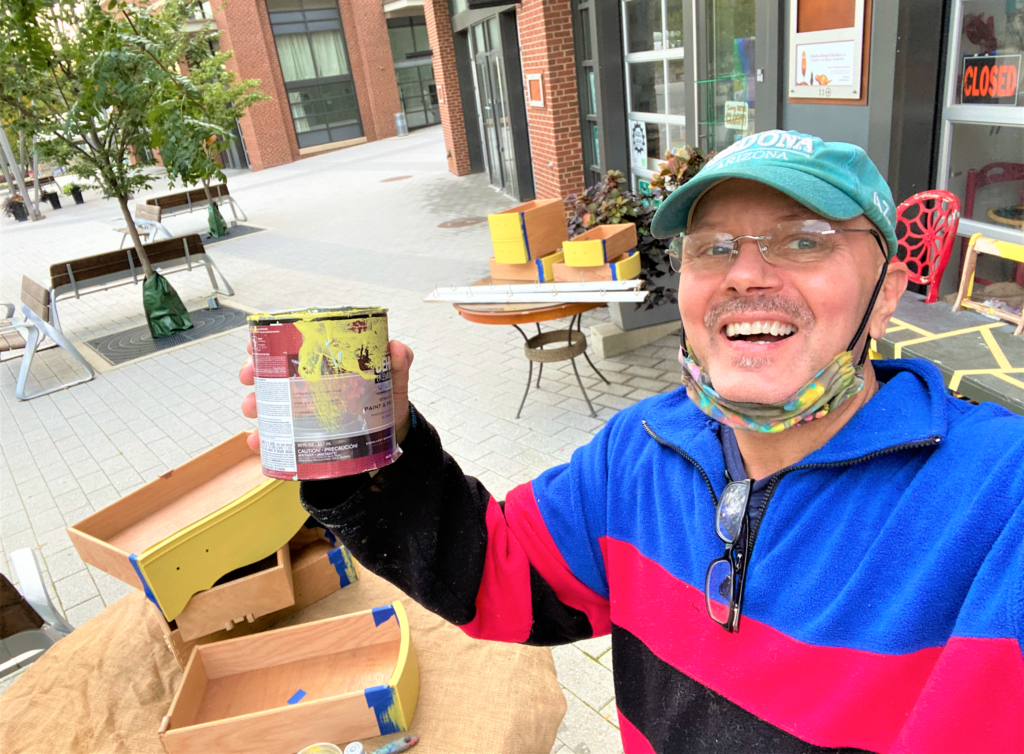
Step 3: Pretend your painting is a pep rally
For any team, a pep rally is held to get everyone psyched up and ready to perform well. So, consider this step as that role—you are helping your thrift store piece to move from being benched to serving as first string quarterback!
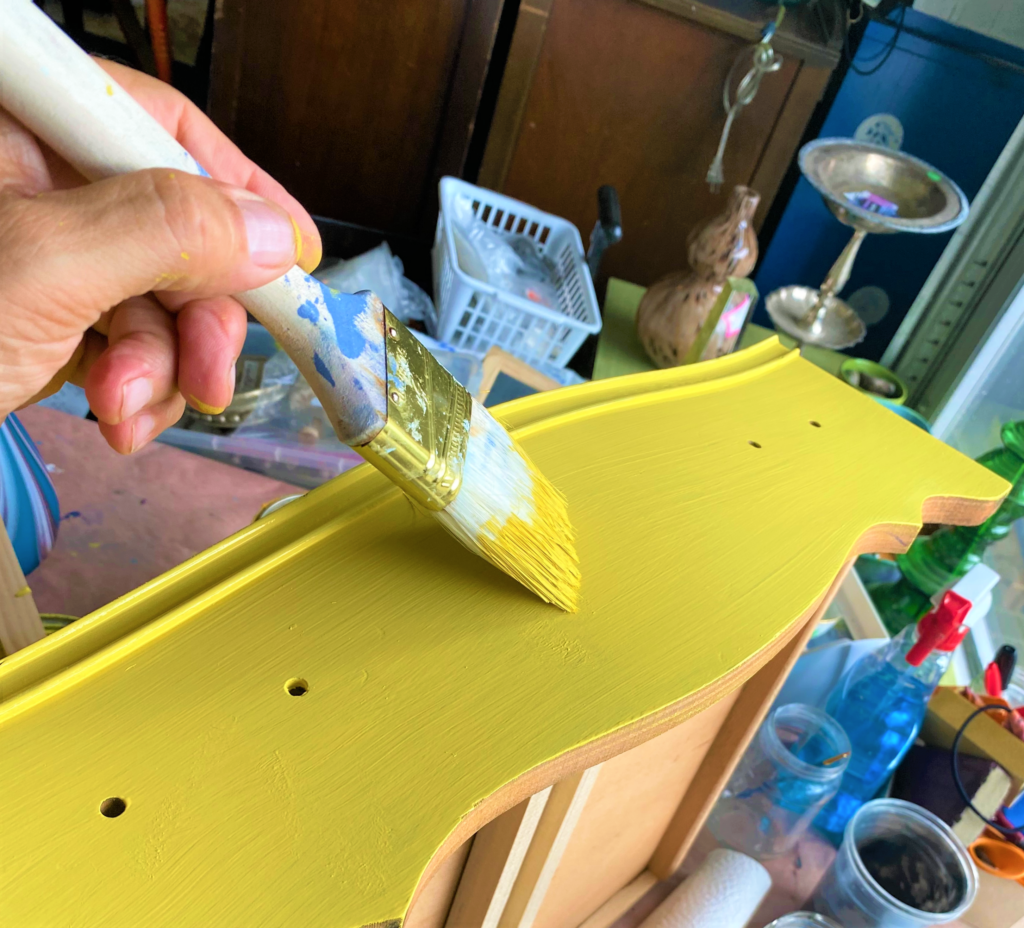

- Use your painter’s tape to protect any sections you want to keep paint-free.
- I used the tape to ensure the paint was only on the front and side edge of each drawer. Also, on the inside, I placed a small piece of tape over the handle holes to prevent paint from coming through and dripping inside.
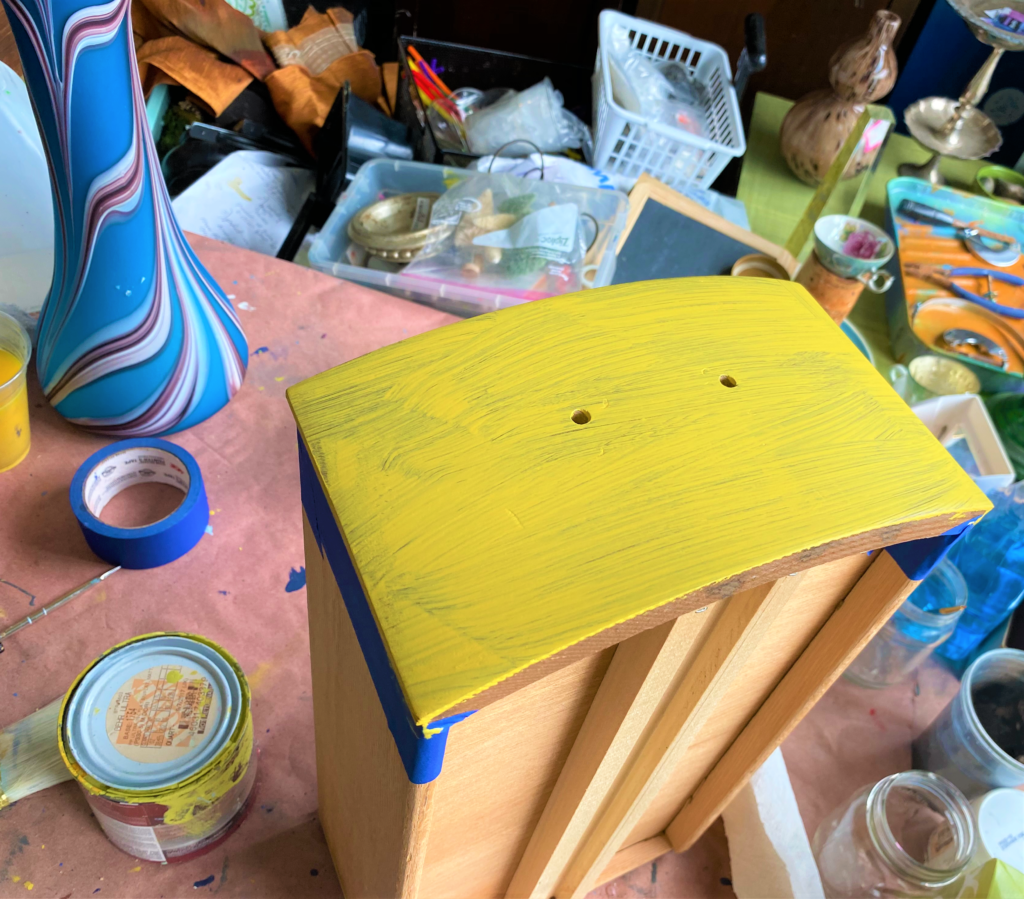
- With careful strokes, add a light layer on your piece. Remember, you are not looking for one perfect coat to do the trick because, candidly, it won’t.
- Allow each layer to dry them come back with another and another as needed.
- As with any piece, you will want to flip it on its back or sides to ensure each and every visible part gets a good covering and coat.
- While this step takes time and care, it is always the most exciting one because with just a couple of strokes, you can easily see how your paint will transform your piece into a winner.
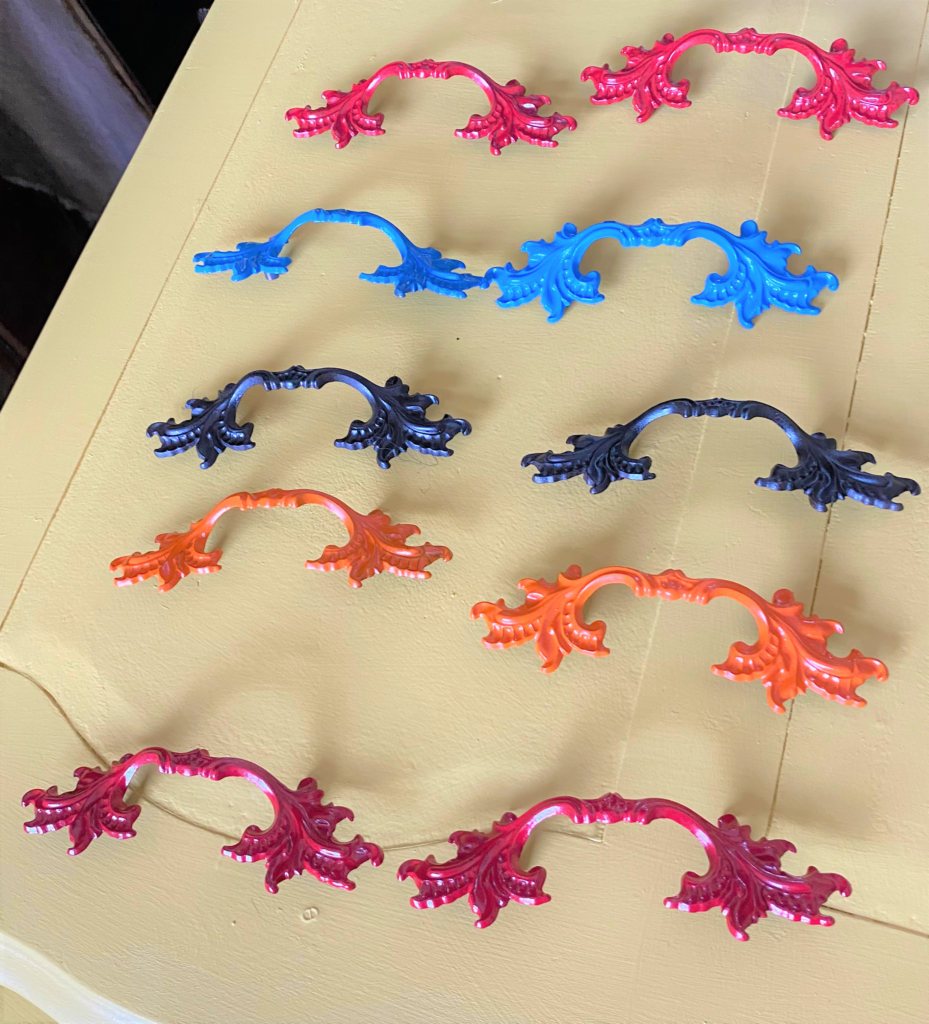
Step 4: Hype up your handles
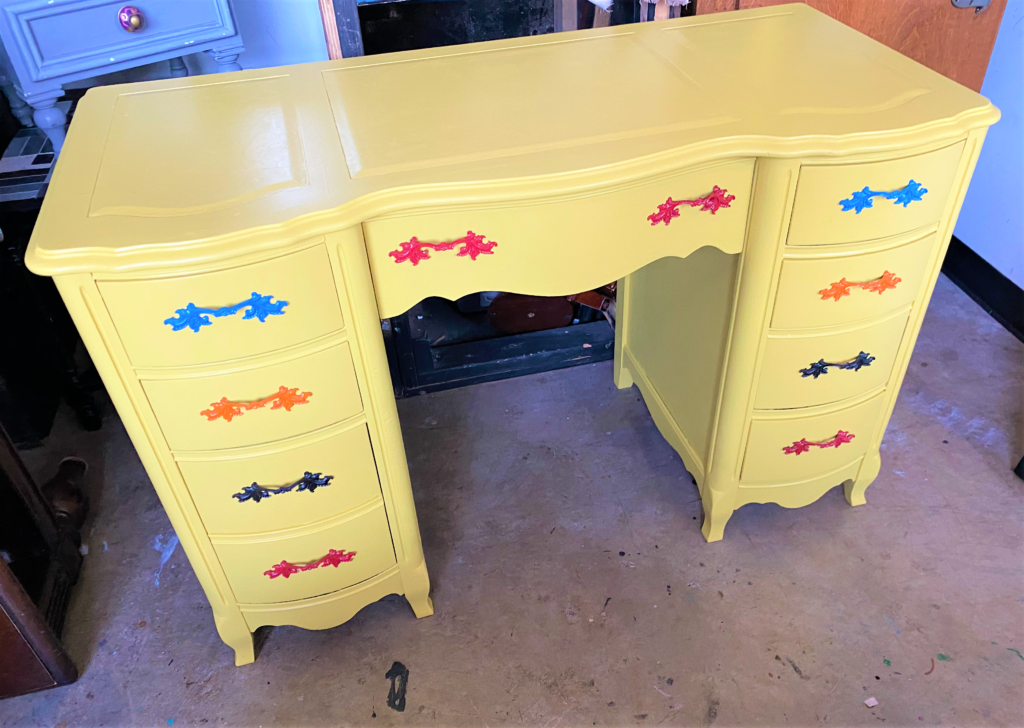
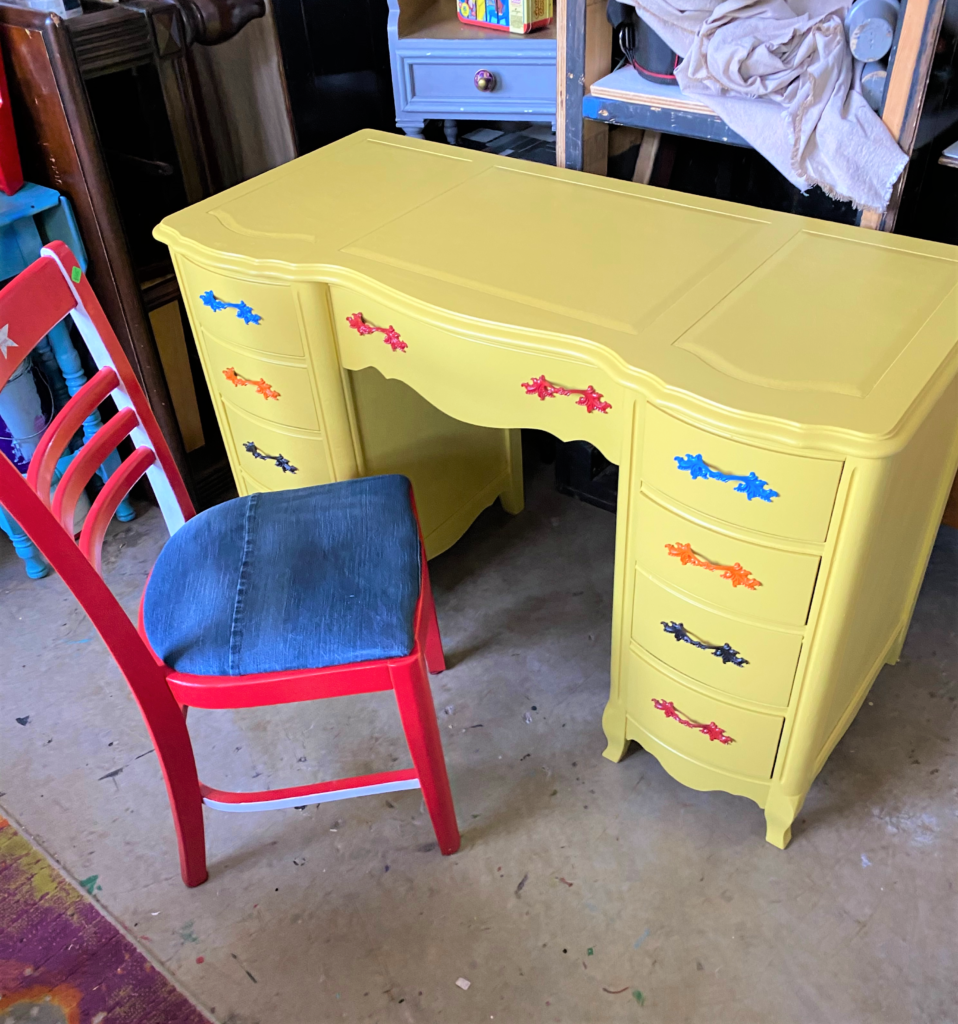
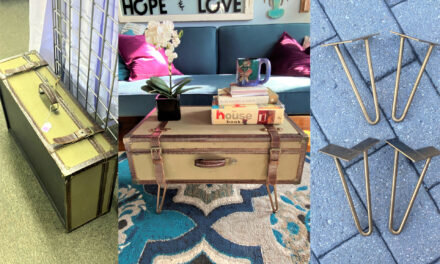
Use your handles to make statement. Rather than tossing out its existing hardware, always first consider using spray paint to give it a new look. The handles on this desk where nice looking yet felt very dated.
Building on the bright yellow tones of the desk, I kept with the basic, primary colors and chose to use several colors rather than just one (which would have looked nice, too). But I wanted this to be a special piece for the little guy so used four different colors and repeated them on the handles. These bright colors made the old hardware jump up and out. And after re-securing them in place, I was jumping up and down, too, because they looked so good and made this old desk look like a Super Bowl Champion!
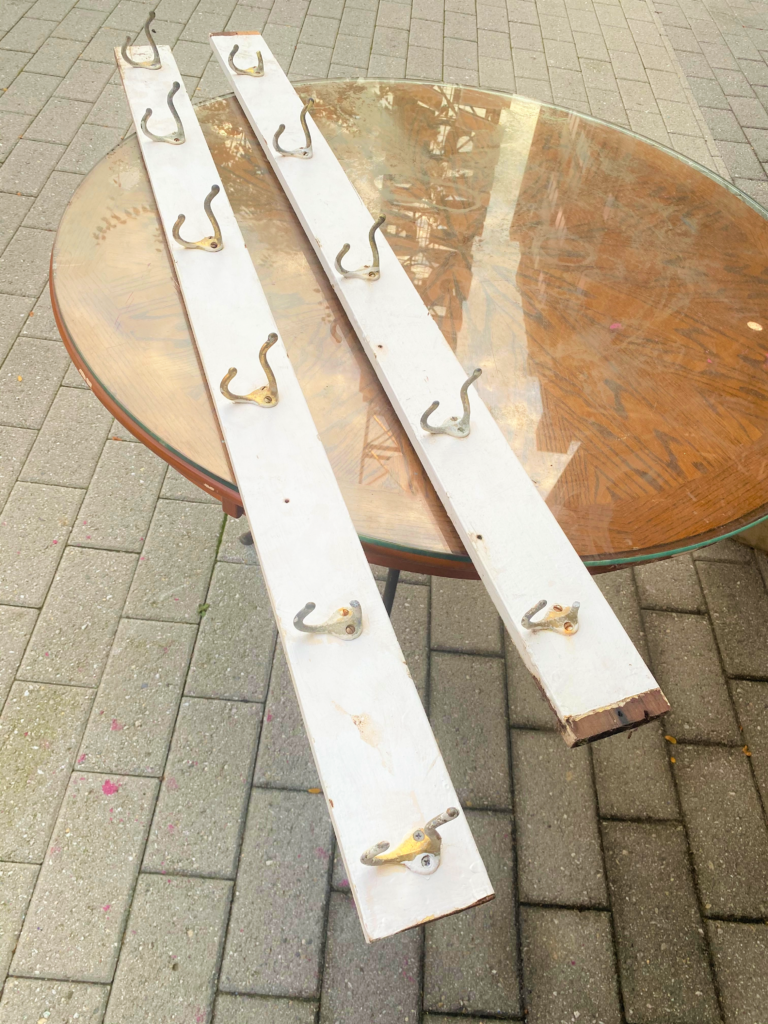
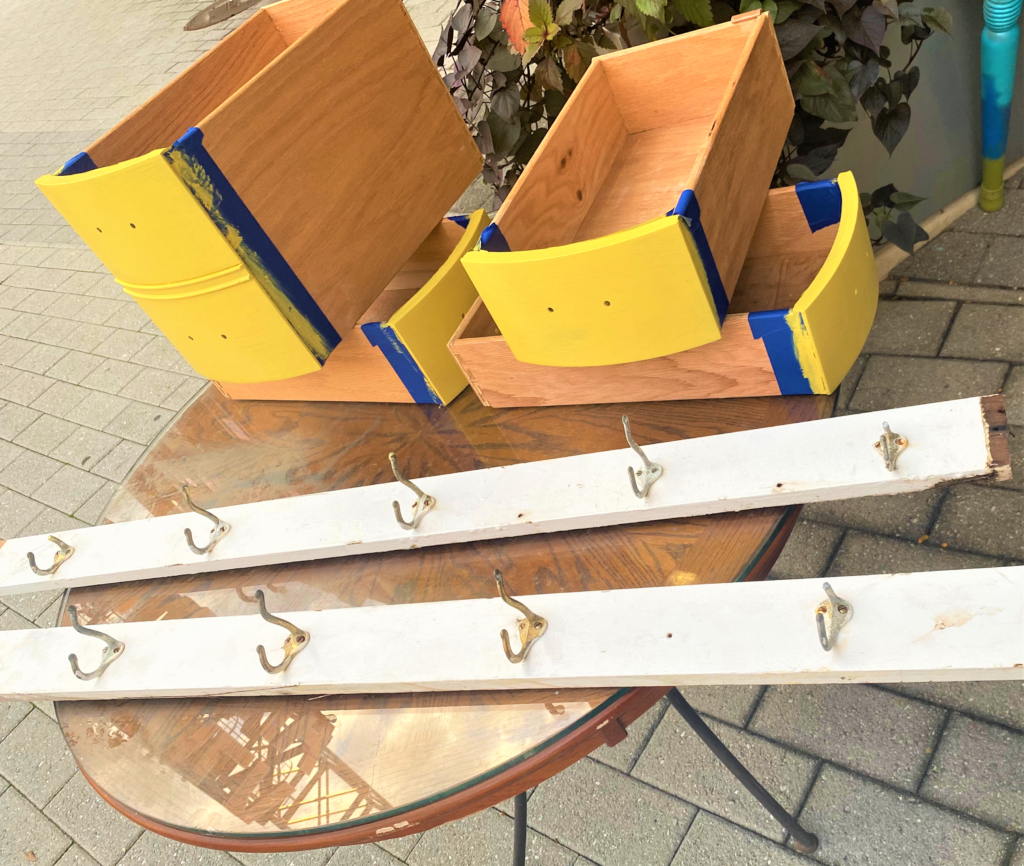
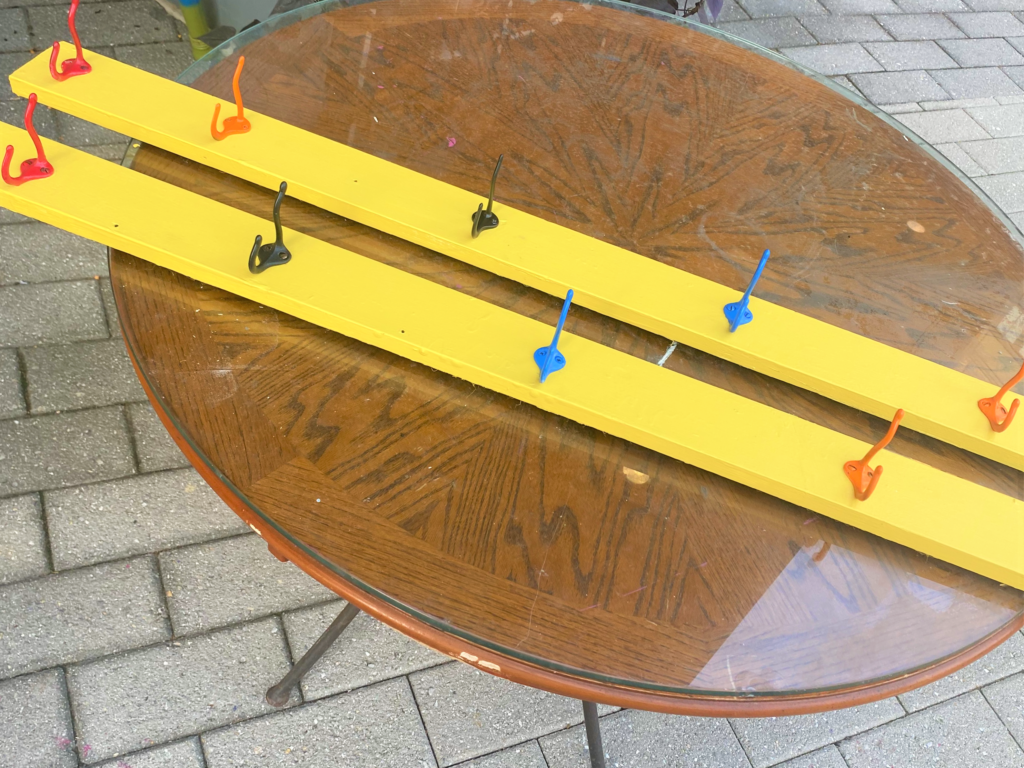
To make this desk look great in his room, I also painted two hook racks with the same yellow base tone. While spray painting the handles, I also covered the hooks with the same bright colors to compliment the desk’s transformation. Now his desk looks part of a great team, too!

Thanks again to the Byrd family for the chance to give this piece a colorful new look that makes me want to shout out, “You Can Do It, Too!”

Tim Kime
Artist, Motivational Speaker, Life Coach