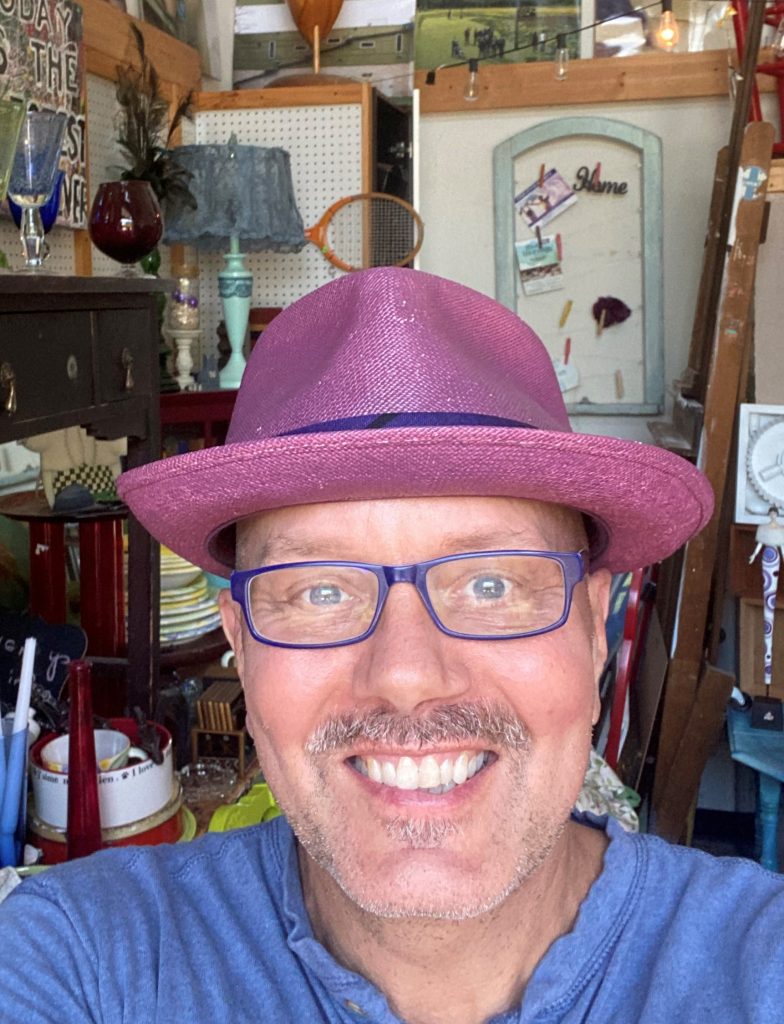
Folks will think you’re part Madhatter and part Martha Stewart when you create this totally fun & festive party hat!
You will want to be gazing at yourself in the looking glass the entire time you wear this one-of-a-kind chapeau.
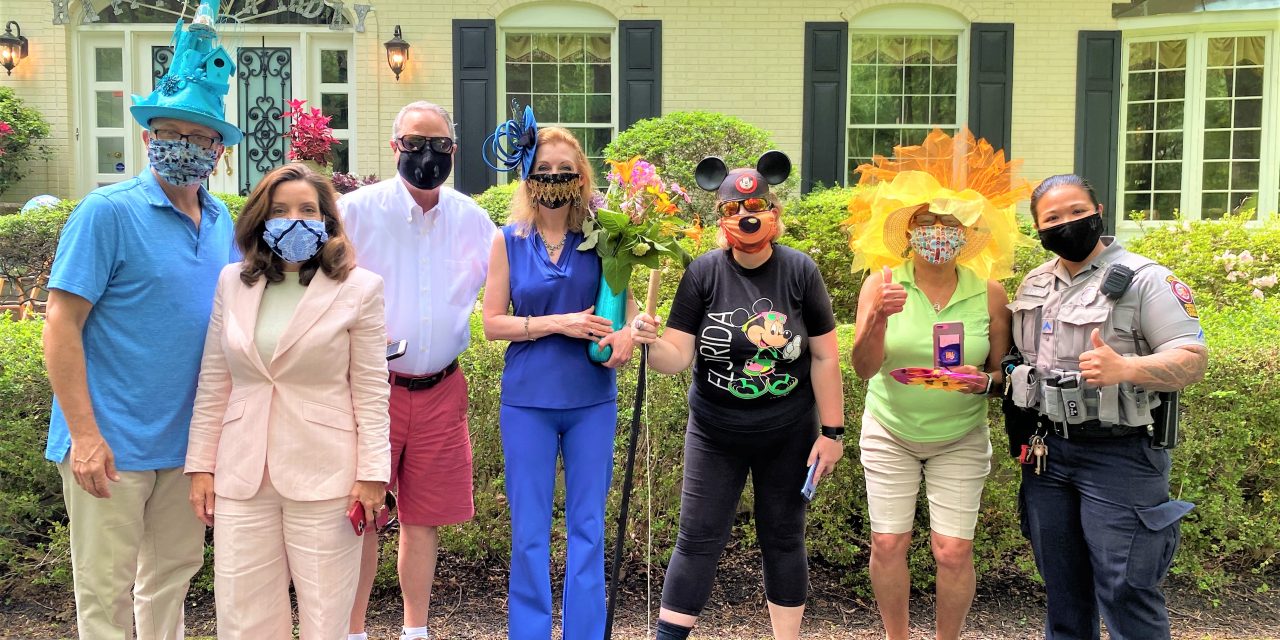
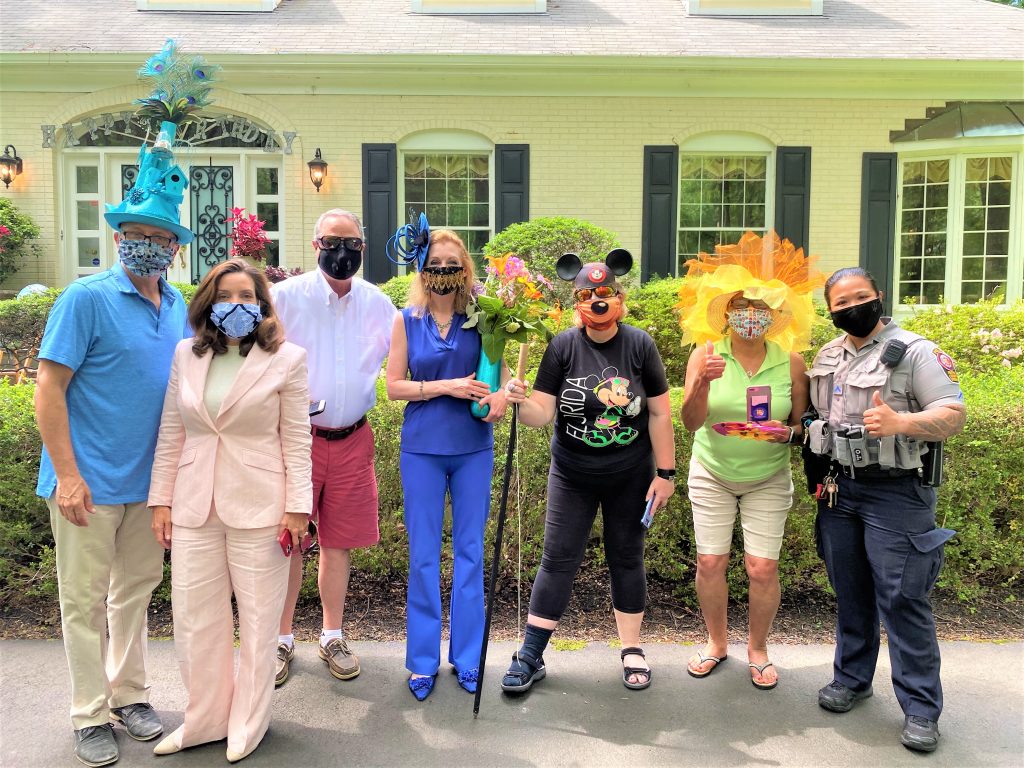
I recently made this party hat made in honor of a dear friend’s hat-themed birthday party and had to share it.
May it inspire you to think outside the box—the hat box, that is—for your next celebration! You won’t go down the rabbit hole with this easy DIY project that will leave you grinning like a Cheshire Cat.
Happy birthday to my wonderful friend Eleanor—who loves hats, bling and feathers—and for all the ways you make our world better, happier and more fashion forward!
Supplies Needed:
1. Sturdy brimmed hat
2. Bathroom tissue and paper towel tissue rolls
3. Fun items to dress it up (puzzle pieces, keys, cookie cutters, holiday ornaments & more)
4. Colorful wide ribbon
5. Glue gun
6. Spray paint
Step 1: Safely, smartly shop at Goodwill—now open!
While the hat featured in this blog was created during the stay at home order and with items I had on-hand, use it for inspiration for your next socially distanced or Zoom special event. And now that Goodwill has reopened its area stores, you can venture out there to find some of the parts for this memorable head gear.
During a recent visit to a reopened store, I was very impressed with their emphasis on safety while shopping.
While at Goodwill, look for a hat with a brim for this festive DIY project. A hat of a sturdy material is needed for a foundation on which to build and let out your inner Madhatter!
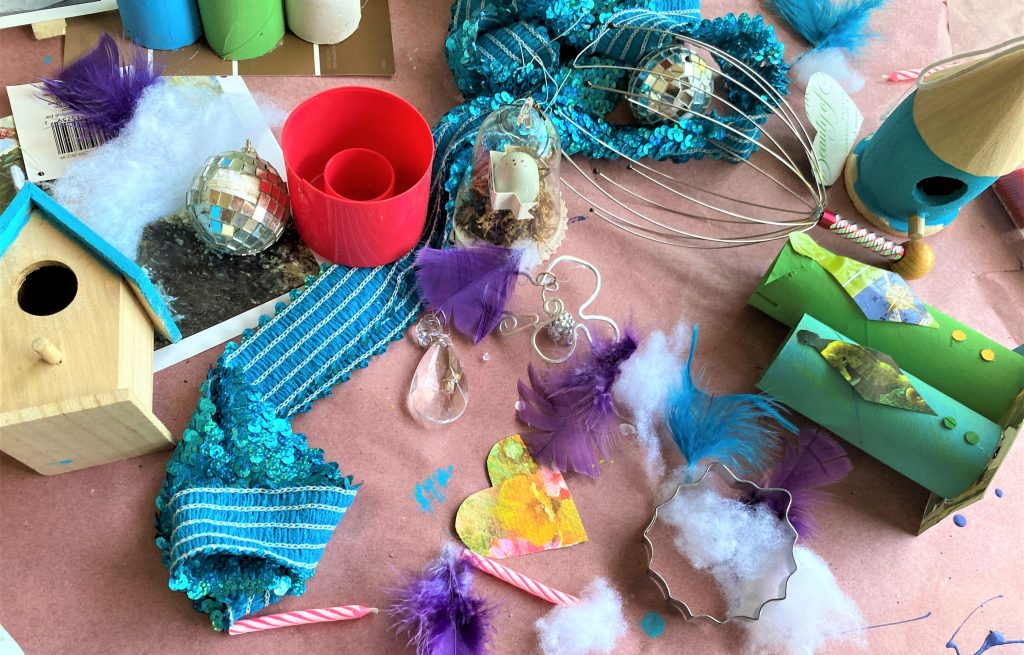
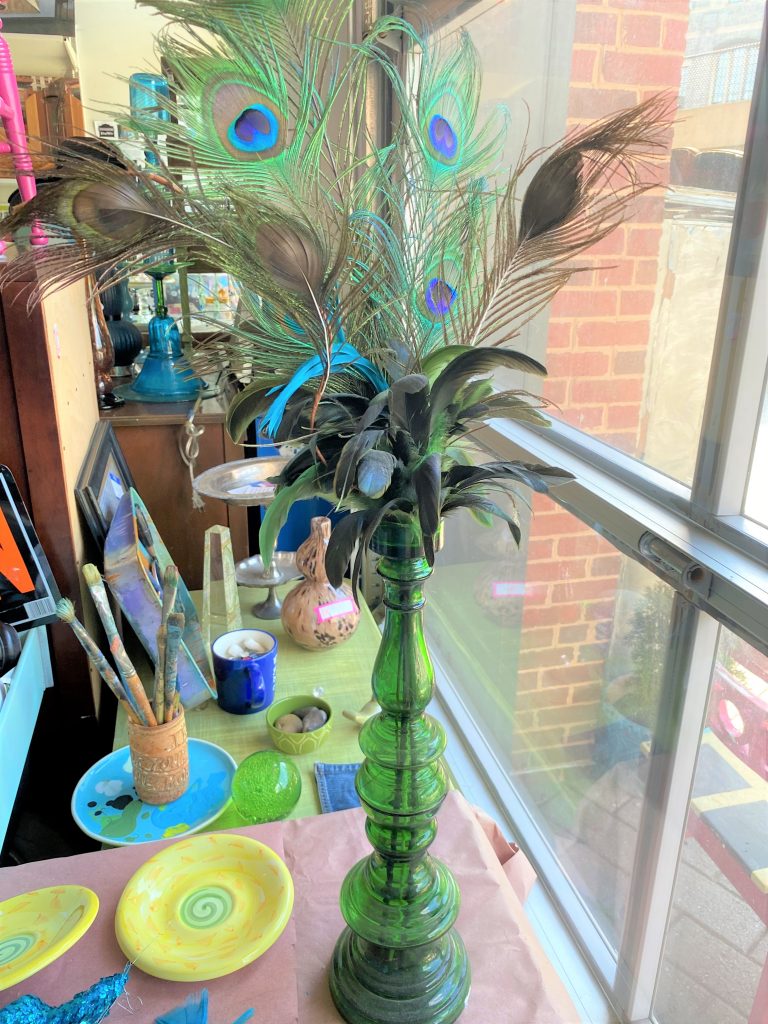
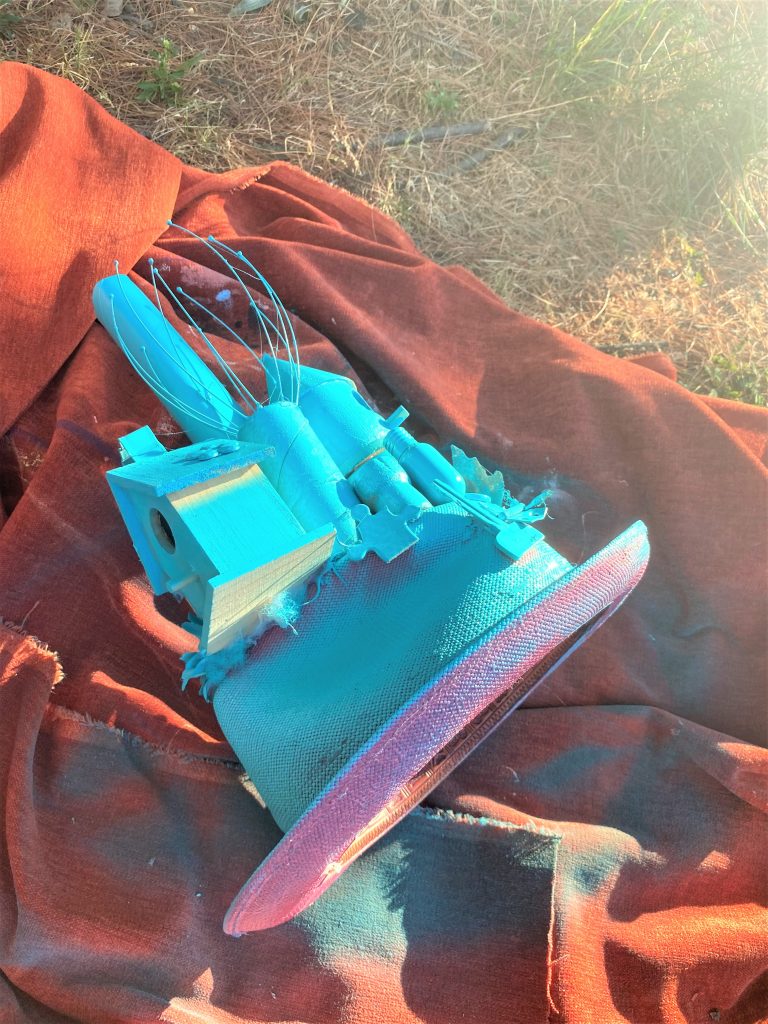
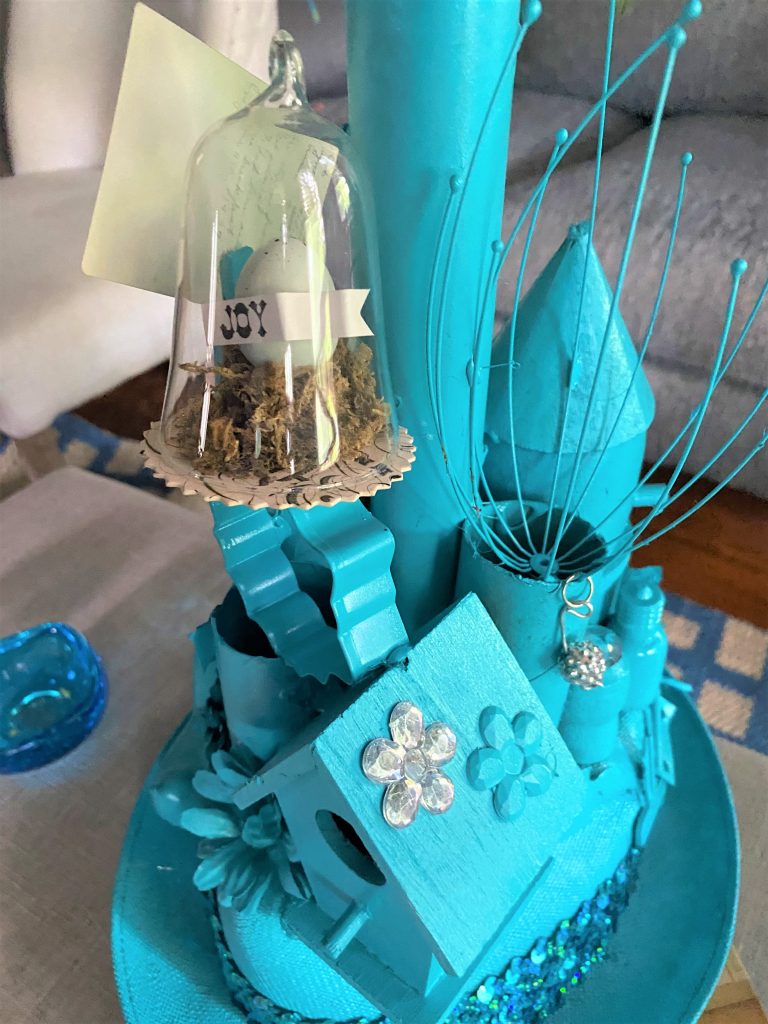
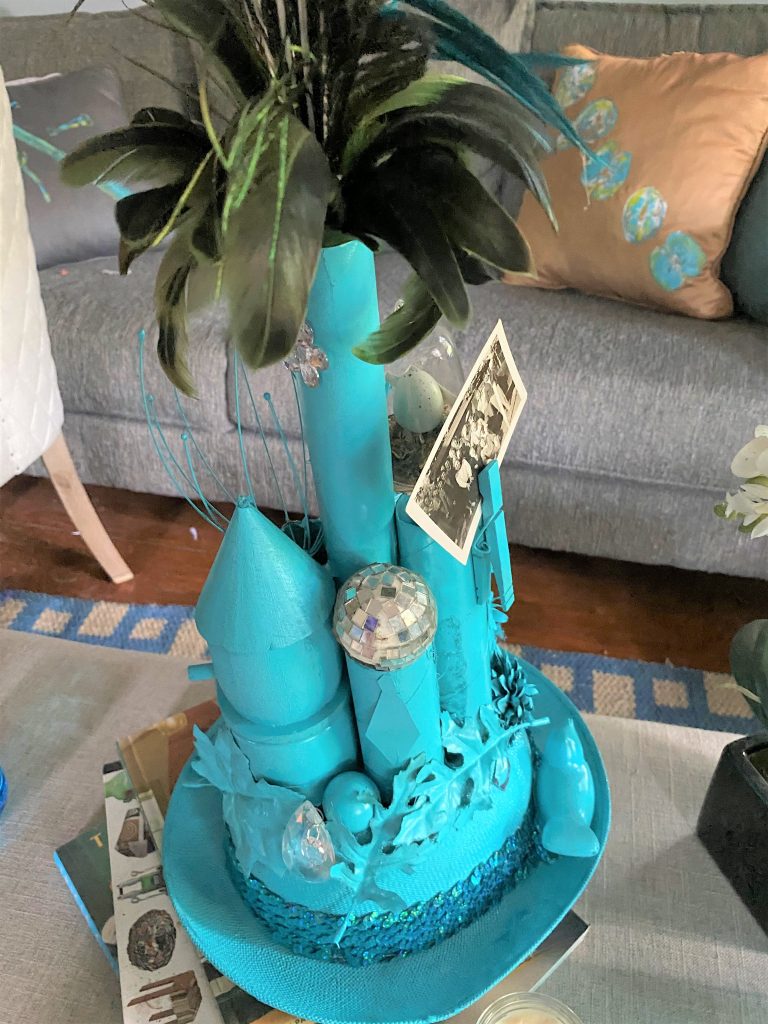
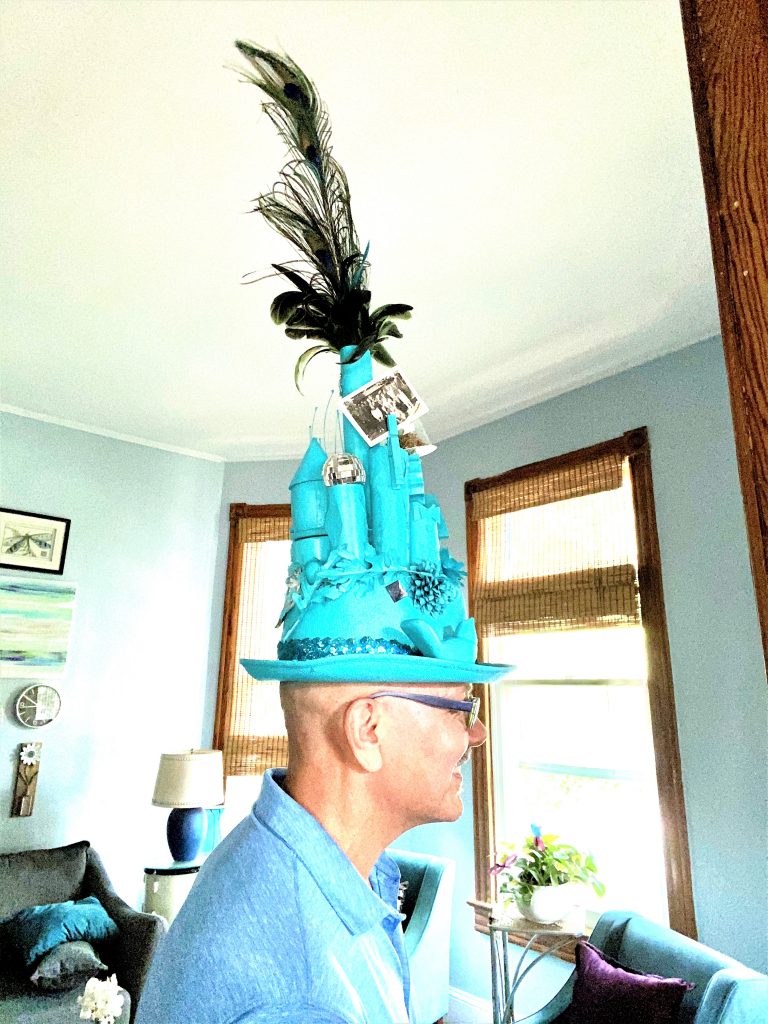
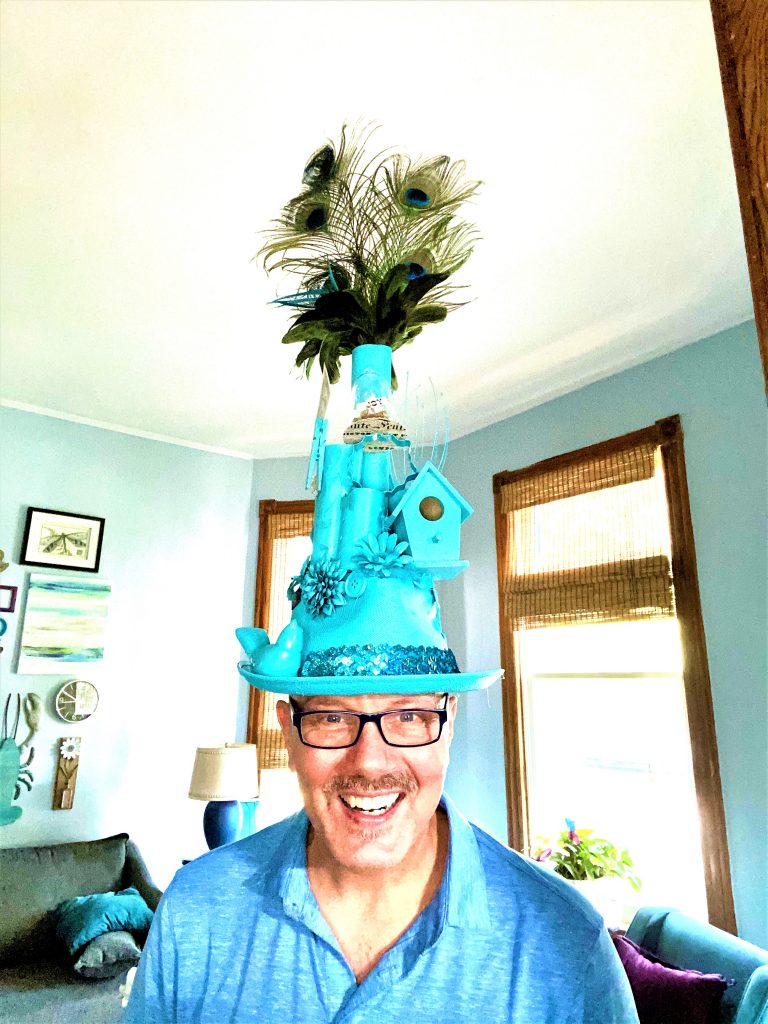
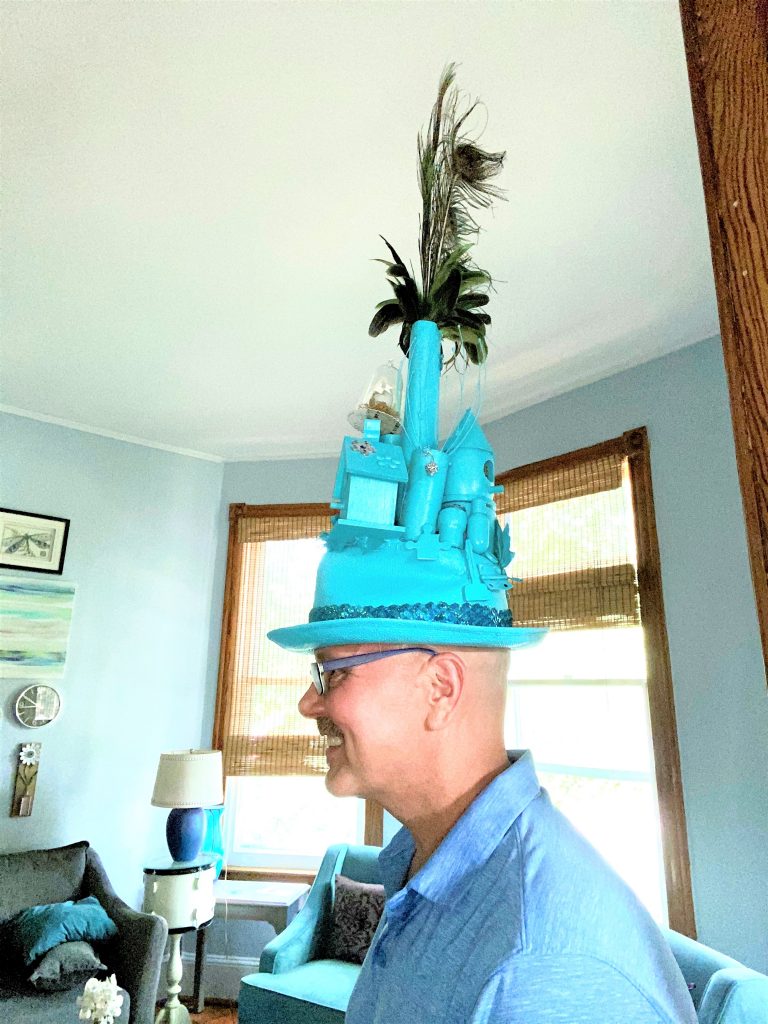
Also during your Goodwill shopping spree, pick up items in which to embellish your party chapeau. For my hat, I added a wire head massager, Christmas ornaments, cookie cutters, silk flowers and even two small birdhouses! Also, a bouquet of colorful peacock feathers was the final crowning glory.
All of these items could have been picked up at Goodwill so be on the hunt for small, lightweight items to add. Check out the Children’s toy section for fun-shaped toys and games too.
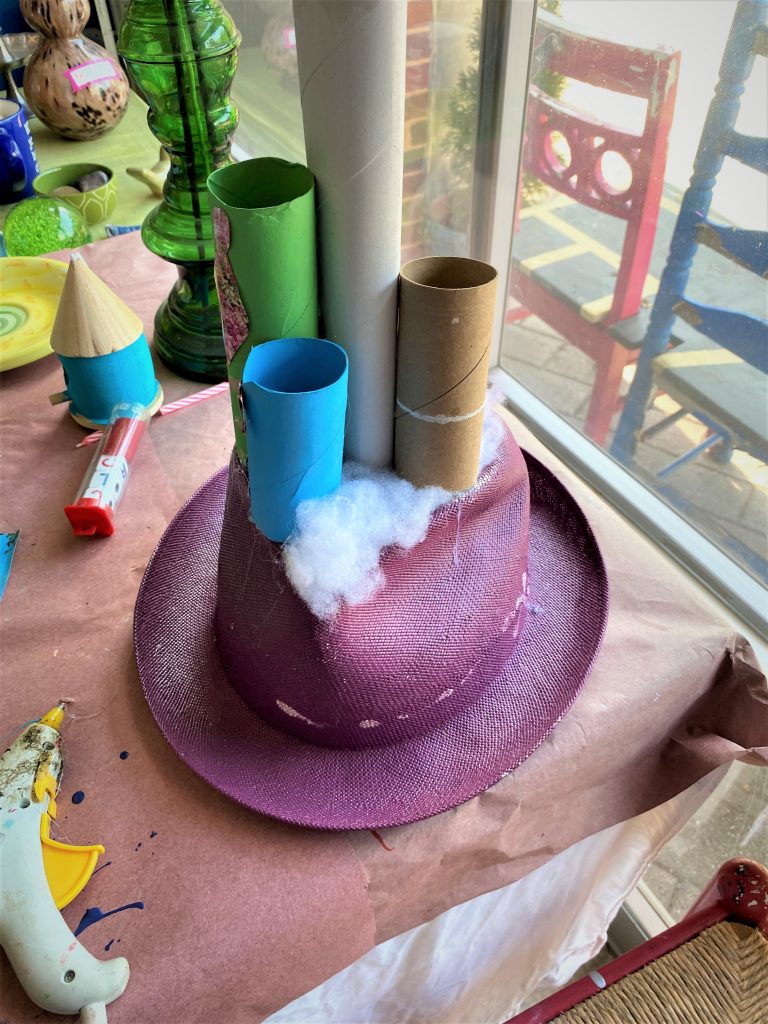
Step 2: Start with empty TP and paper towel tubes
Seems like we all have plenty of empty bathroom and paper towel tubes around these days.
- To give your hat some height, glue gun several to the top of your hat and at differing heights for visual interest.
- In addition to adding glue to the bottom of the tubes, apply some along the sides in order to secure them together to provide extra support.
Step 3: Express yourself with embellishments
Okay, truth to be told, I had so much fun with this step that laughed at myself.
In my junk drawers and craft boxes, I discovered small, light-weight and interesting things to add to my hat.
What do you have that you could use?
Add your items using your glue gun; if small children are helping you or making their own hats, please be sure to glue things for them or supervise them closely.
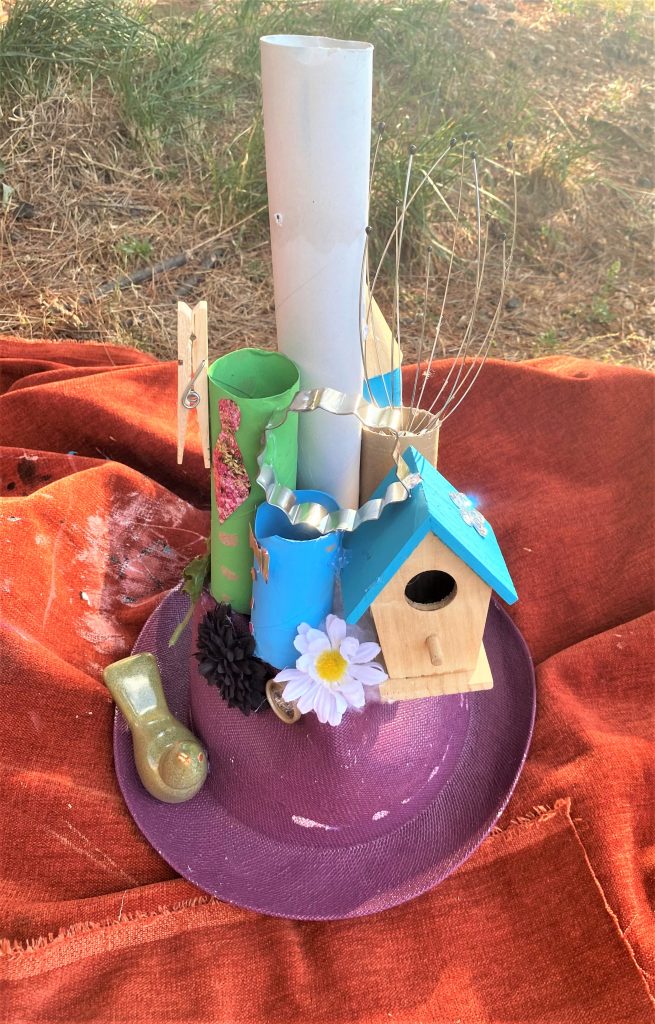
You may want to leave one or two of your tubes opened to hold fake flowers or in my case, feathers.
Step 4: Spray on bright colors to connect
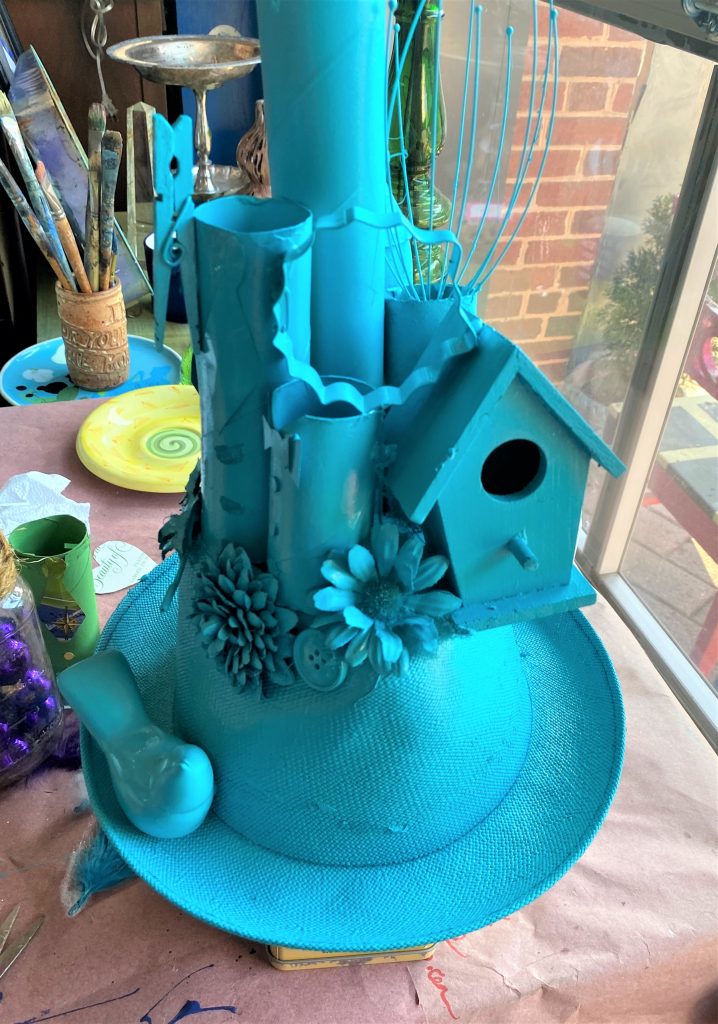
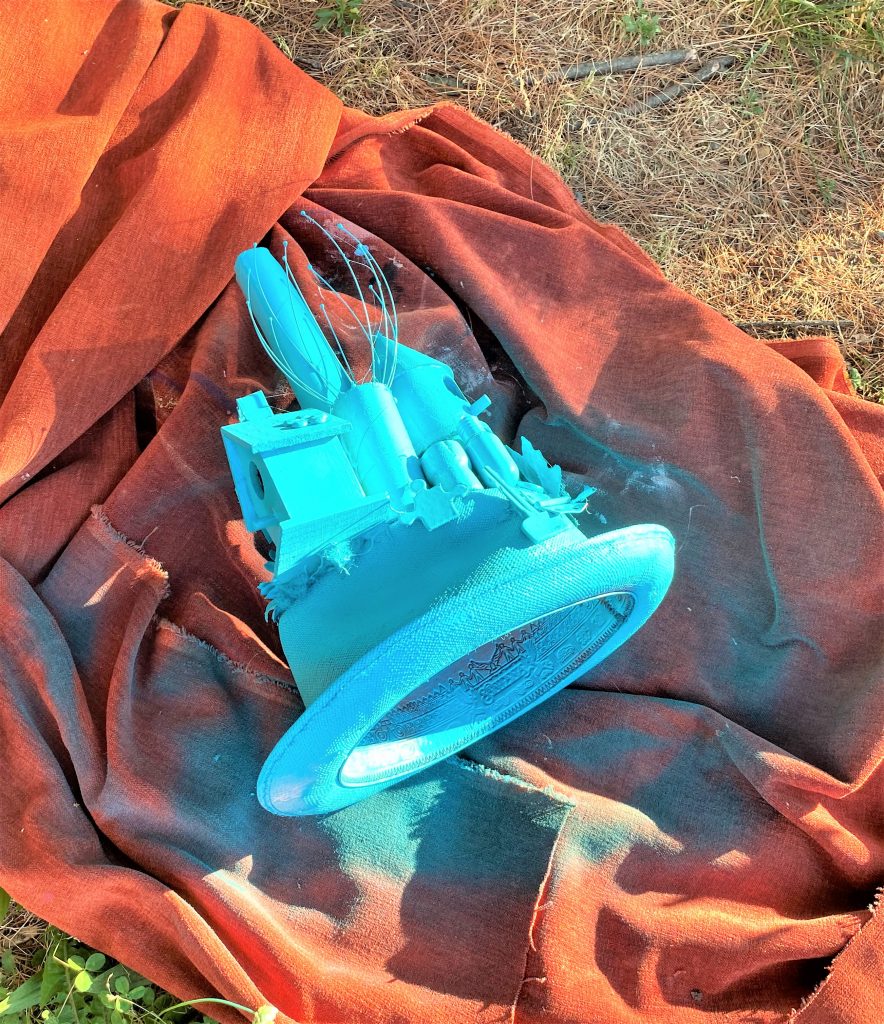
- Move your hat with the first round of embellishments/accessories outside and place on a drop cloth.
- With a fun and festive hue of spray paint, give your entire hat a light covering.
- Let it dry then place your hat on one side and spray on more paint.
- Again, let it dry then add paint to the other side.
- Be sure to get the underside of your hat brim, too.
- Let dry completely before the next step. Thankfully, most spray paints dry pretty quickly, so you won’t have to wait long for the creative fun to continue!
Step 5: Add more accessories
Now that your hat and all that you have glued on it are all the same color, you can now easily see how whimsical it looks with the various shapes and textures.
For additional visual interest, add items to that hat that will not be painted – they will add something even more special. My dear friend Eleanor loves bling, so I added small plastic jewels at various heights and sides to catch and reflect light.
I found an old earring and two small disco ball ornaments to make it dazzle.
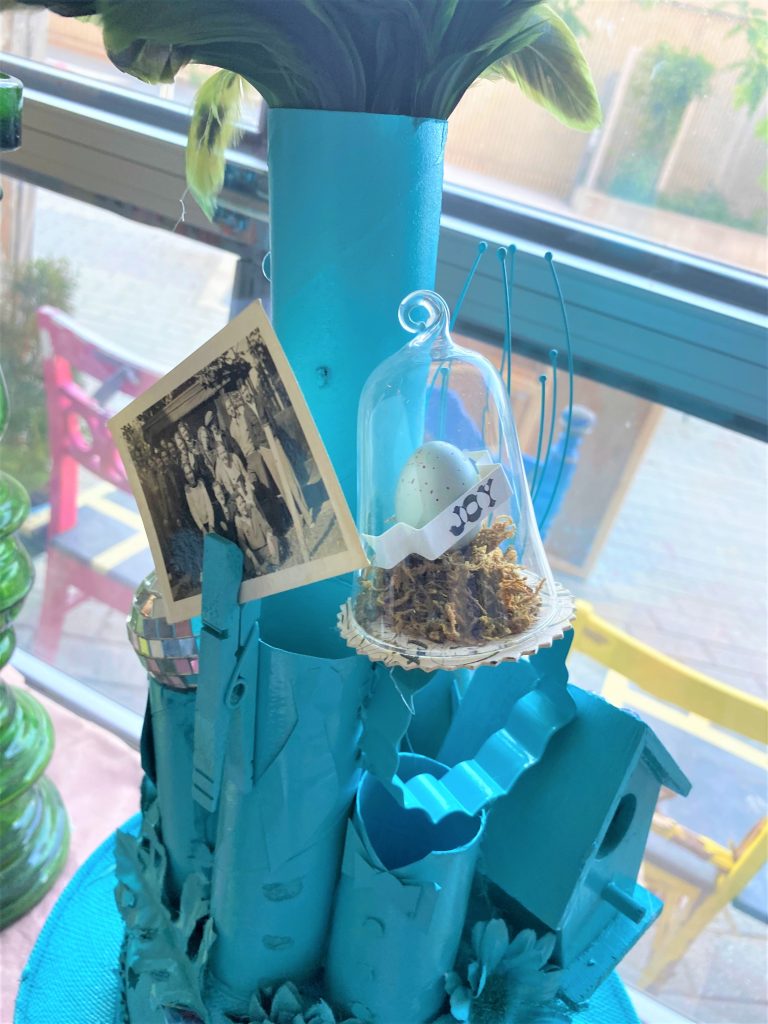
A clear glass ornament with a small plastic bird’s egg inside took center stage and connected with the birdhouses.
A strip of sequin-covered ribbon was added around the hat (I found this beforehand, so its bright turquoise color inspired my paint choice).
Step 6: Wear with flair and display with pride
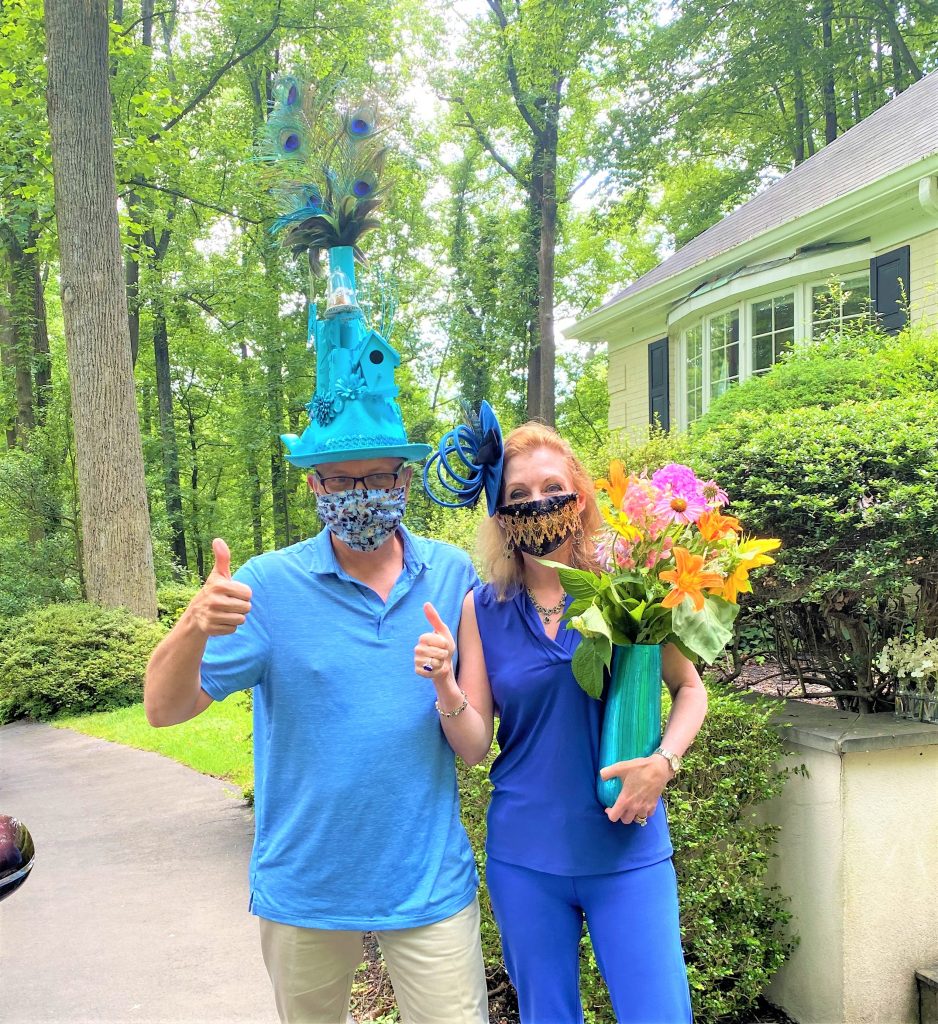
It was so much fun to surprise my buddy on her birthday with my colorful creation.
This relatively easy and super inexpensive project would be fun to make for any Zoom party and is great for kids of any age.
Wouldn’t it be heartwarming to see a bunch of little kids wearing crazy, creative hats? Or what about a group of grandmothers having tea while donning these?
Such a hat would make a one of kind, beautiful centerpiece, too, for your special occasion.
Where will you wear yours or how will you display it? Alice and her friends would certainly approve—just as Eleanor and her guests did!

Tim Kime
Artist, Motivational Speaker, Life Coach

