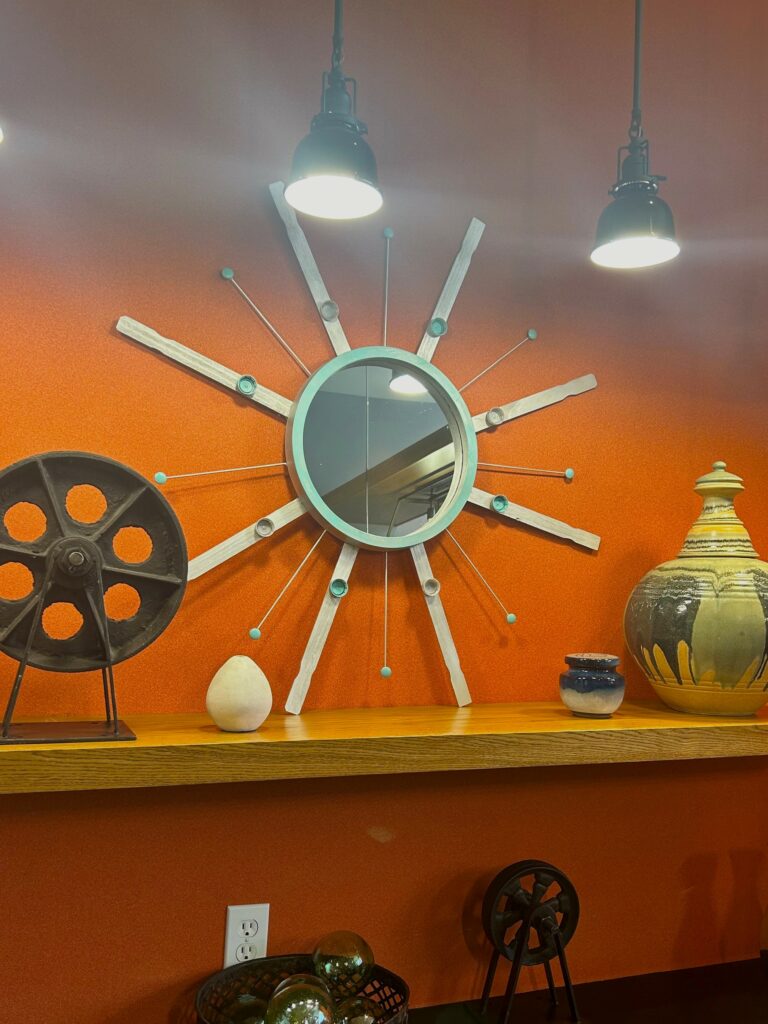
Create an Out-of-this-World Upcycle: Transform a Mirror with Paint, Repurposed Pieces
A Goodwill-found mirror gets a totally cosmic transformation using Mid-Century Modern design as inspiration. In the 1950’s, interior designers took cues from the news and current events. As America was heading to the moon and outer space, many household items reflected an out-of-this-world feel look and feel.
This easy DIY project pays homage to the design elements found in round wall clocks and mirrors of that bygone era. It also uses repurposed items to honor today’s focus of being good stewards of our planet.

Here’s How:
1. Let your upcycling ideas take flight at Goodwill
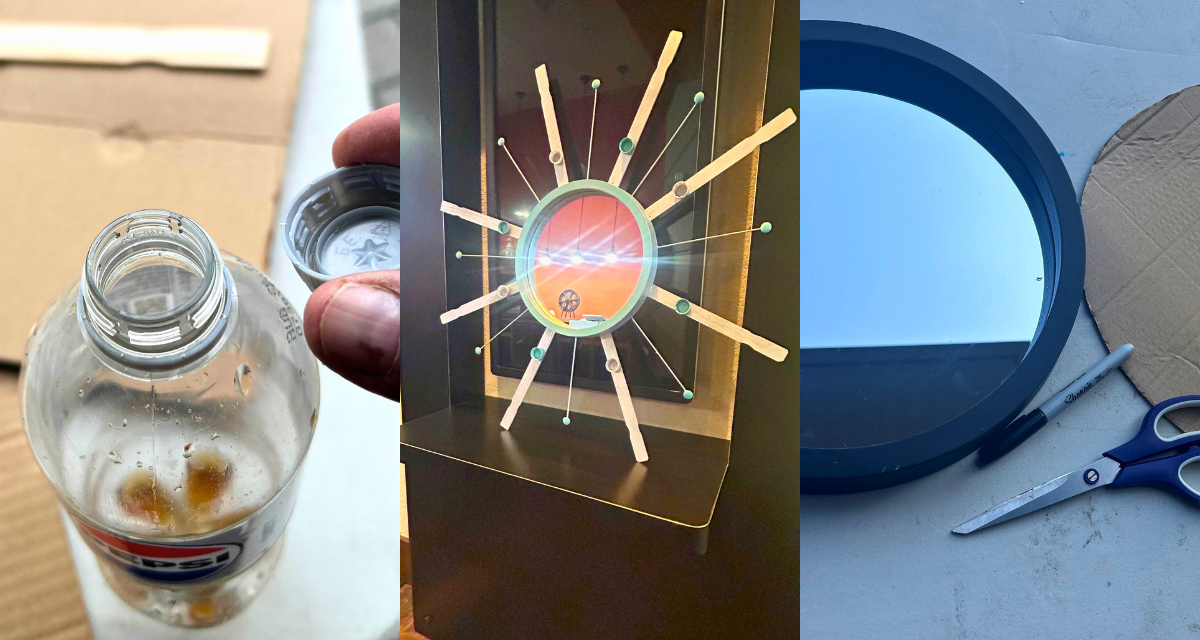
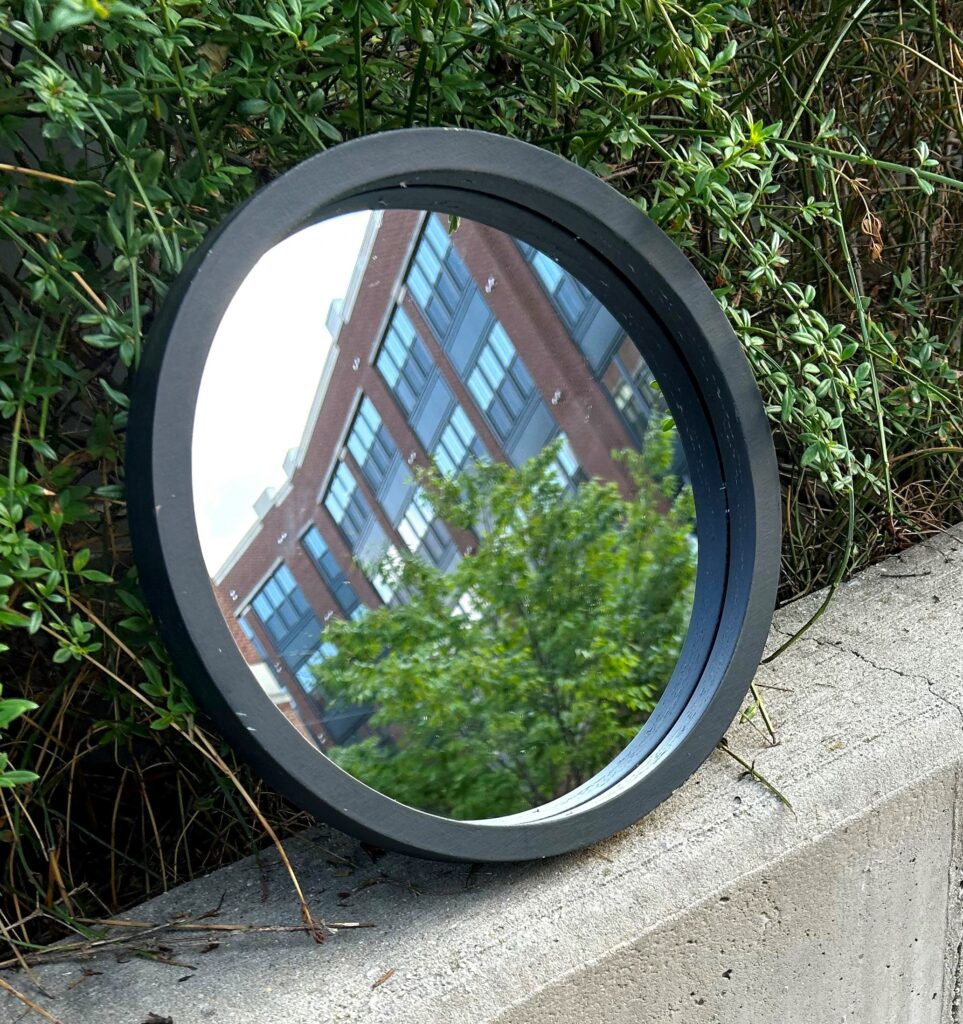
It is always an exciting adventure to shop at Goodwill as you explore all the interesting and unusual items they have in every aisle and on every rack. While I was looking for a round clock to transform, I didn’t come across one that was quite right AND, instead, found a picture-perfect mirror that was less than $10!
As you look for your good and items to upcycle using this blog/project as inspiration, consider ones with clean, simple elements. Those will line-up with the Mid-Century Modern tone and design.

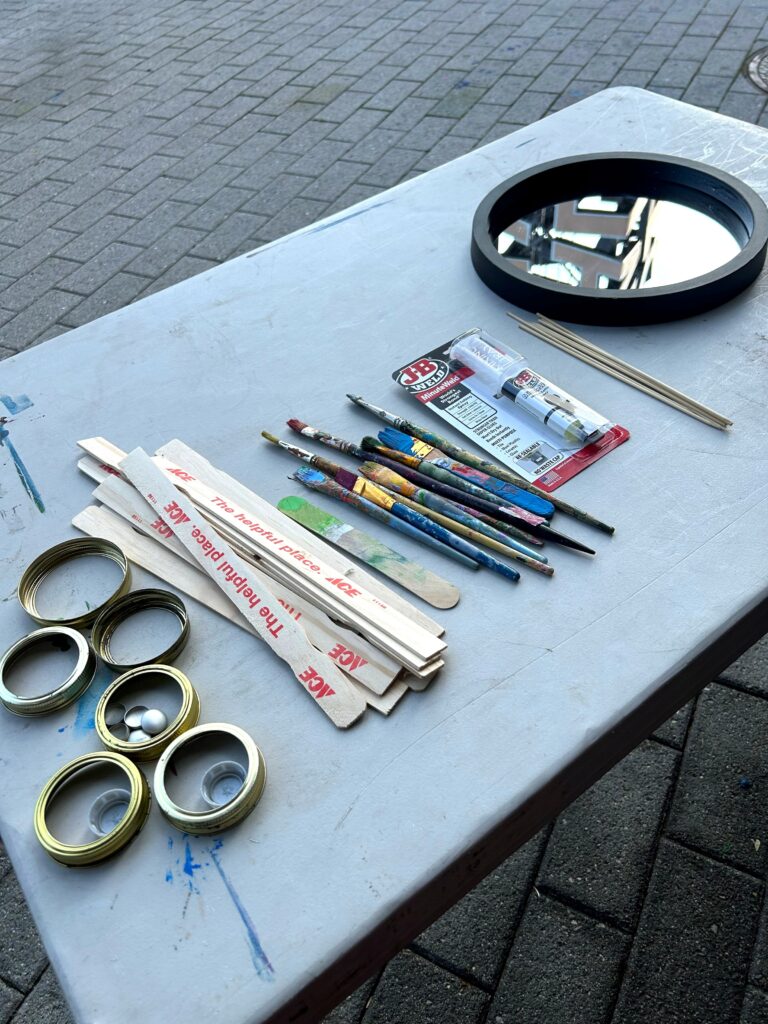
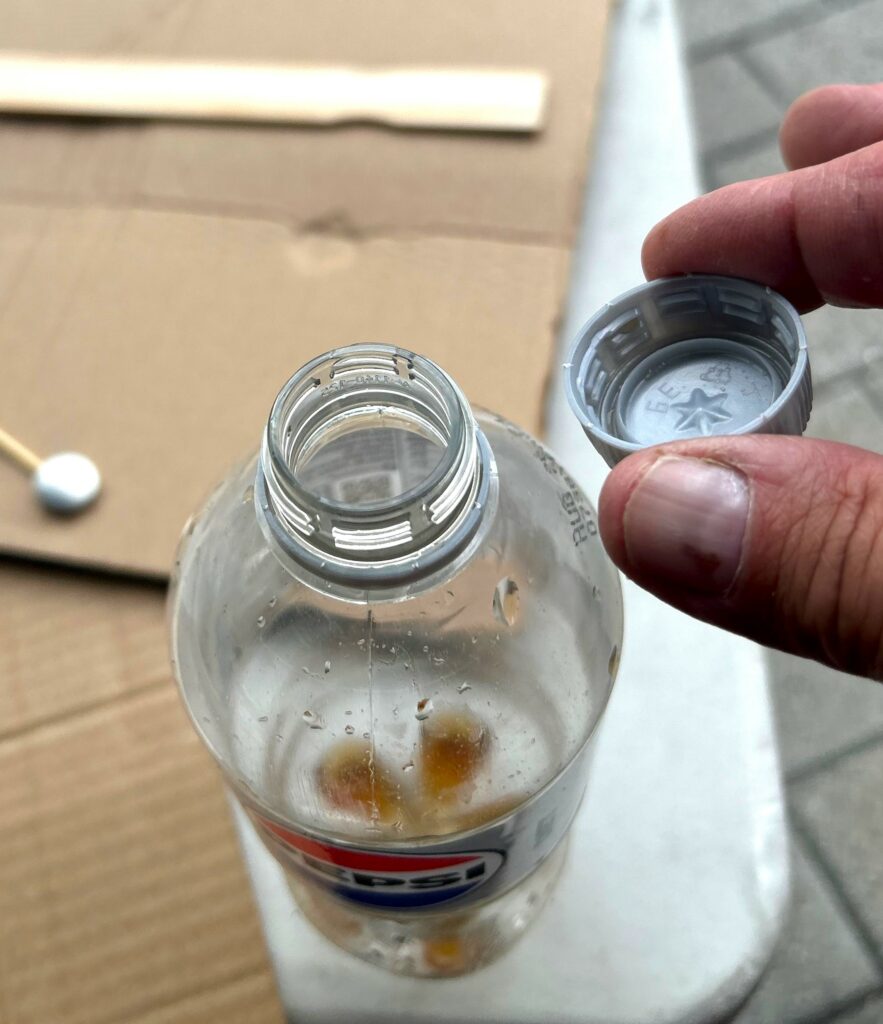
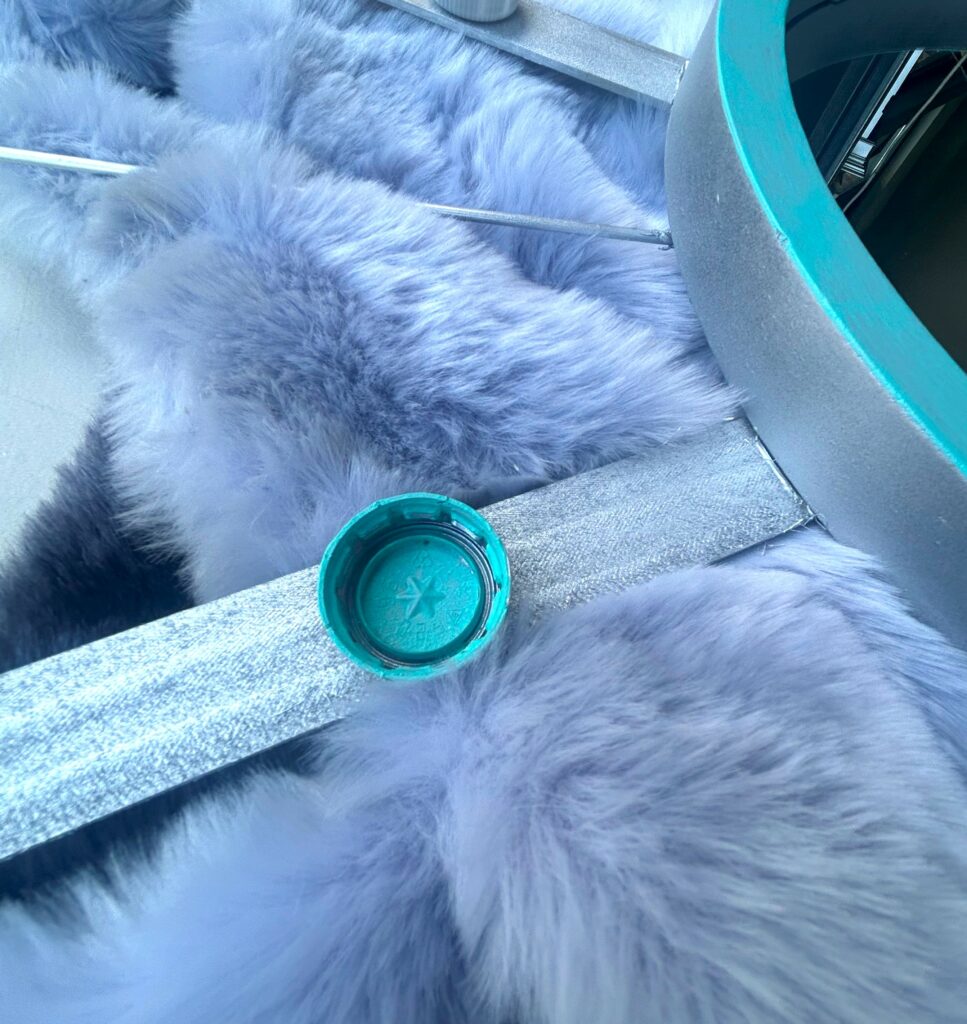
Also, while at Goodwill, check to see if they have other items to reuse for this project which includes wooden food skewers and metal button covers. Also enlisted for it AND for free were paint stirrers picked up at my favorite neighborhood hardware store, Annie’s Ace Hardware, as well as soda pop bottle lids. (They even had little stars in them, adding to the inner-galactic look!)
2. Build on a base
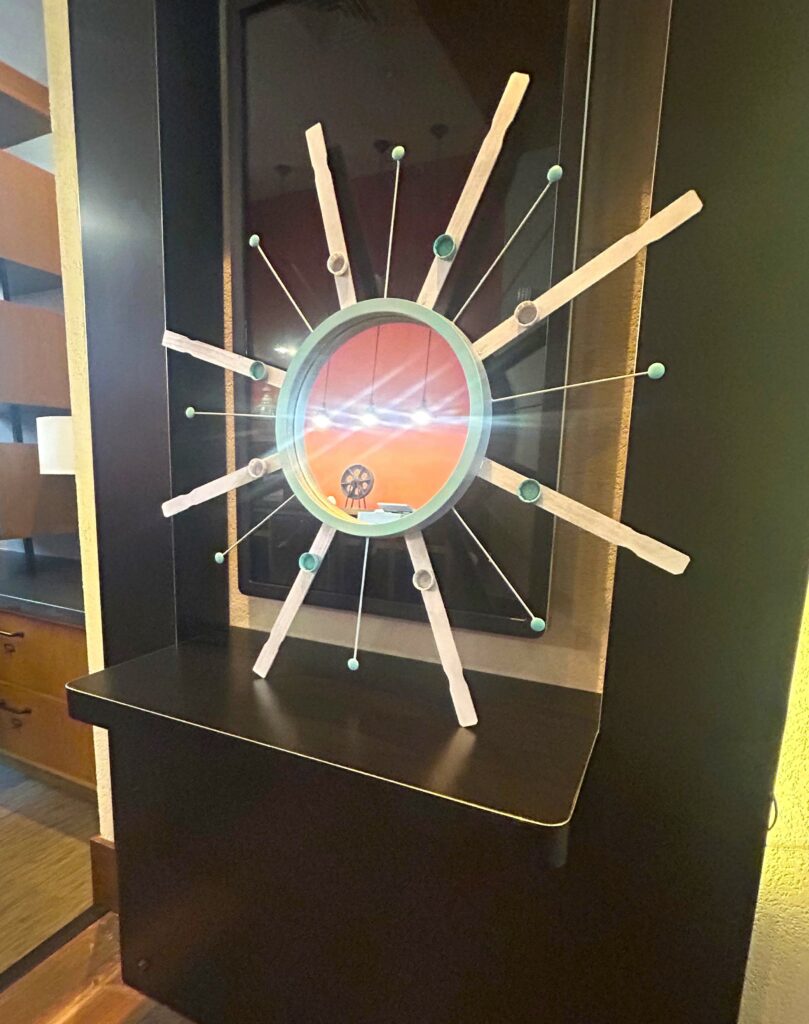
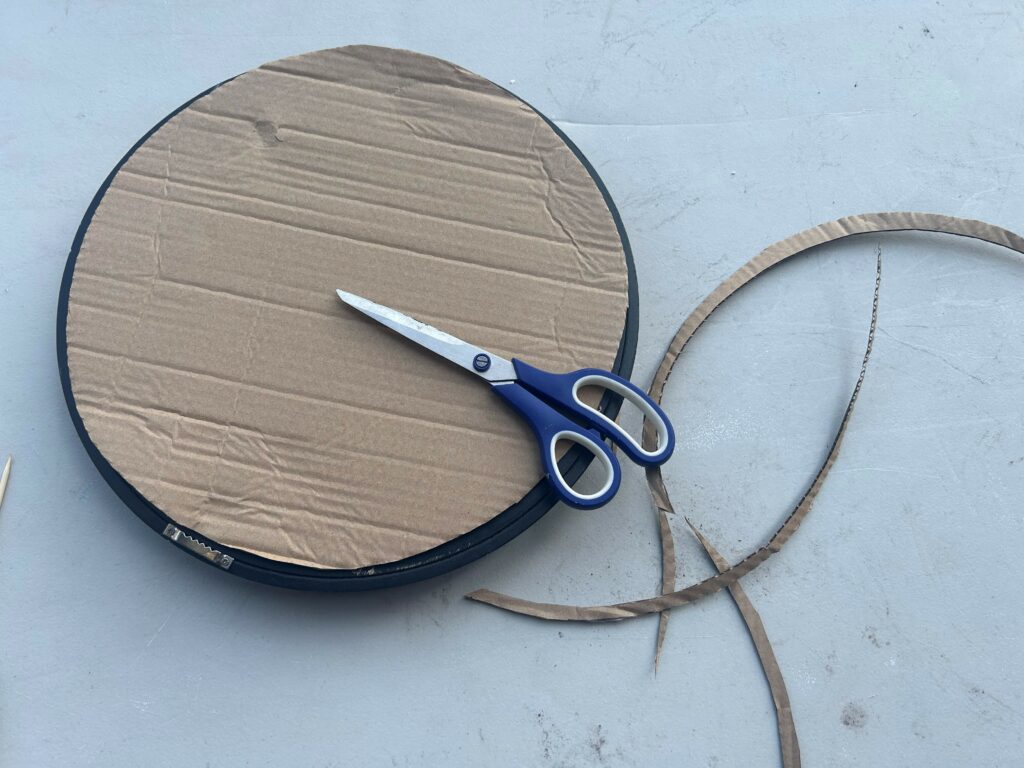
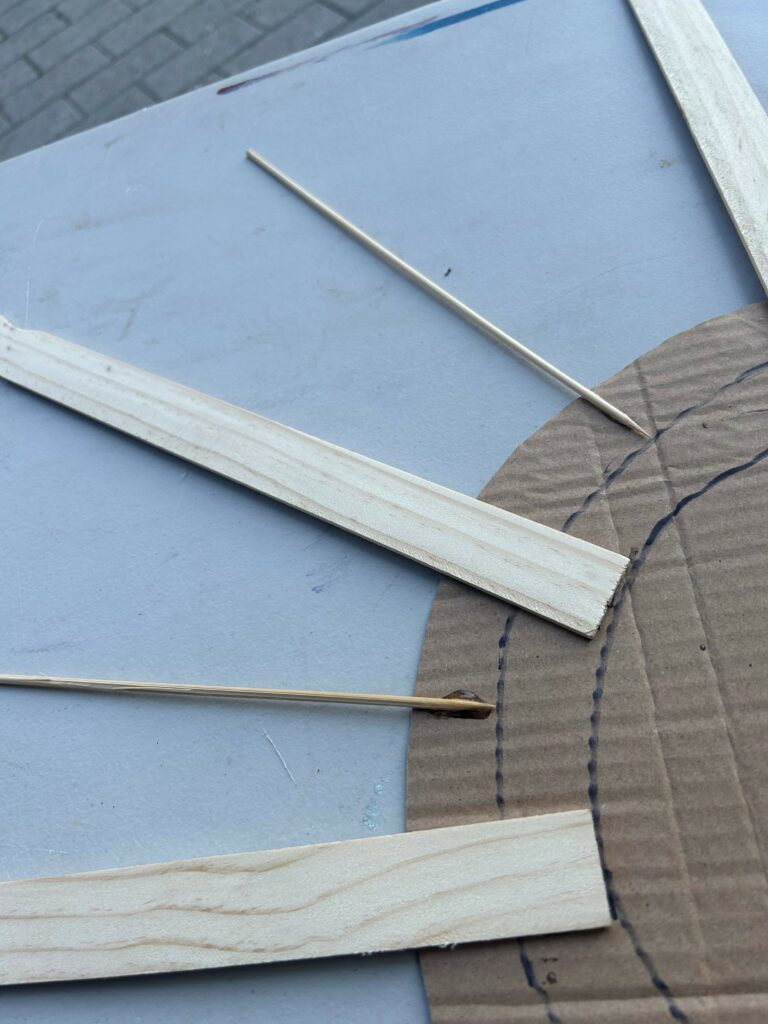
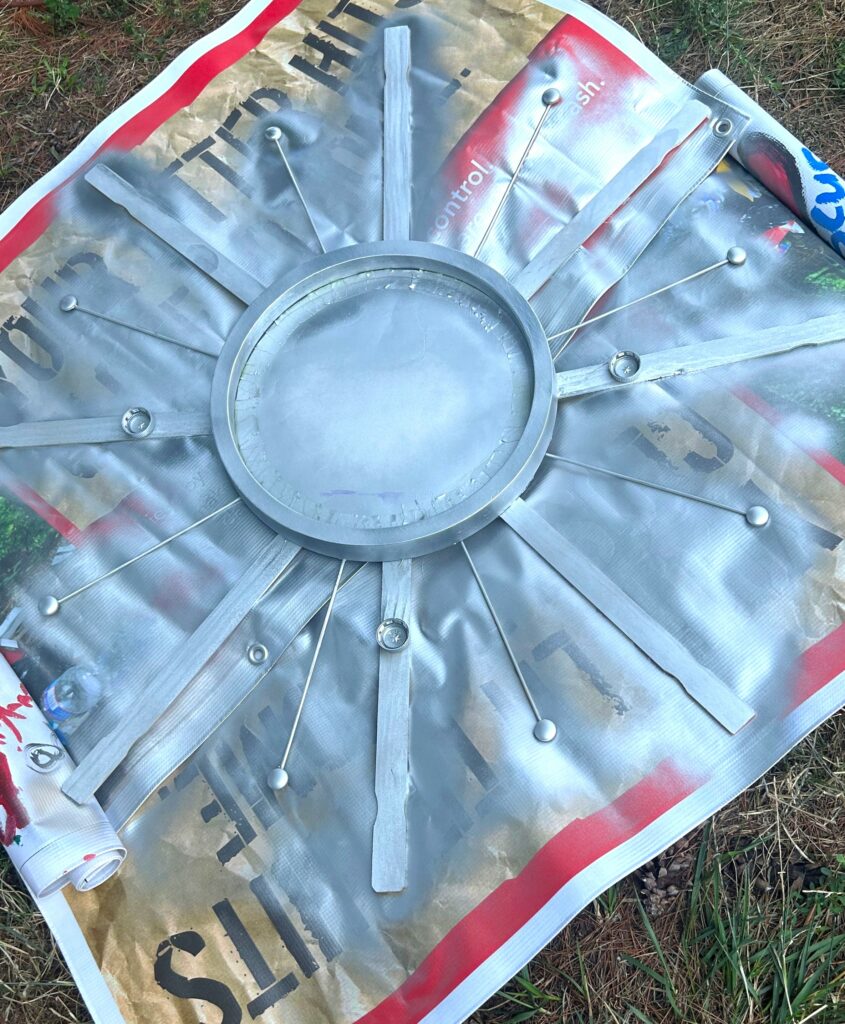
Since most of the pieces and parts for this project will go behind the mirror, you’ll want to create a base on which to build your cosmic creation. Use sturdy cardboard, trace around your mirror then cut and trim out the circle.

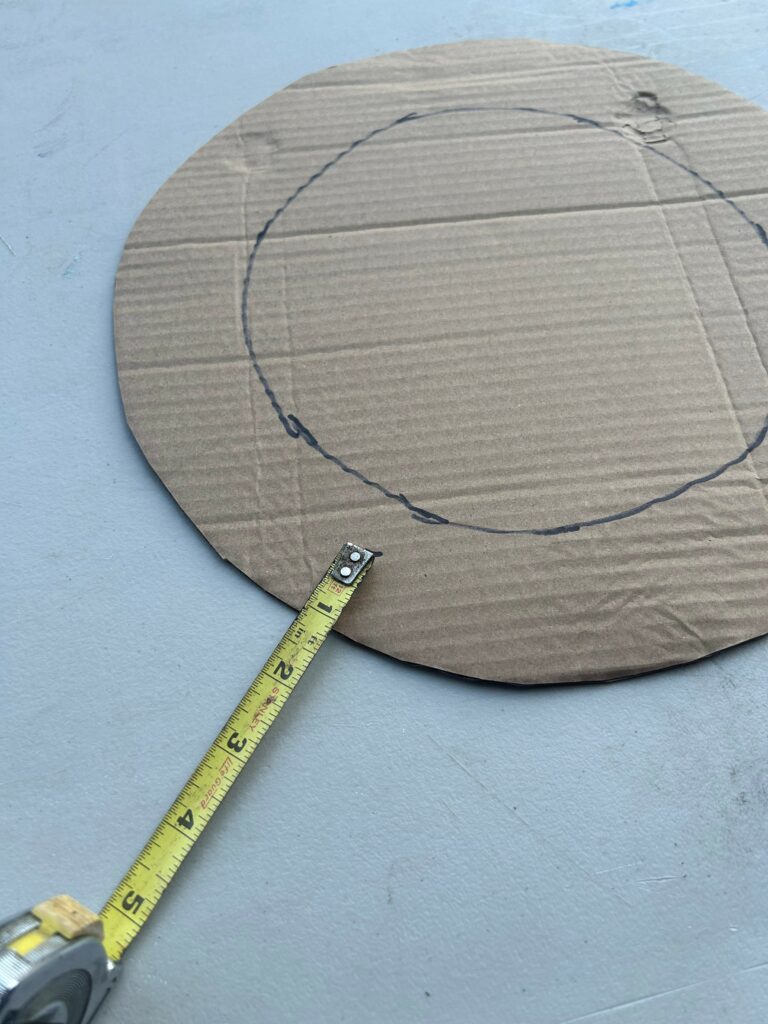
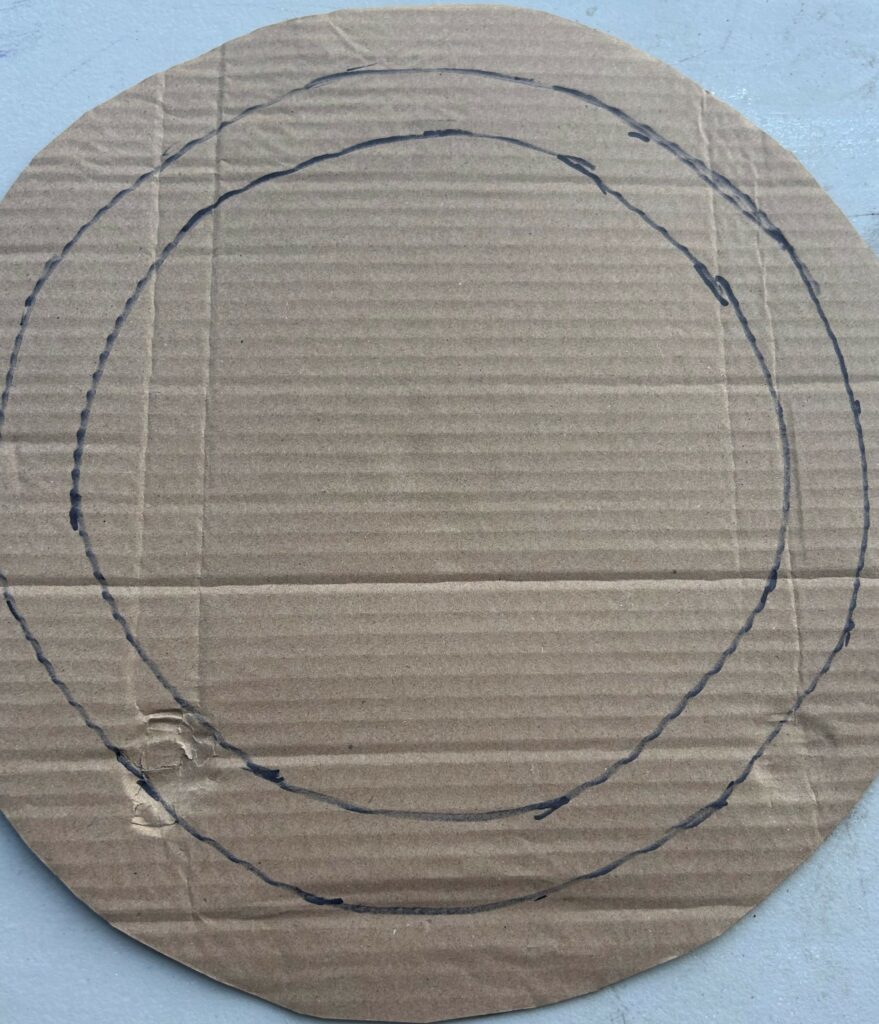
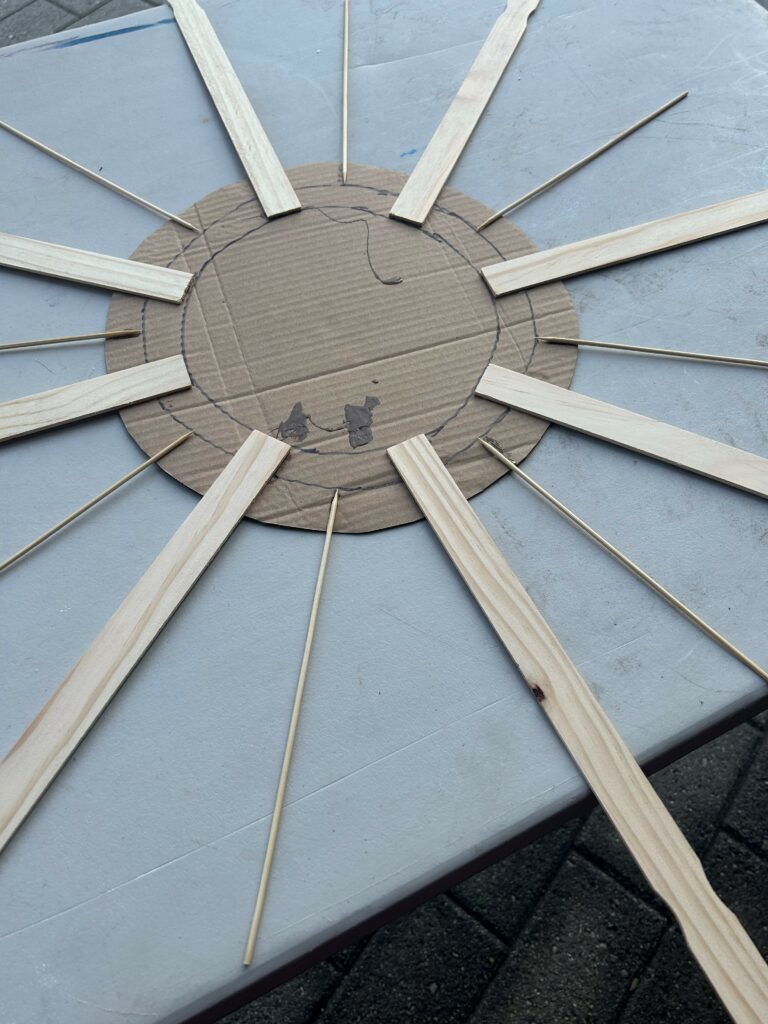
Layout and space out (Ha—a cosmic pun!) your paint stirrers and skewers on your cut out cardboard circle/base. Place your mirror on top to see how it looks and feels. Remove the mirror then use a tape measurer or ruler to determine where these parts go so the final look is balanced.
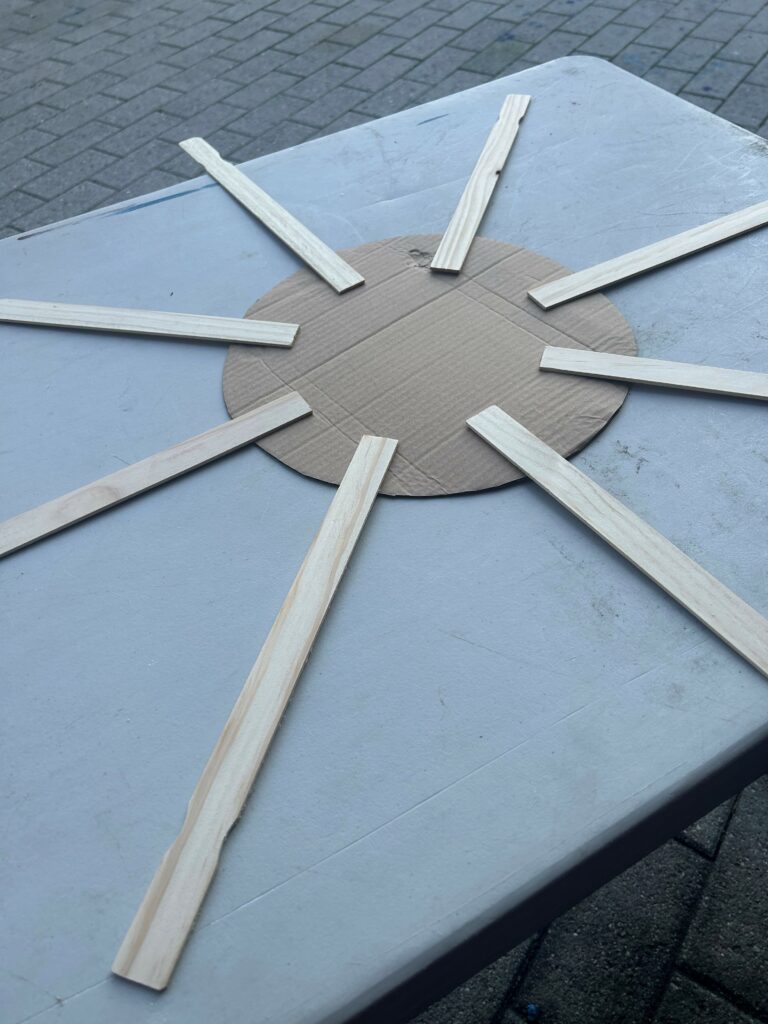
For my mirror, each paint stirrer looked best when positioned at two inches behind the mirror, so a circle was measured and drawn in place with a marker. The skewers were placed at one inch, so another circle was drawn. This step made it so easy to lay out the mirror with its elements exactly where I wanted them to be.
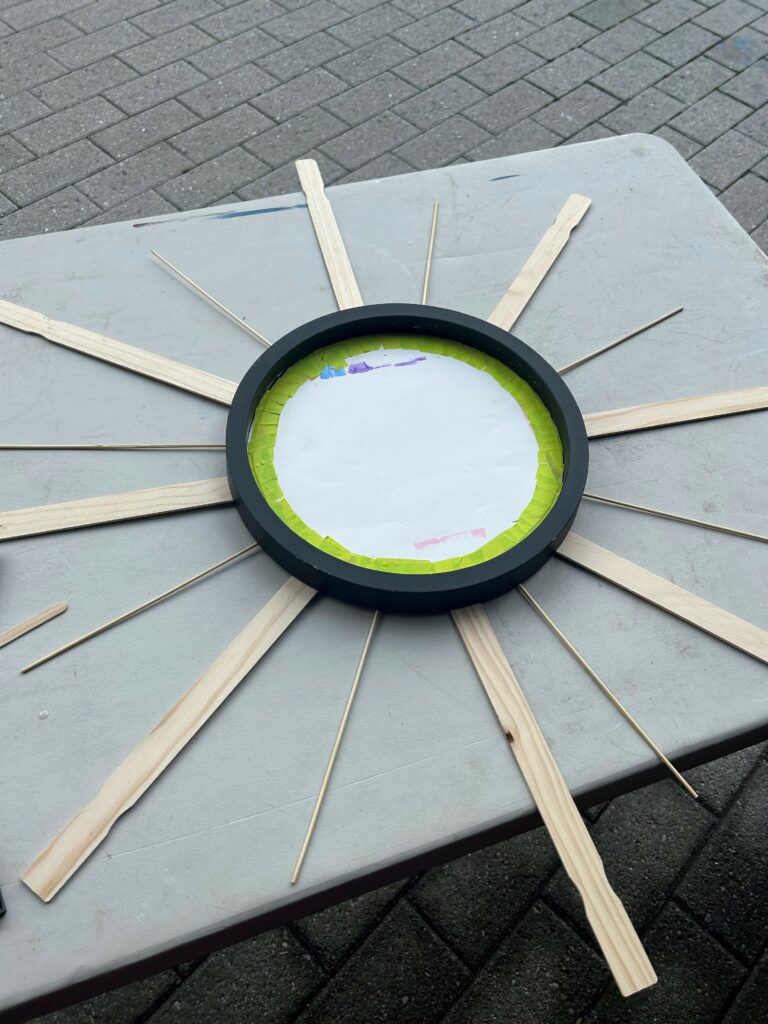
3. Protect your mirror’s glass
To keep the mirror glass paint-free, use painter’s tape and scrap paper to cover it. This simple step takes a little bit of time and is well worth it.
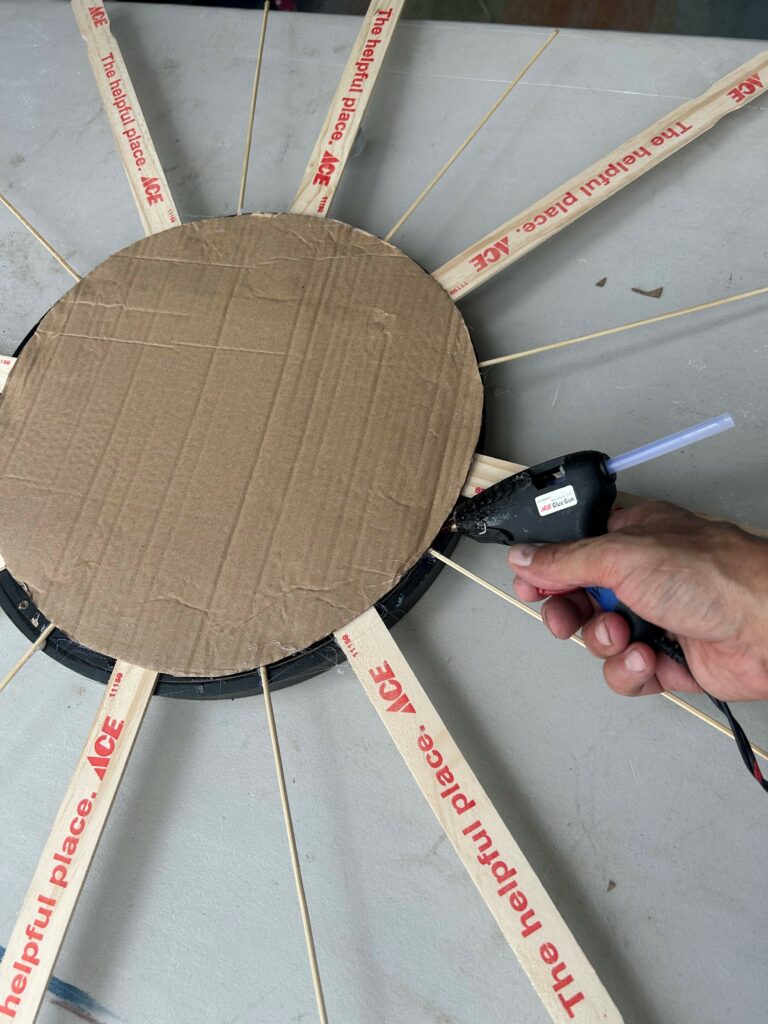
4. Epoxy & hot glue to the rescue
For a strong and secure final product, use quick drying epoxy glue to adhere the stirrers and skewers in place. Use a small craft brush to apply more epoxy glue on the back side of your mirror then place it on top and allow the glue to dry completely. Flip your mirror and its base over carefully and use your hot glue gun to ensure the base, the stirrers and skewers are in place tightly.
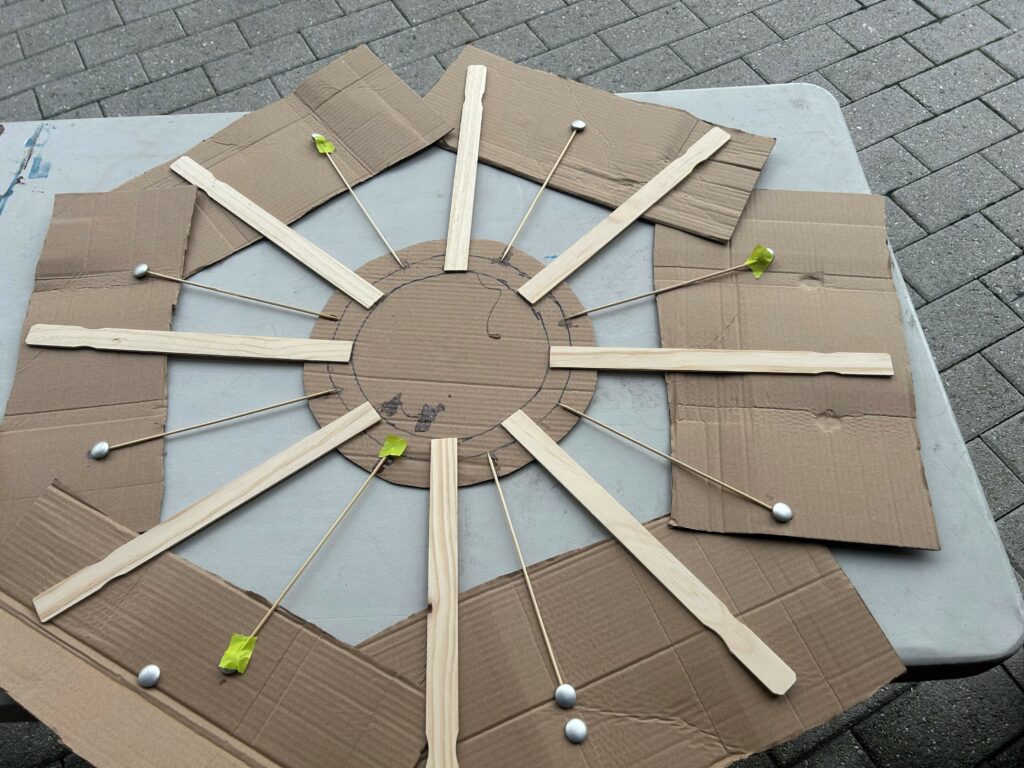
Once more, flip your mirror over so its right side is facing you then use your hot glue gun to add the metal button covers on the ends of the skewers. Secure your repurposed bottle tops on the stirrers about two inches from the mirror.
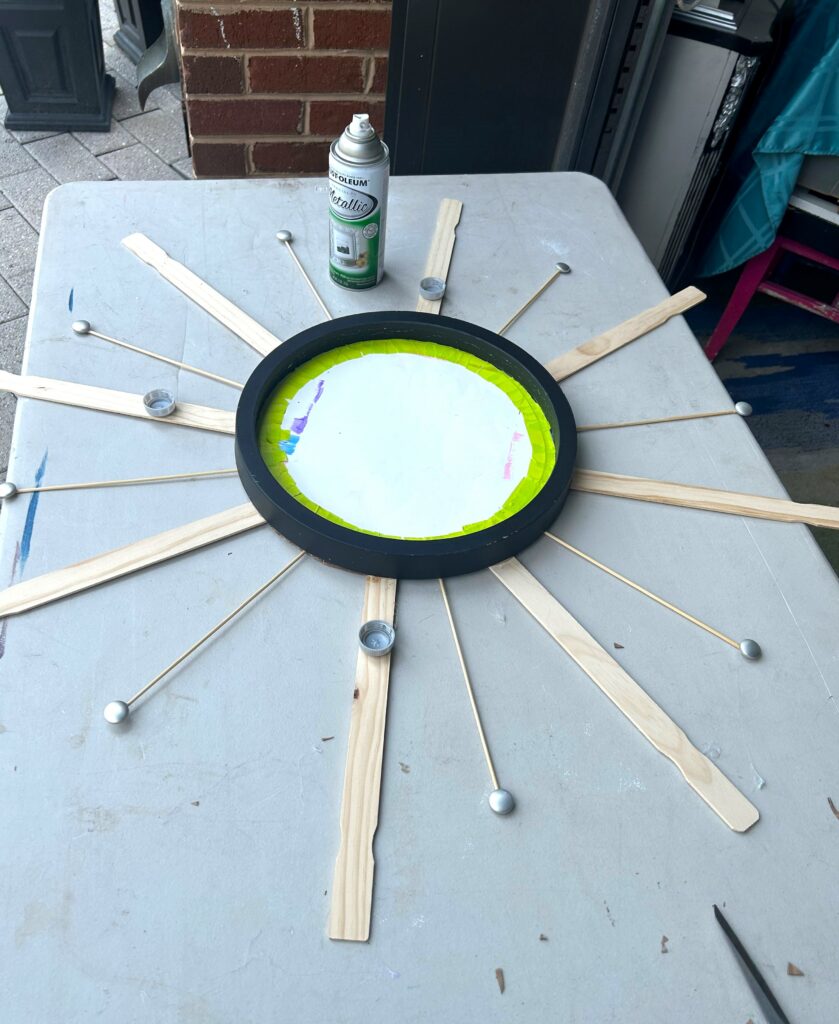
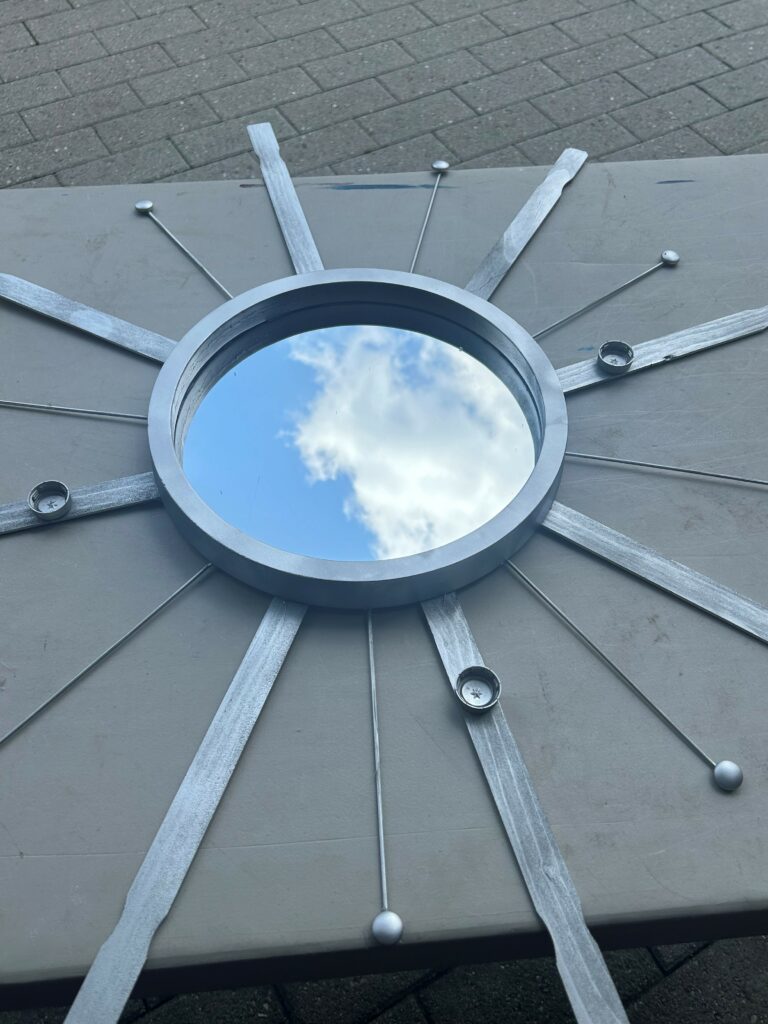
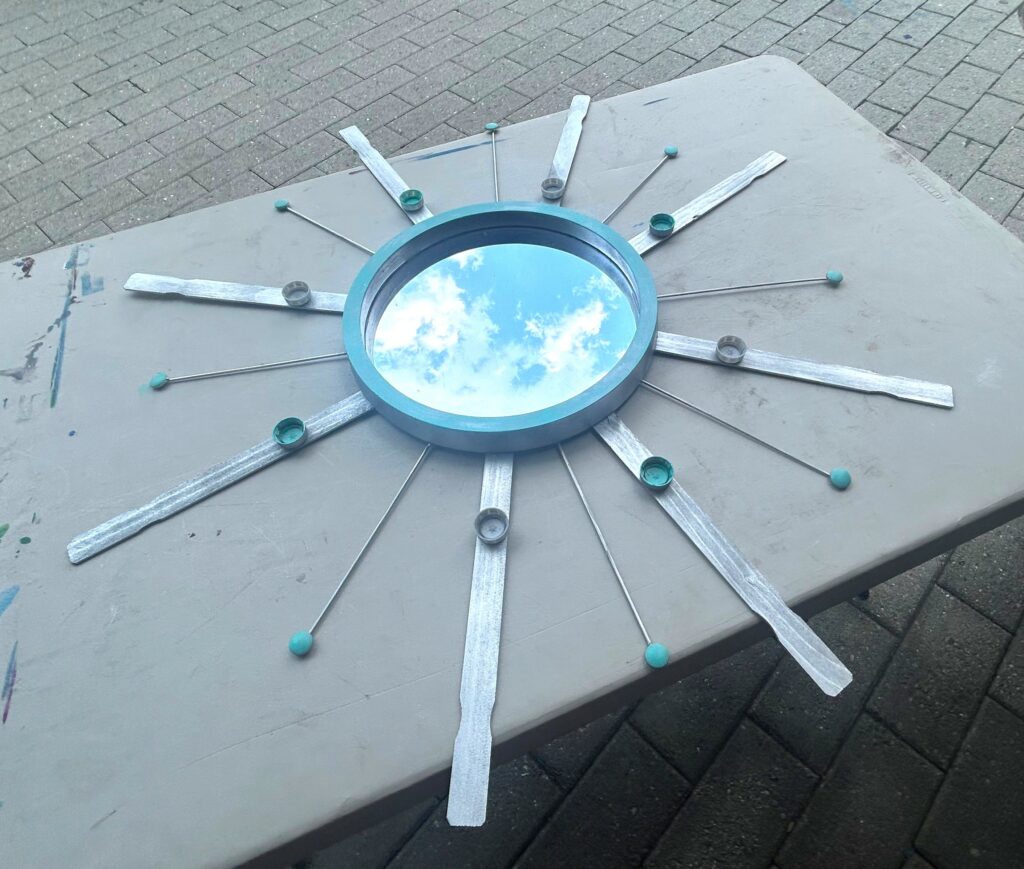
5. Spray on the silver
Wanting to keep with the space exploration tone, silver spray paint was added all over the mirror, stirrers, skewers and other accents after placing the piece on a drop cloth. Add light layers to your piece and move around it to get all sides and edges. Allow time to dry then carefully pick up your mirror and add more paint to any missed parts.
When dry, remove the painter’s tape and scrap paper from the glass.
Expert/Design Tip
Always use what you have on hand to keep your project’s costs as low as possible. While I was inspired by “sunburst” mirrors in gold tones I had seen online, I didn’t have gold paint in my stash. However, I did have a shimmery, silver metallic paint, so it got used instead. I love it!
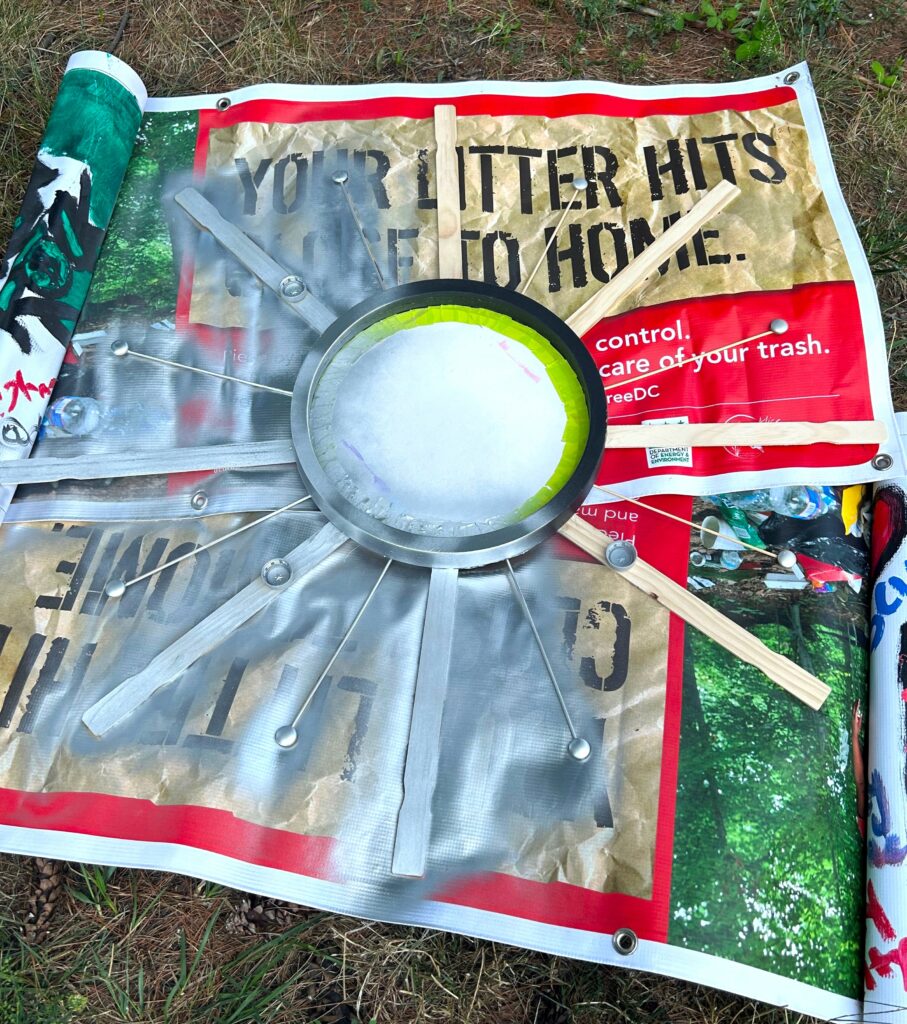
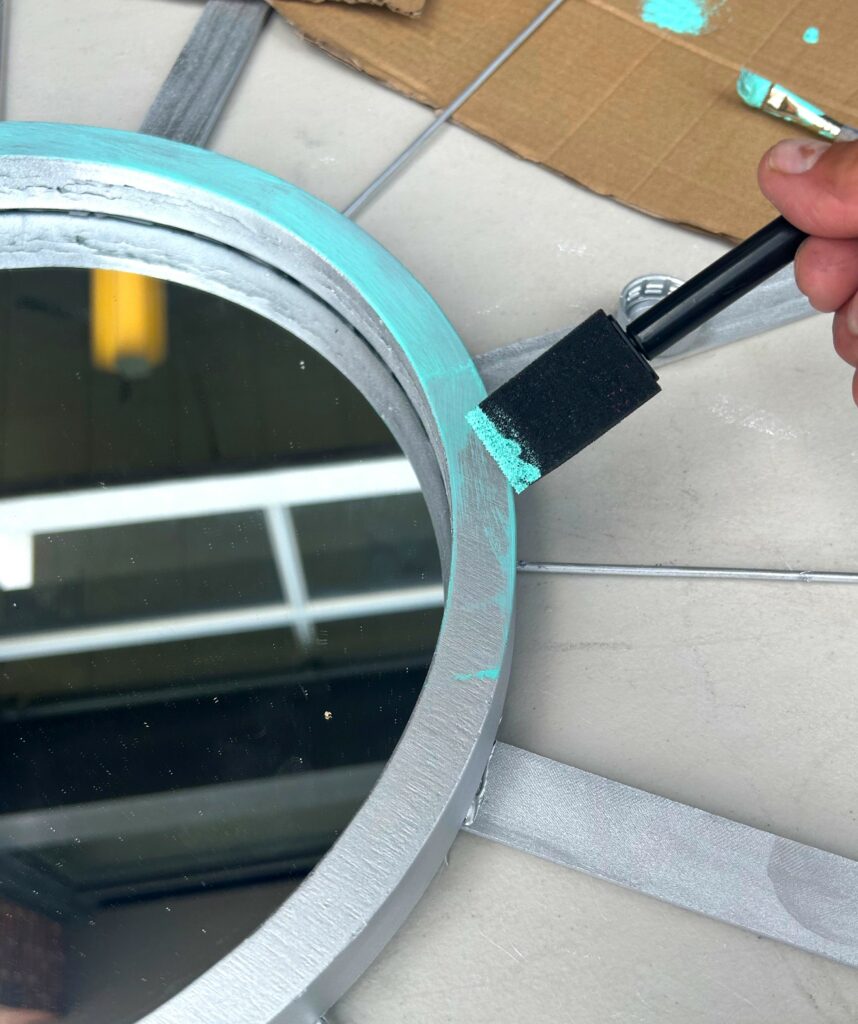
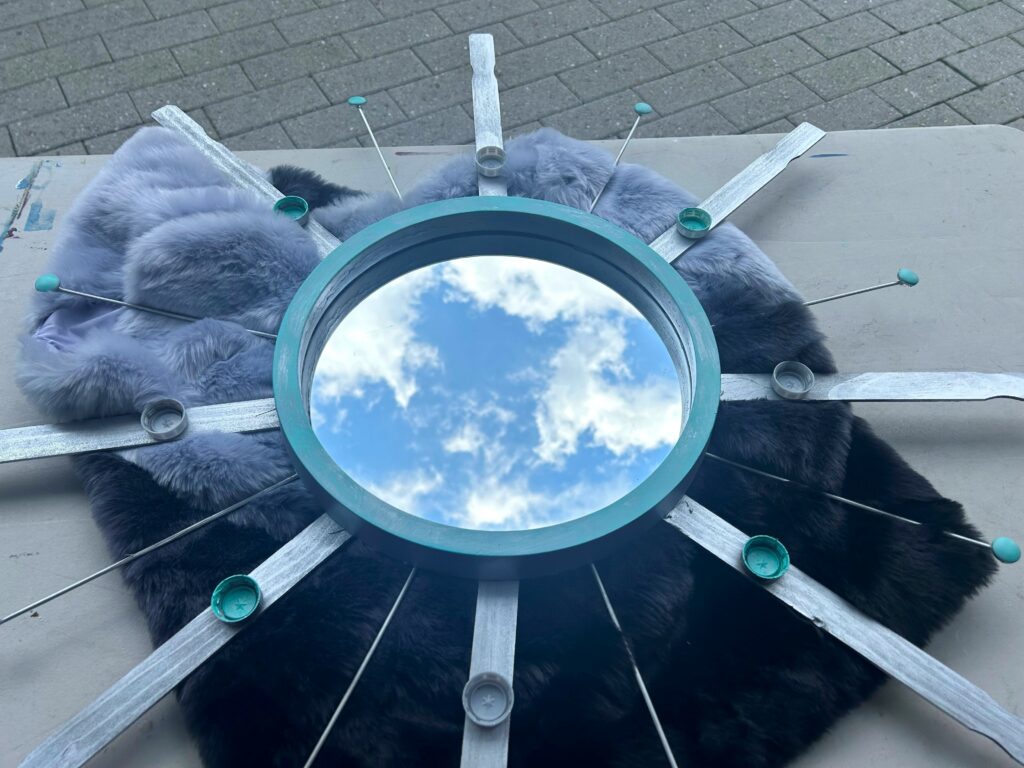
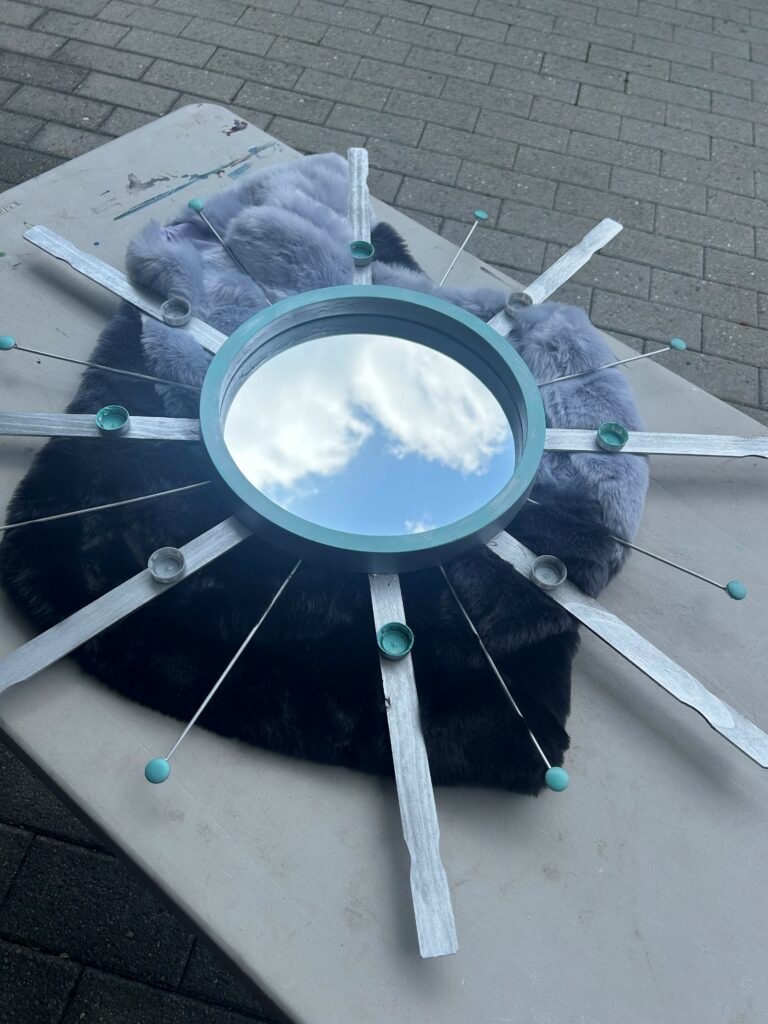
6. Bring out details with blue
Take your now silver-covered mirror to the next level by using teal-blue paint (another popular color in Mid-Century design) to bring out details. The flat, front edge of the mirror got some blue love as did the metal button covers and some of the bottle caps. The blue also complimented the space age feel I was going for.
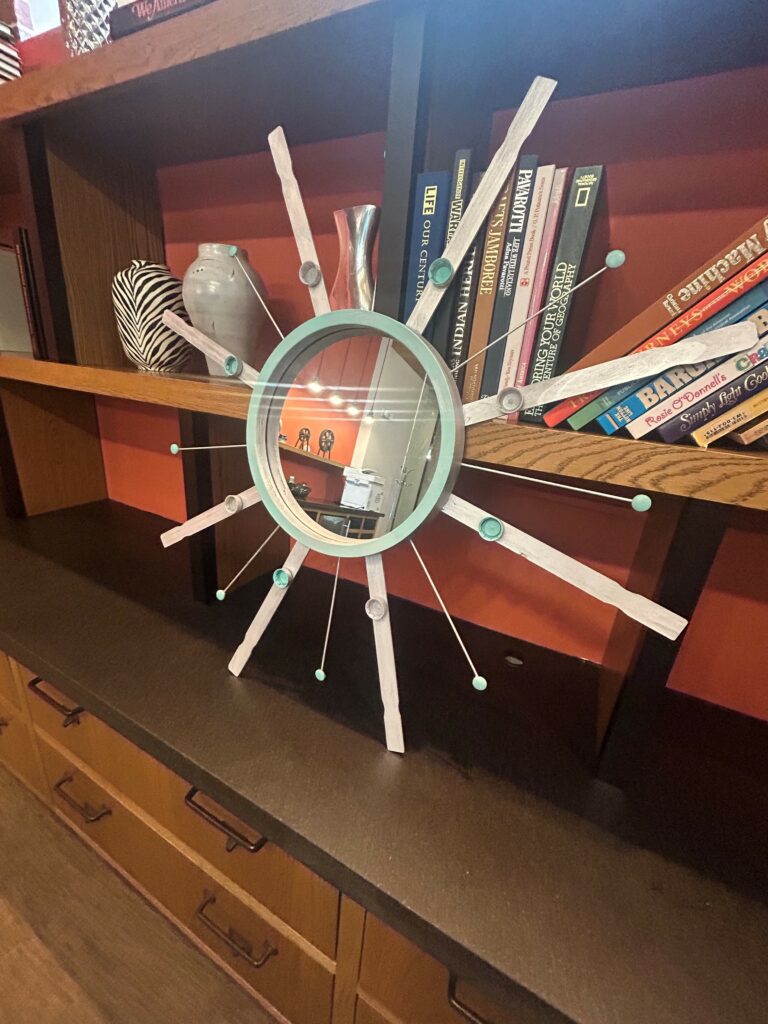
7. Place your Cosmic Mirror to make your space soar
This totally cool and funky mirror will look great in your home or office. It will be sure to attract the attention of all Earthlings who see it and maybe even visitors from other planets in your orbit!
Similar Reads:
- DIY: How to Easily Upcycle a Mirror with Rainbow Spray Paint
- DIY: How to Upcycle a Mirror to Reflect Your Pride
- How to Upcycle Thrifted Mirrors to Reflect the Spring
- DIY: Give a Mirror the Royal Treatment With a “Frozen” Transformation

Tim Kime
Artist, Motivational Speaker, Life Coach
