Joyful & Jurassic: Upcycle a Lamp with Dinosaurs & De-Light
Who loves dinosaurs? Kids of all ages — and every grown-up who still secretly roars now and then. Pair a thrifted lamp with Goodwill-found dinos to create a light that will never go extinct.
This family-friendly DIY project is perfect for folks to do together and results in a totally dino-mite, one-of-a-kind piece. It makes a terrific holiday or birthday gift for the prehistoric superfan in your life.


Here’s how:
1. Find Your Good & Hunt for Dinosaurs at Goodwill
Put on your explorer gear — channel your inner paleontologist — and head to your nearby Goodwill nonprofit retail store. On a recent expedition to my favorite store on New York Avenue in NE DC, I spotted a bag of plastic dinosaurs for $1.99 and knew they could turn anything into a Jurassic showstopper.
If you discover a bag or two on your own Goodwill adventure, snag them before the runaway. They’re perfect for this project and plenty of others.


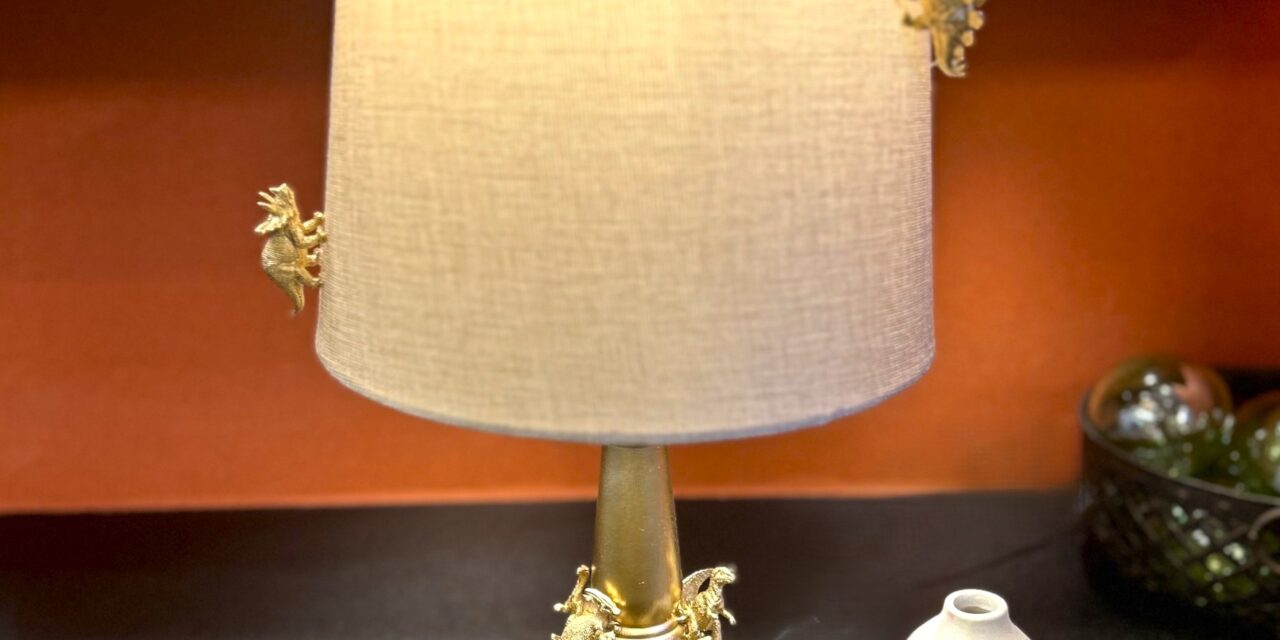
While you’re at it, explore the lighting aisle. Goodwill has an ever-changing inventory of lamps and shades. The lamp featured here had a simple wooden base and a handsome shade — plus several levels that made the perfect playground for tiny T. rexes, stegos, and their dino-pals.


2. Hot-Glue Your Dino Guys & Gals
A hot glue gun is your best friend for securing your prehistoric posse. Attach each dinosaur so they look like they’re standing, scaling, stomping, or sashaying their way up the lamp. Mix and mingle different types so the whole piece feels balanced and lively.


I even stacked a couple, so one dino looks like it’s giving another a boost — talk about teamwork, that’s Triassic.
If a younger one is helping with this project, take the lead on the hot glue so no little fingers get burned.
Design Tip:
Set aside three or five dinosaurs to add later to the lampshade. Choose different species to keep it visually interesting and delightfully diverse.
3. Protect Parts Before Painting
Before you paint your Cretaceous creation, protect the pieces and parts you don’t want to coat. Use painter’s tape to cover:
- Socket
- Switch
- Cord (wrap, bag, and tape it securely)
- Any spots you want crisp, clean edges
This step keeps your project looking professional instead of “oops-I-accidentally-painted-the-plug-again.”

4. Spray on the Sparkle
Time to give your dinosaurs their moment to shine — literally. Place your lamp base and the extra dinos outdoors on a drop cloth, tarp, or cardboard box. Lightly spray a coat of paint on everything. Let it dry, then flip the pieces to get every toe, tail, ridge, and roar.
Repeat until you achieve full, solid coverage. Remember, light layers are always best to avoid drips, runs, and smears.


Design Idea:
Metallics like gold and silver are always winners. They make the lamp look like a prehistoric trophy and help the details really pop. You can also pick a lighter color that echoes the room where the lamp will live. Think green, blue, or yellow. Avoid black or very dark tones — you’ll lose all that fun shape and texture.
5. Jurassic Up the Shade
Once everything is dry, return the shade to the lamp. Use your hot glue gun to attach the painted dinosaurs along the rim and up the sides. This visually connects the shade to the base, making the whole piece feel unified—and unexpectedly fabulous.

I added two dinos facing each other on the rim, and they look like they’re having a prehistoric heart-to-heart.
6. Position with Pride
Your new dinosaur lamp is ready to take center stage — or center cave. This totally whimsical, absolutely unforgettable piece is sure to be the talk of the Triassic.

Try placing it:
- On a desk with jars (from Goodwill, of course!) to hold pens, pencils, and creative supplies
- Beside your bed with a funky thrifted nightstand and a good dino book (also found at Goodwill)
- On a tiny table near the front door for a welcoming glow that says, “ROAR you happy to be here?”
No matter where it lives, this DIY lamp will bring joy, light, and a touch of prehistoric playfulness to your space.
Similar Reads:
- DIY: How to Upcycle a Mirror to Reflect Your Pride
- DIY: How to Use Plants & Paint to Upcycle a Mirror

Tim Kime
Artist, Motivational Speaker, Life Coach
