Flips Only, No Flops with this DIY Summer Wreath!
You won’t change your mind—no flip flops that is—when you see how easy and cool this wreath is to create. Take pairs of these popular summer footwear and transform them into the perfect summer wreath to greet family, neighbors and guests. This is also a memorable gift for those who wear flip flops often like swimmers, beach goers and casual dressers.
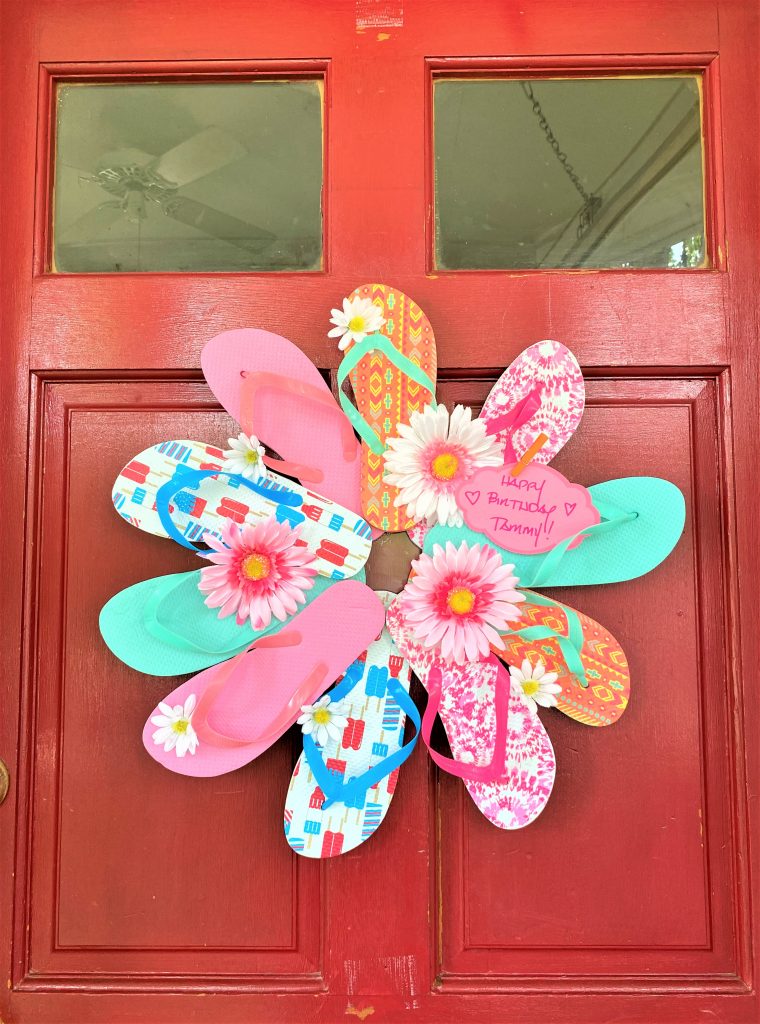
This fun DIY project was inspired by my swim coach sister, Tammy (whose work attire includes flip flops) and will be given to her in honor of her July birthday! Happy Birthday “Coach” Tammy!


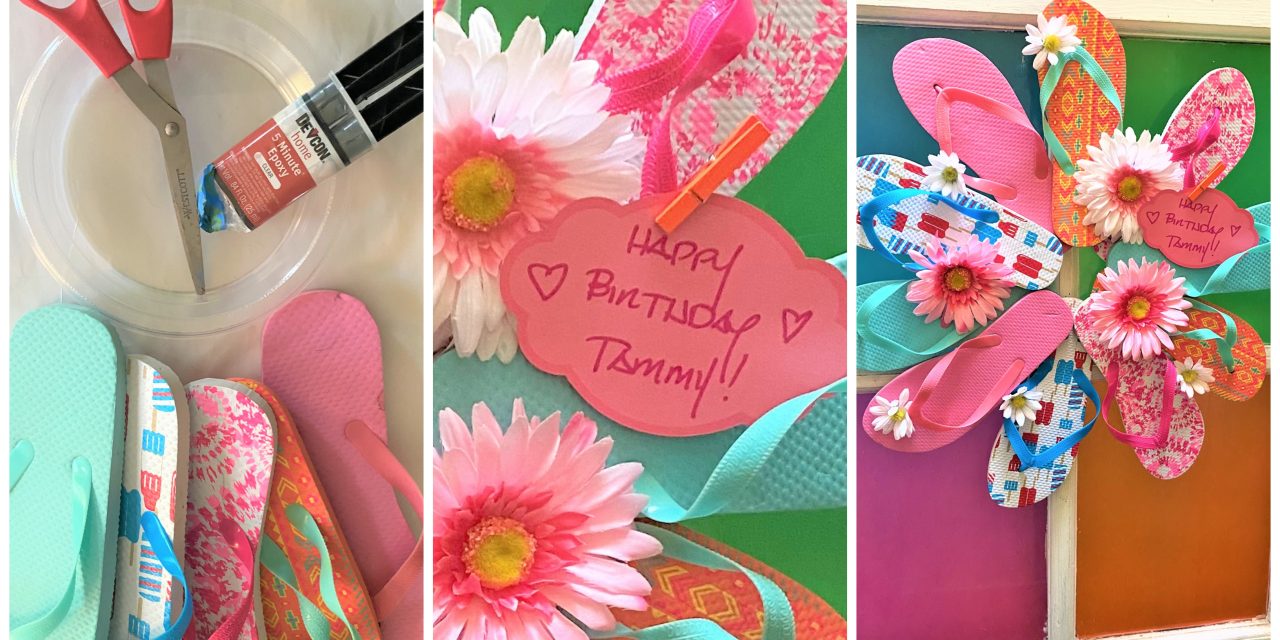
Supplies Needed:
1. Four to five pairs of plastic flip flops
2. Epoxy glue
3. Disposable plastic plates
4. Silk or plastic flowers
5. Twine or wire
6. Clip-style clothes pins (optional)
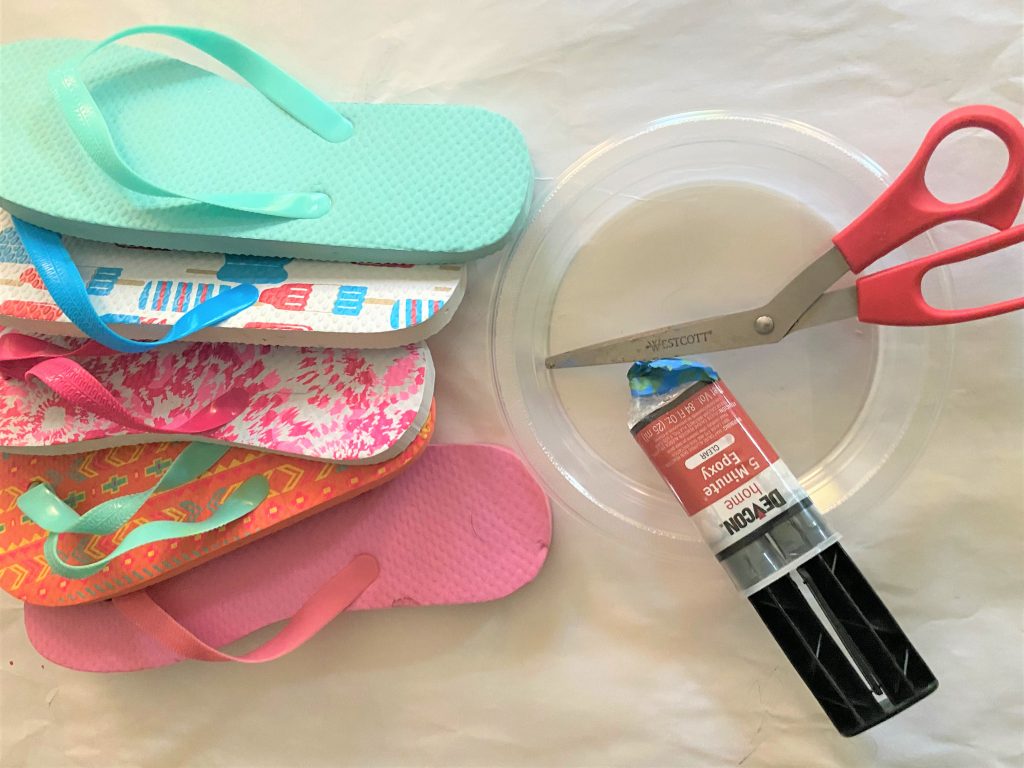
Step 1: Start with the center
- To provide a foundation for your wreath as well as a circle shape to mimic, cut the edges from your disposable plastic dinner plate. While you could use a paper plate, I suggest plastic if you have it handy to provide a sturdier and weather-resistant base of your wreath. I was so excited when I opened my drawer to see that I already had a stack of clear plastic ones! What other circle-shaped items might you use for this first step?
Please note that the plate won’t be seen when the final project is displayed.
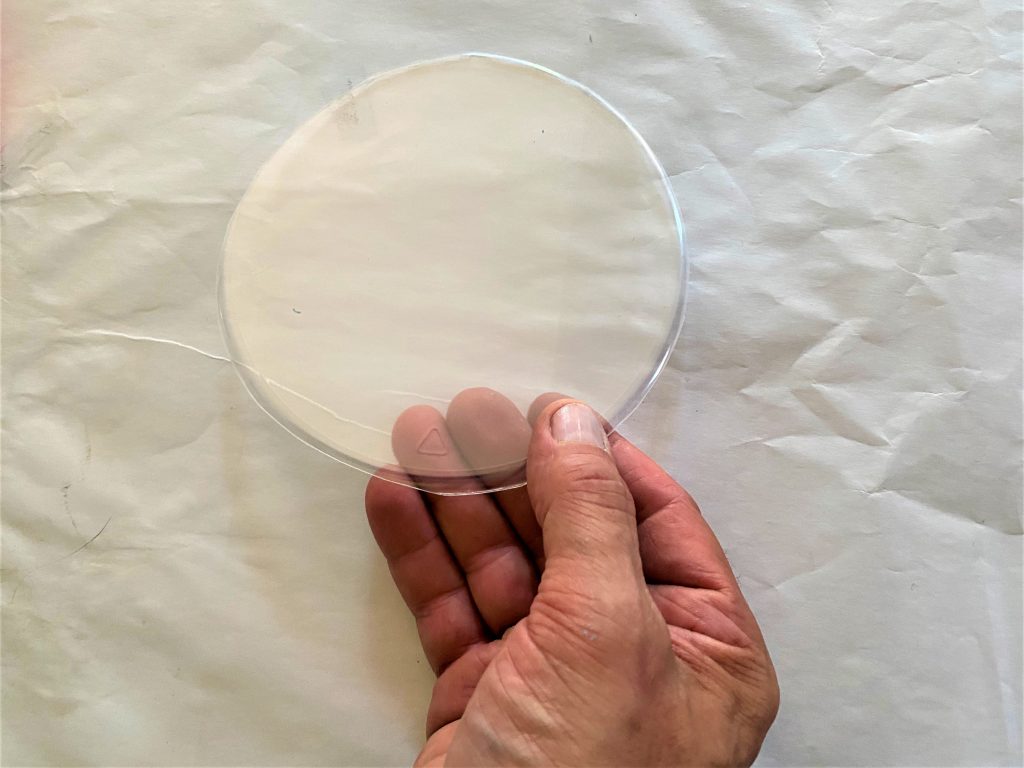
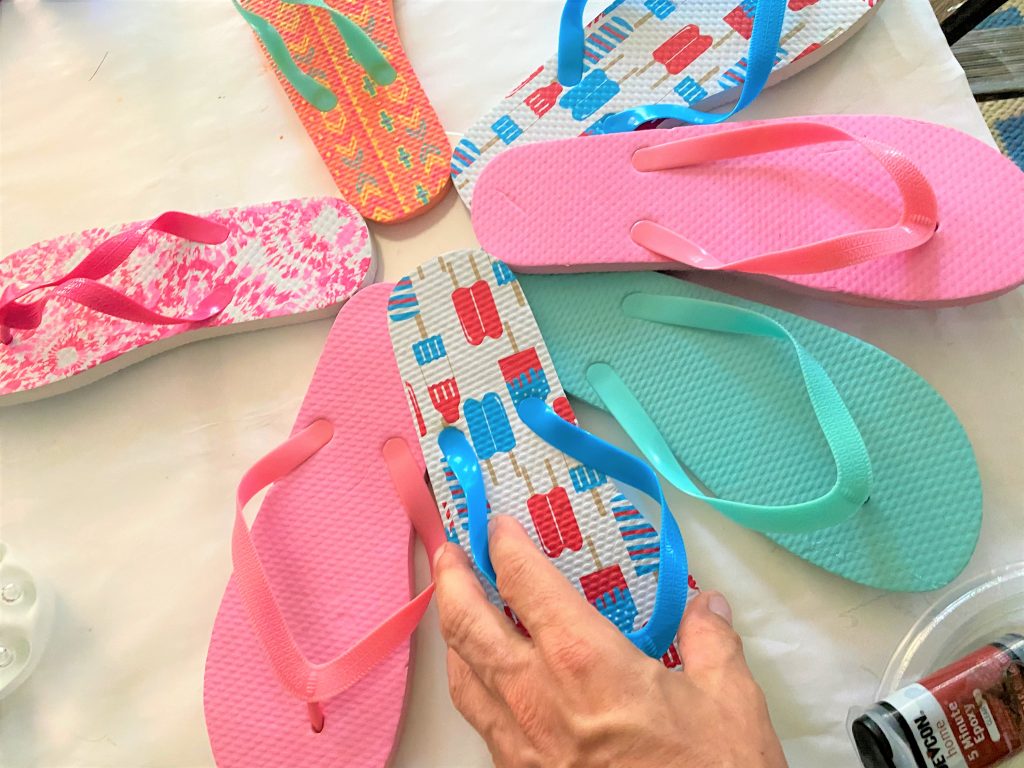
Step 2: Lay out your footwear
Most discount or dollar stores have scores of flip flops this time of year; if you are going shopping for these, please be sure to wear your mask and be super safe! Goodwill has many flip flop options to use as well. These are usually located in the sandals area.
I got my collection off of the off-season in the sale rack at a big box store – they practically paid me to take them home. If these hadn’t been sold to me, they very well may have been thrown away. Thus, this project, hopefully, kept them out of a landfill!
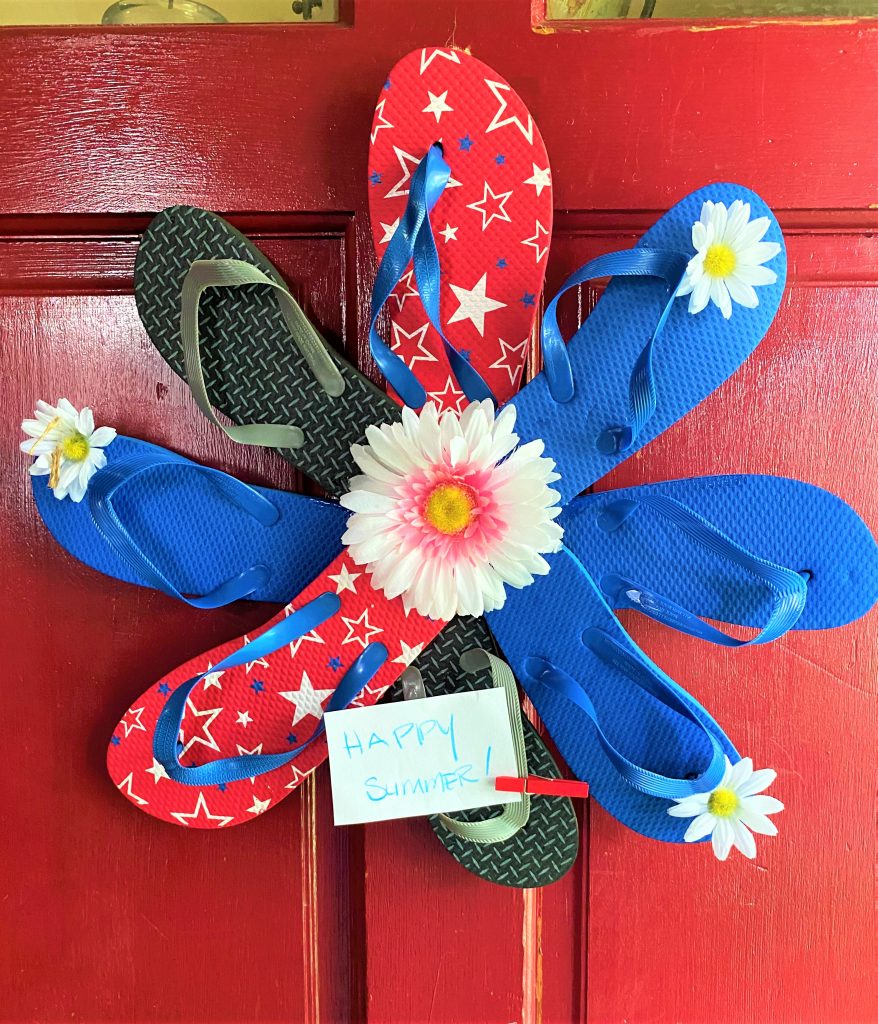
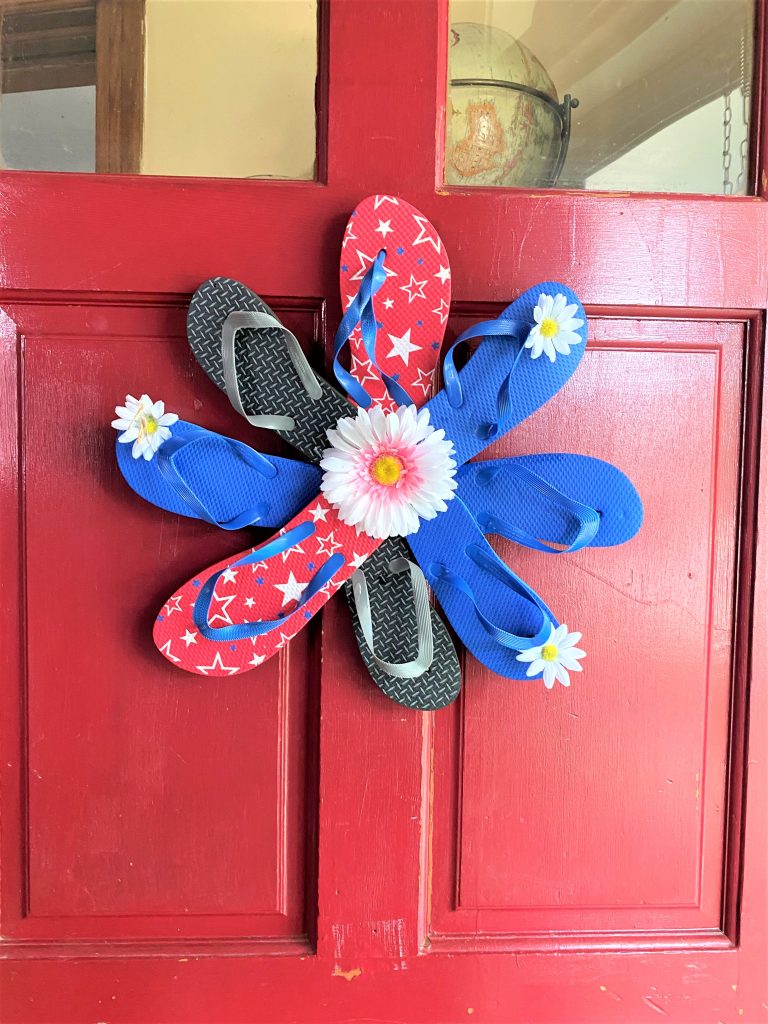
When I looked at all the colorful pairs, I decided to make two wreaths: one with the very summer colors of teal, pink and orange and the other with a more patriotic with red, white and blue.
- With your plate part as the center, place four or five flip flops around it with the foot part in the center and the top part radiating out like a big flower.
- While this simple project would be charming with flip flips of one color, I found using a variety of patterns and colors to be more appealing.
- Space out your first layer of flip flops so that they look evenly spaced and balanced.
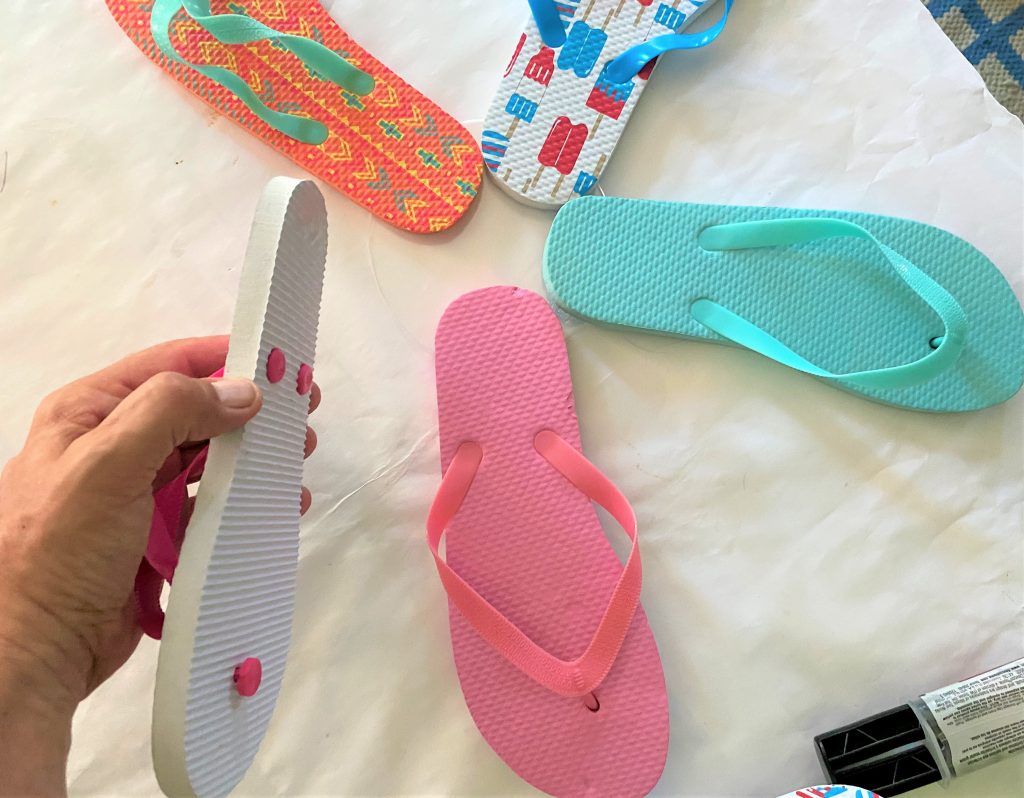
Step 3: Embrace your epoxy
For this project, I wanted the glue to be as strong and as durable as possible, so I hit my favorite hardware store (Annie’s Ace in Brookland) for some quick drying epoxy glue.
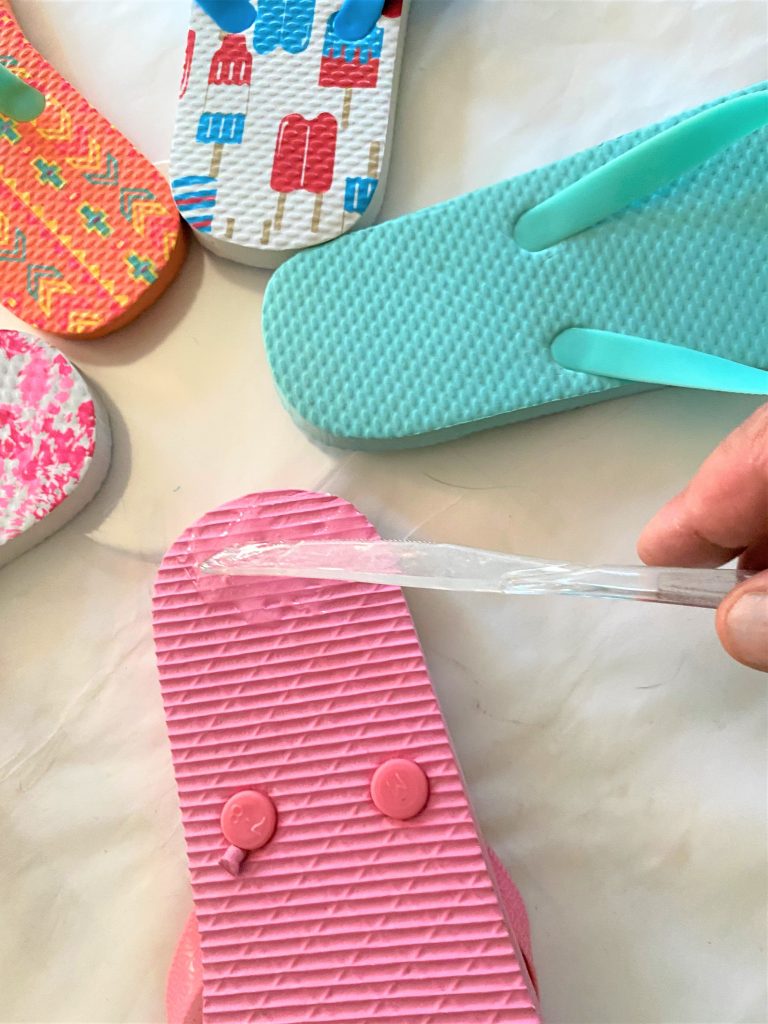
While the glue from a hot glue gun would be fine, too, I envisioned the wreath hanging on a front door that will be opened and closed often and might be exposed to the elements.
- Epoxy is truly easy to work with – just open the tubes, squirt out some onto another plastic plate, mix it and apply to the bottom of your first flip flop so the part that touches the center part is secure.
- Repeat with all your foundational layer of flip flops; once all in place, you might want to add the glue along the side edges where the flip flops touch it other for additional support.
- Let dry.
Repeat the Step 2 and 3 now. Add the second layer of flip flops on top giving yourself the okay to move them around so the colors and designs are spread throughout the wreath. Add more epoxy to flip flop bottoms and edges. Again, let your project dry.
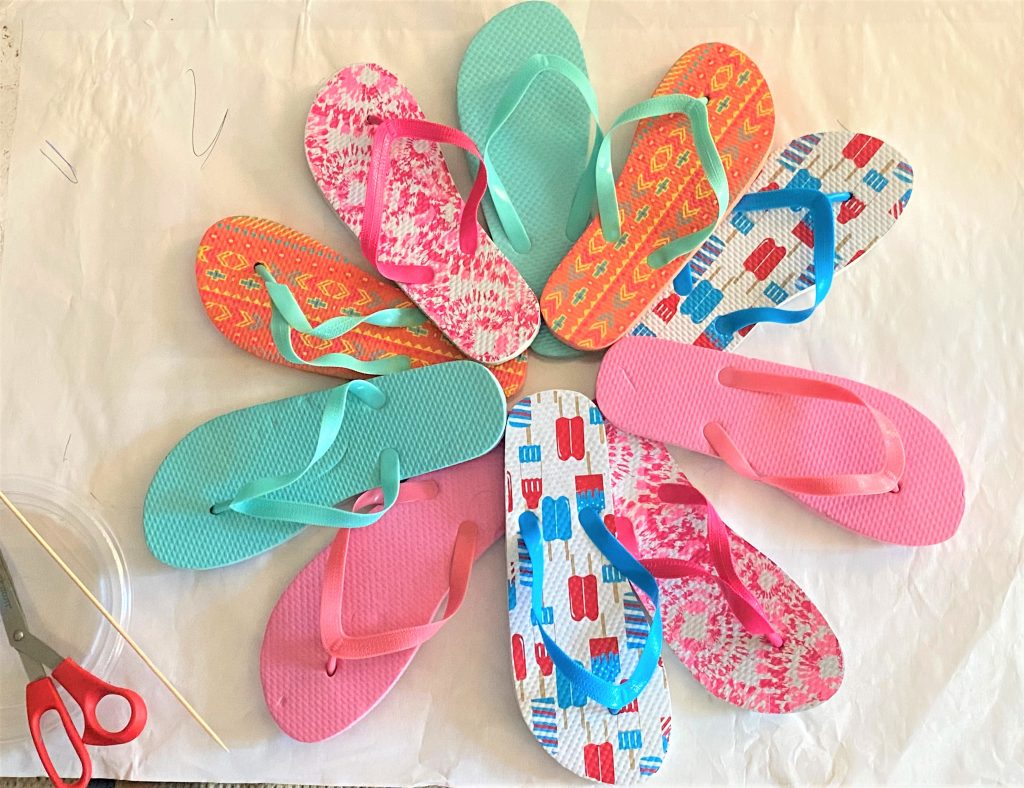
Expert Tip: After all your flip flops are in place and the glue has dried completely, you may want to see where else you want to add more glue. You will want each flip flop to be as secure as possible so this additional care will make a big difference with how your wreath will ultimately look.
Step 4: Make it bloom
While at the dollar store, pick up some silk or plastic flowers. Often, your favorite Goodwill store has these too, so grab them immediately if you see them!
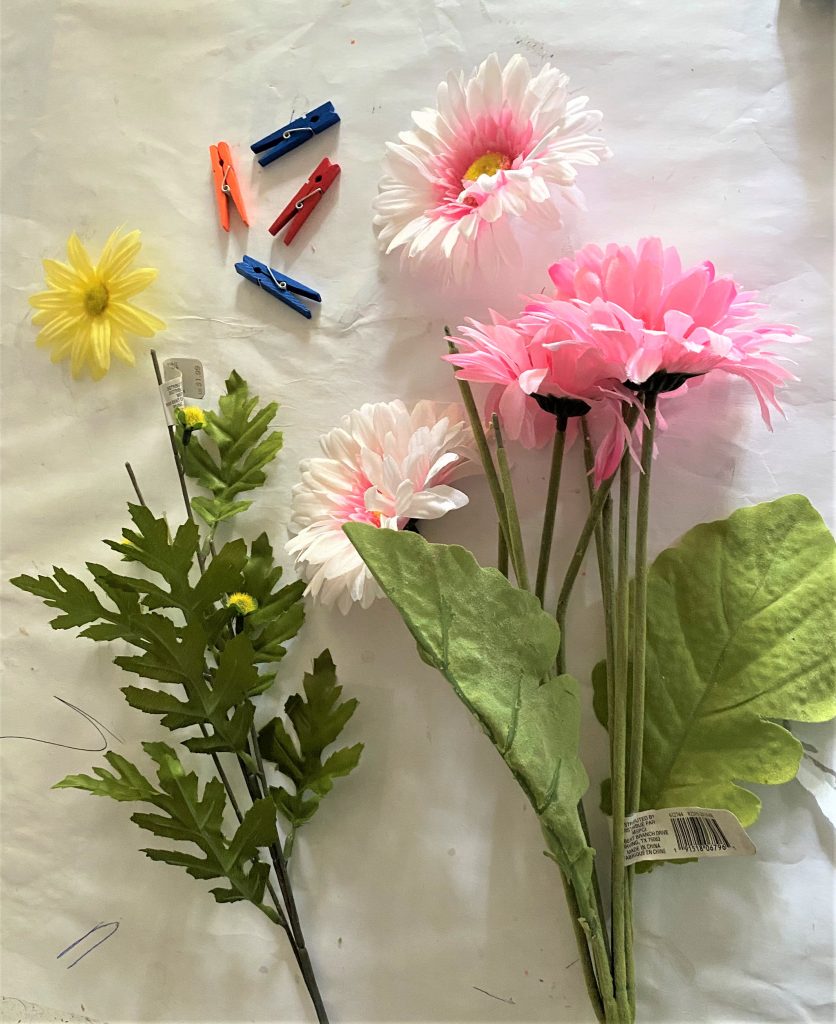
I selected Gerber daisies and “regular” daises because they are in bloom during the summer and are so cheerful and happy.
- Remove your flowers from the stems and cut off the little part on the back where the fake stem was inserted, so the flower is able to lay as flat as possible.
- Squirt out, mix up and apply your epoxy to the back side of each flower then put it in the position you like. You might need to enlist some painter’s tape to hold them in place until the glue has dried.
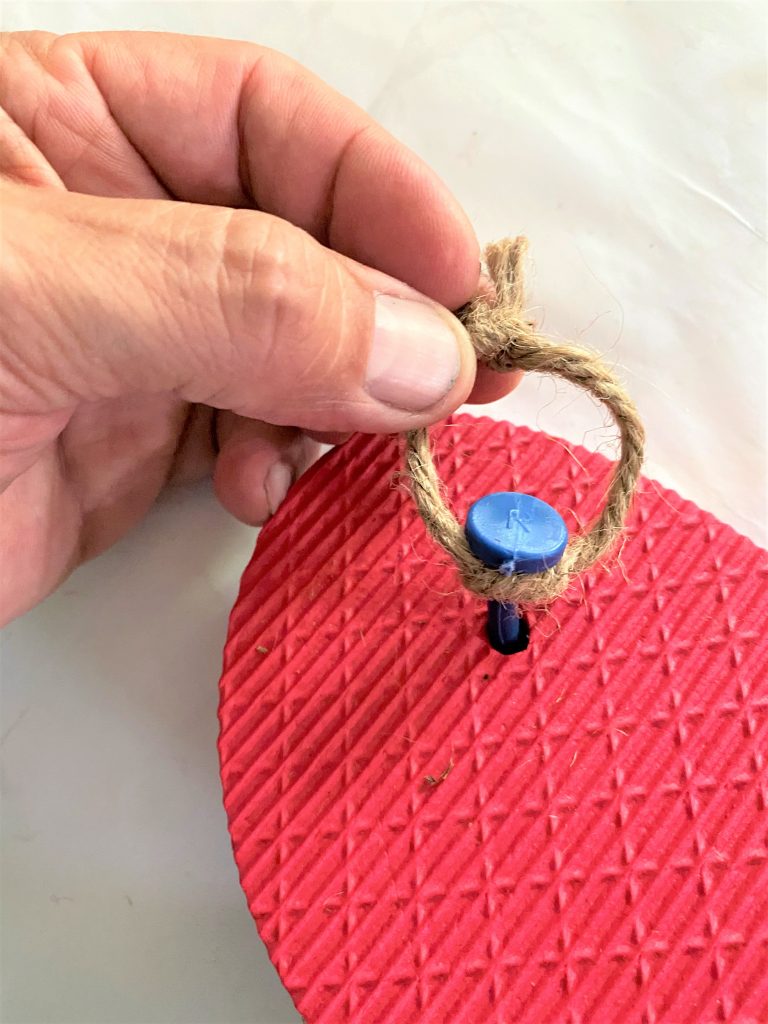
Step 5: Create a hanger, add a clothes pin
- Flip your flip flop flower wreath over and tie a piece of twine or twist a piece of wire on the upper part.
- This will be your hanger and can easily be looped over a hook or nail. Try to position it so you don’t see the twine/wire hanger when it is hanging up.
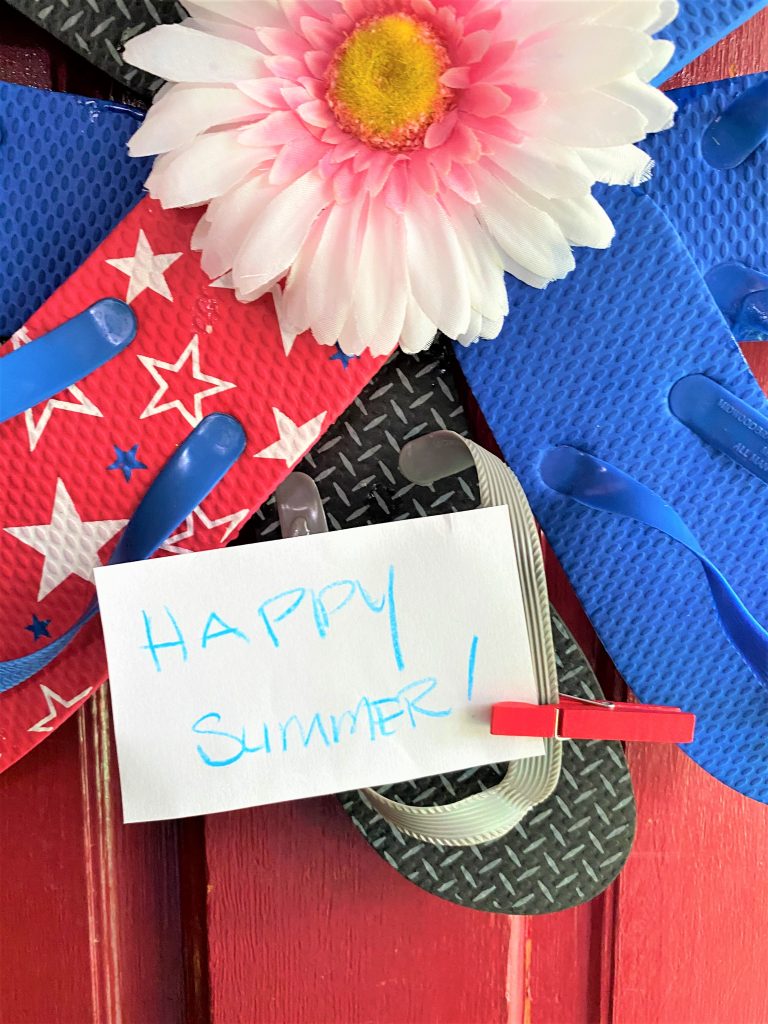
Also, if you have a clothes pin, use it to clip on a message to go with the season or a specific reason. I had some small colorful ones that I got at a craft store which looked nice and helped to make the wreaths even that much more friendlier.
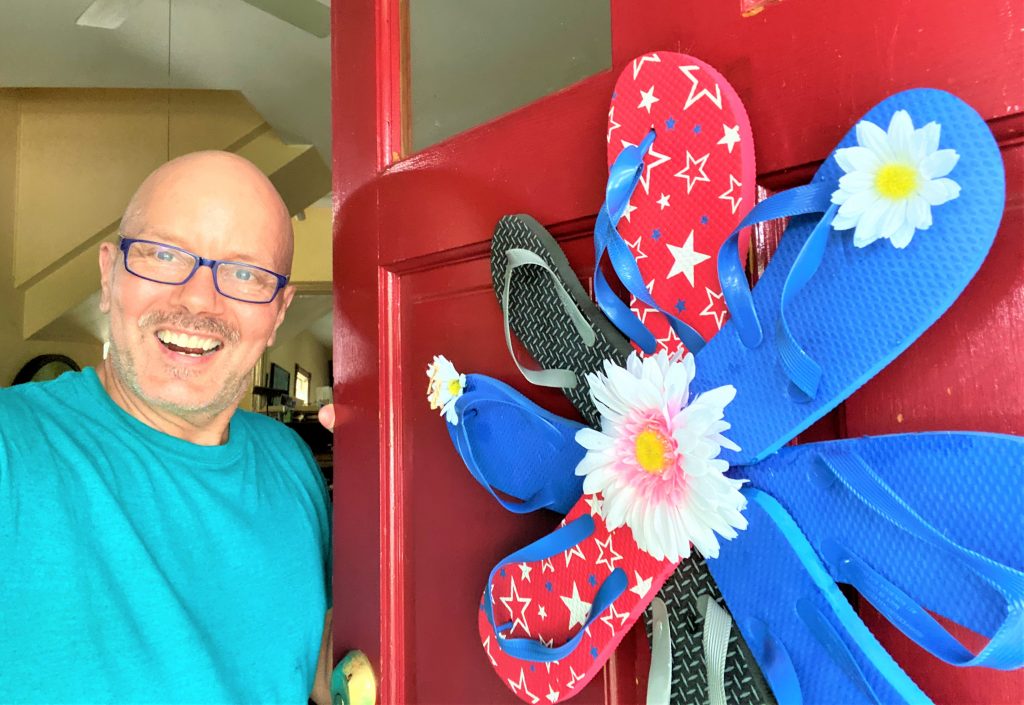
Step 6: When you display, you will do a flip!
Okay, I have to say, if I coulda, I woulda…done a flip right on my front porch when I hanged these wreaths. They are so happy, really unique and “shore” to get lots of foot traffic from folks who want to see it up close (and safely socially distanced!).
So grateful to have a very cool sister who is so supportive of my artsy and crafty ideas and projects. Thanks Tammy—sending you lots of love!

Tim Kime
Artist, Motivational Speaker, Life Coach
