
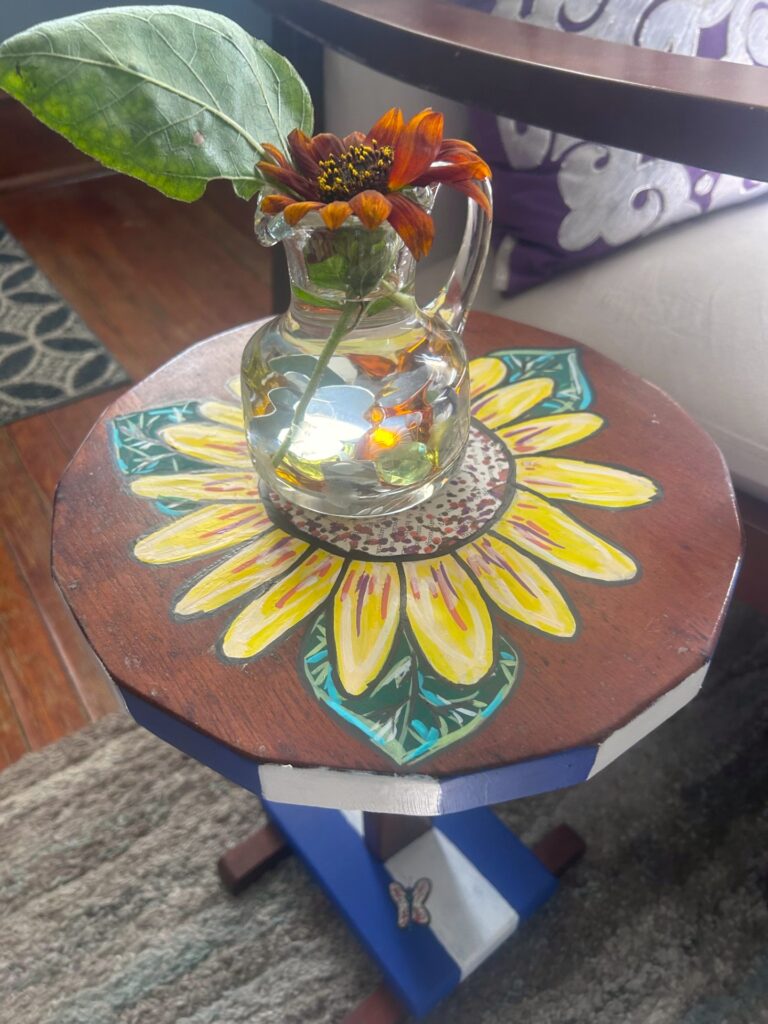
A worn and weary small table with great “bones” is transformed with paint and paper. The result? An eye-catching, charming piece blooming with personality.


Here’s how:
1. Pick up a piece, paints & papers at Goodwill for pennies
Looking for a reason to get out of the heat? Wanting a fun adventure during your stay-cation? Seeking a memorable family excursion? Then stop by your favorite, nearby Goodwill nonprofit retail store. The temps are cool, the deals are hot, and the team is the best.
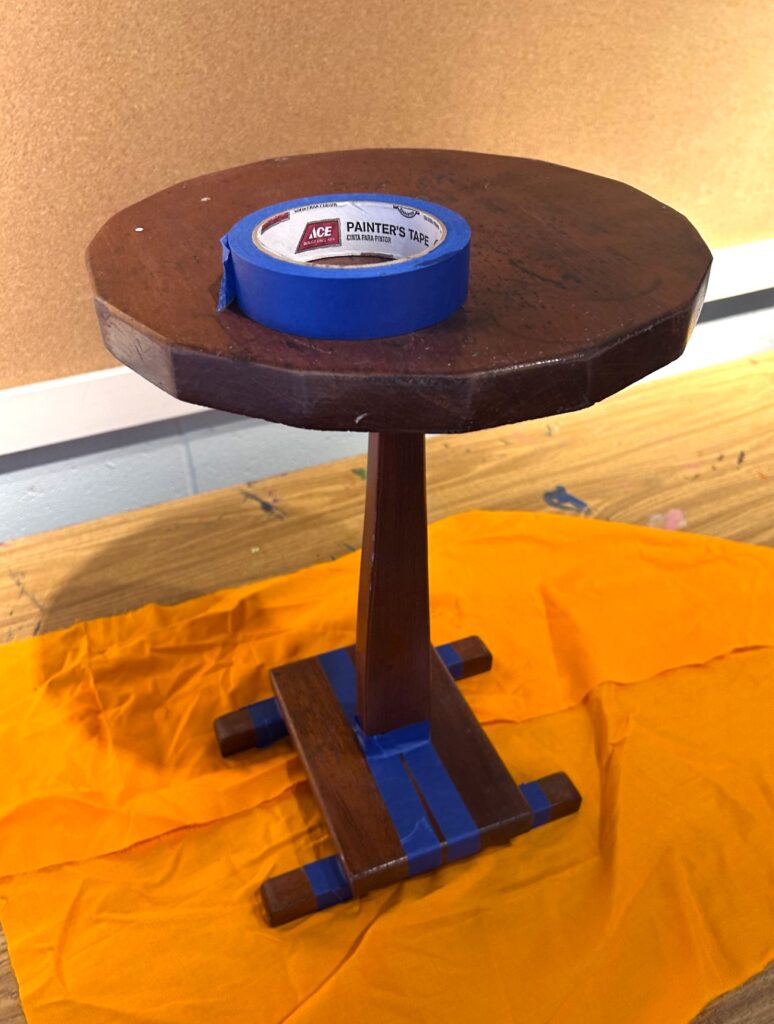
While there, look for a small piece to give a new look and life. This small table was actually left curbside, so the price was certainly right. Accent pieces like this are often available at Goodwill for less than a cup of coffee at certain establishments.


Why this table? Its appeal is threefold.
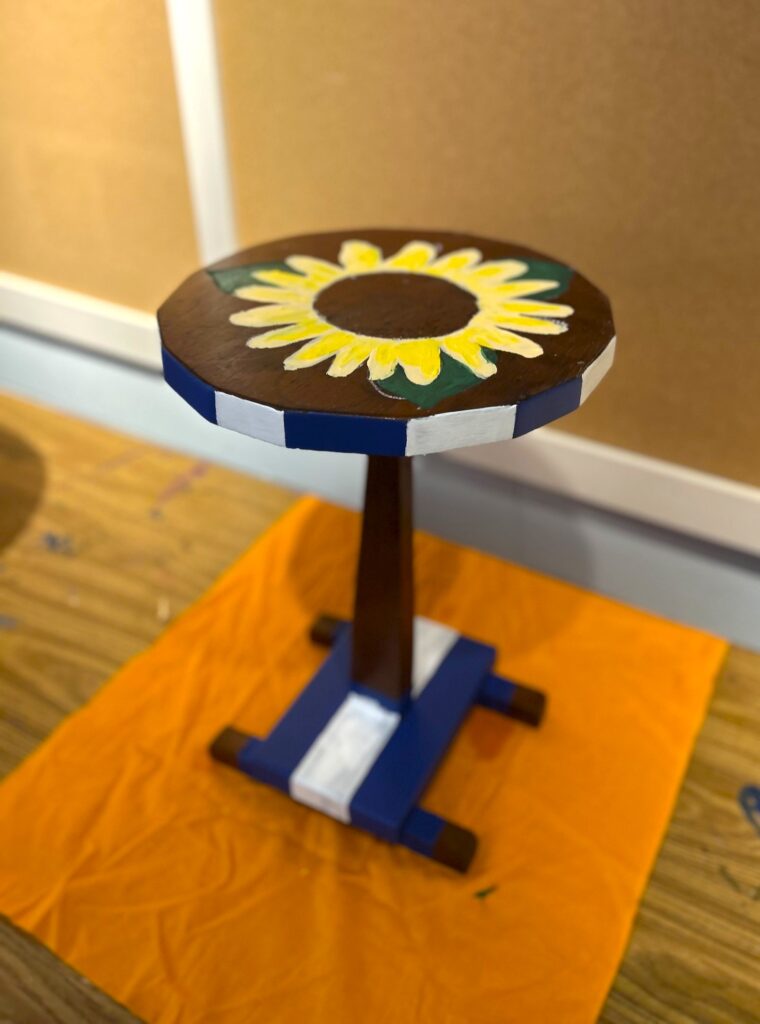
First, its small size makes it perfect for any room or space and can easily hold a book, a drinking glass, or a cell phone. Second, it has some nice details (like the round top, the tapered middle section, and the layered base). Last but not least, it is solidly built—it might even have been hand-made many moons ago.
2. Prep your piece
Based on the condition of your accent table, you might need to give its current surface some buffing up and wiping down. This little table looked like it had been in someone’s attic or basement for years, so it got a very deep cleaning. Use a damp rag with a little soap to remove years of dirt and dust. Dry it off with another rag or paper towels.
Consider using a medium- to coarse-grade sanding block or sanding paper to make the surface more paint-friendly. You are not removing the entire current layer; you are just buffing it up. Give it another wipe down to make the surface clean and clear.


3. Use paint to bring out details, pretty parts
Does your piece have any special details or parts you want to ensure get the attention they deserve? Also, what about parts you want to keep paint-free?
Top:
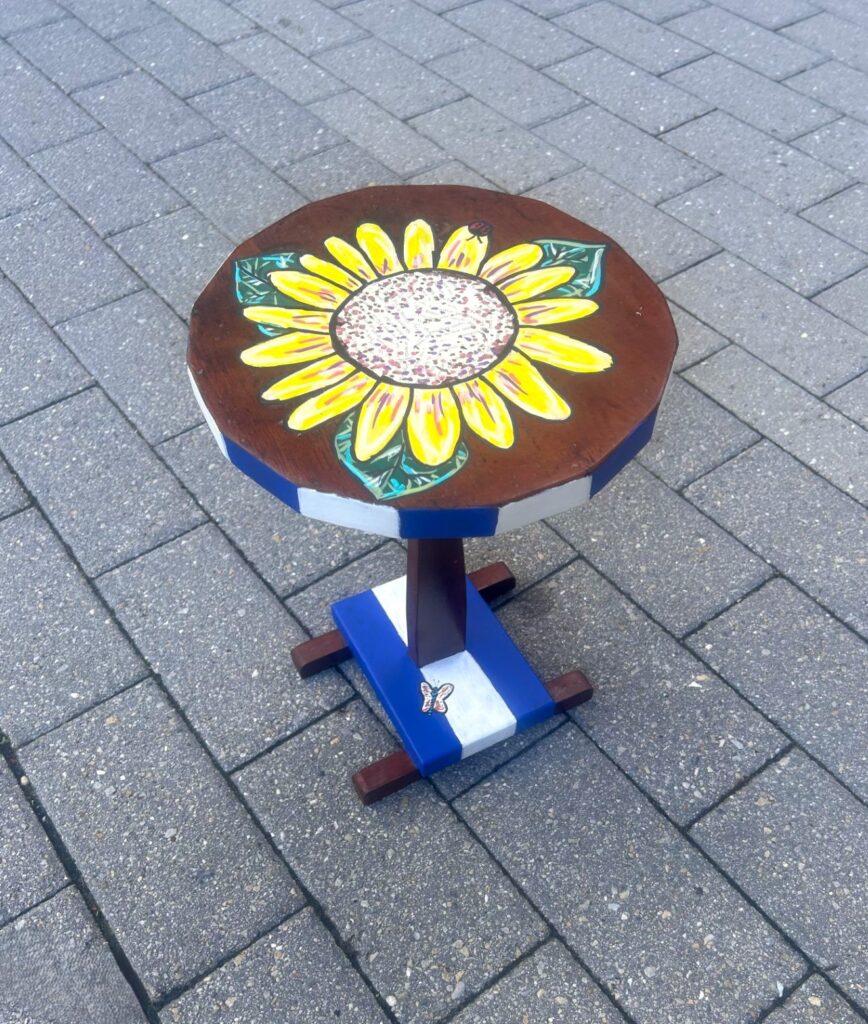
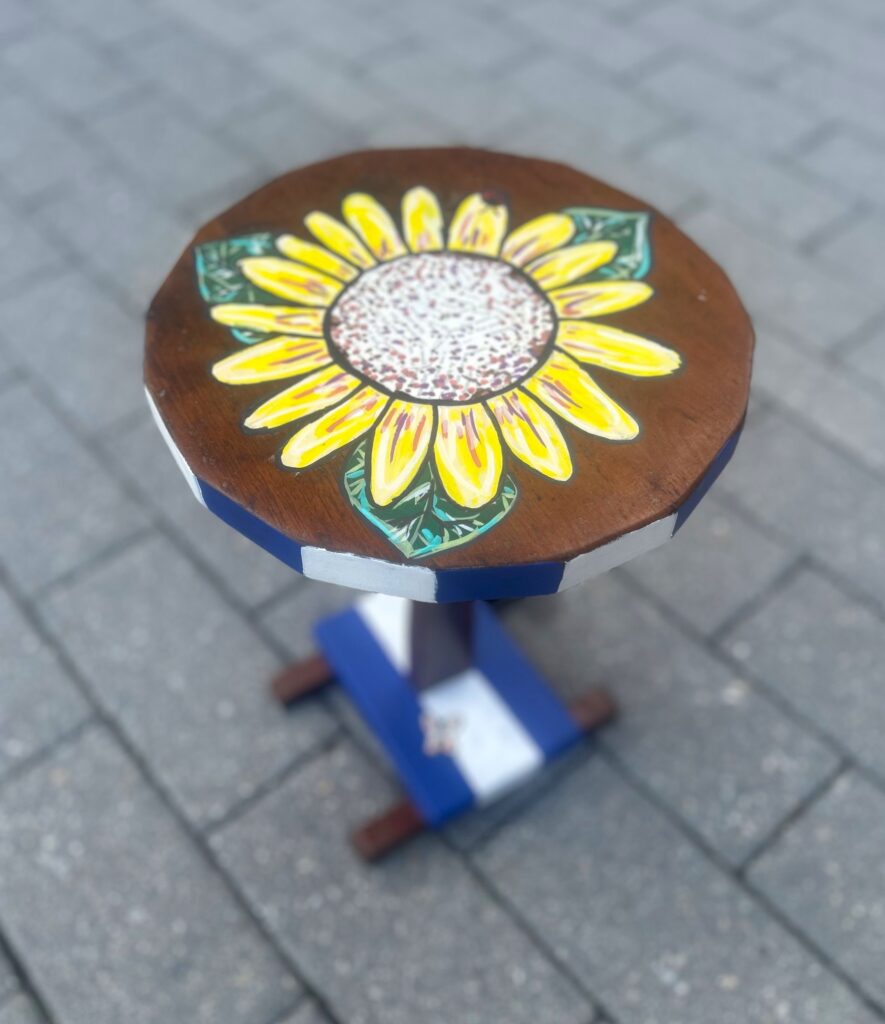
The table’s top had a series of straight cuts along it, not quite scalloped, yet interesting nonetheless. Cobalt blue paint was added along the top of every other edge piece. A small foam brush was used to apply the paint to help keep a sharp, crisp edge. After it dried, white paint was added using the same process. Several layers were added to ensure the colors popped.


Base:
The table had a nice base on top of wooden legs. Painter’s tape was used to keep paint off the table’s upright, mid-section, and the small horizontal legs. The small foam brush was used again. After several layers of blue were added, the tape was removed. White paint was added between the two blue strips to connect the base to the top’s edge.


4. Brush on a big bloom
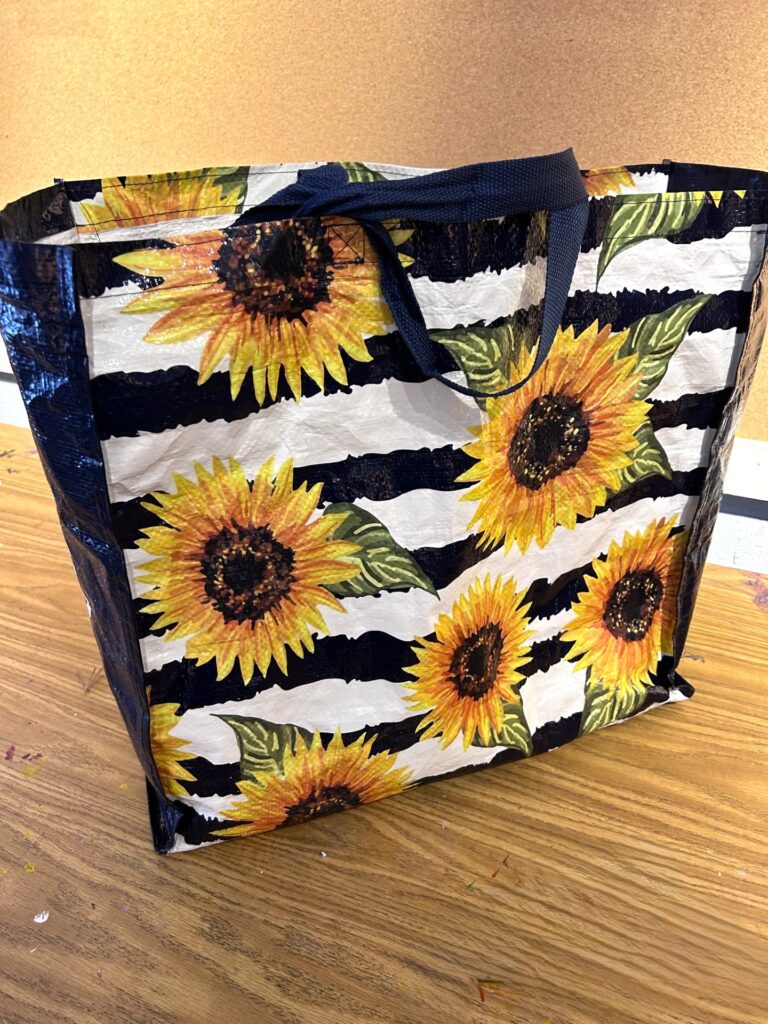
Given the time of year, you might see sunflowers strutting their stuff all around your community. When you shop at Goodwill, you will see them on their reusable bags for sale. I have several in my garden, too, so the flower choice was an easy one. They are cheerful, happy, and easy to paint.


Use chalk to sketch out your bloom. Trace or draw a circle as the sunflower’s center. Around it, add petals that are simply upside-down, slim U-shapes. Add several leaves, too, ideally one, three, or five to make it look organic.
Yellow paint was applied with a small craft brush. Several layers were added, and then highlights were painted with another yellow hue. Green filled in the leaves.

5. Use paper/pages for your flower’s center
To add additional visual delight and whimsy, consider using book pages as the table’s center. Remove pages from a book (also purchased at Goodwill), then tear them into smaller pieces. Use Mod Podge to secure them in the center. Consider overlapping and having them face different directions so they will look nice from wherever you see the table.
Use a small foam brush to apply a layer and a page piece. Use your fingers to push out any bubbles, and apply another light layer on top. Allow time to dry.

6. Paint pens add pizzazz
After your sunflower’s first painted layers and center book pages have dried well, then tap into your paint pens to add additional details. Outline the petals and leaves. Add veins to the leaves and dots to the center.


For fun, consider adding a ladybug or small butterfly. If inspired, add meaningful words (love, bloom, shine) or a phrase (grow where you are planted or shine your light). Be sure to sign and date it, too!
7. Protect your piece with poly
To keep your transformed table looking good, brush or spray several light layers of satin or semi-gloss polyurethane on each section, edge, and part of your table. Allow plenty of time for the polyurethane to dry well, too.
8. Position it, accessorize it, enjoy it
This happy little table will add joy wherever you place it. Set it by your favorite easy chair to hold your coffee cup. Add a candle votive. Place a small vase with a real sunflower on top.


Such a charming upcycled project will inspire your DIY talents to continue blooming brightly, too!
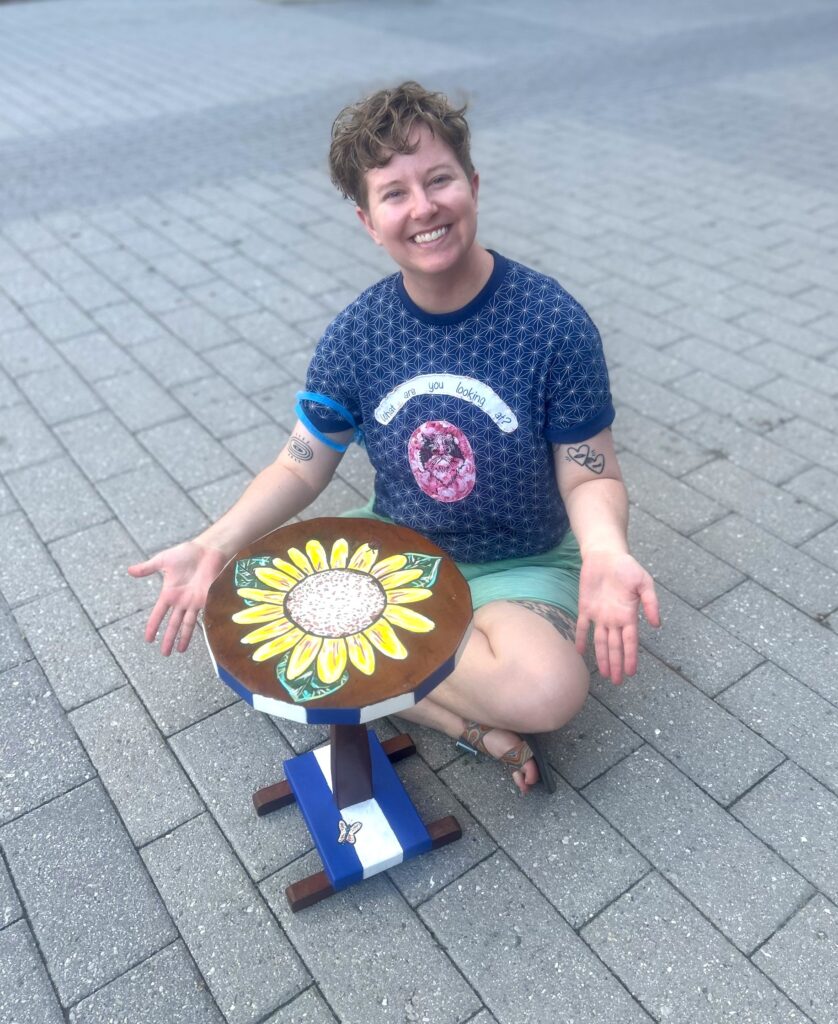
Thanks to my model, Milo, a wonderful artist. Find her on Instagram at @queerquartz13 to see her eye-catching creations.

Similar Reads:
- DIY: How to Upcycle Mannequins into Pride Art Pieces – Finding Your Good
- DIY: How to Upcycle a Mirror to Reflect Your Pride – Finding Your Good

Tim Kime
Artist, Motivational Speaker, Life Coach

