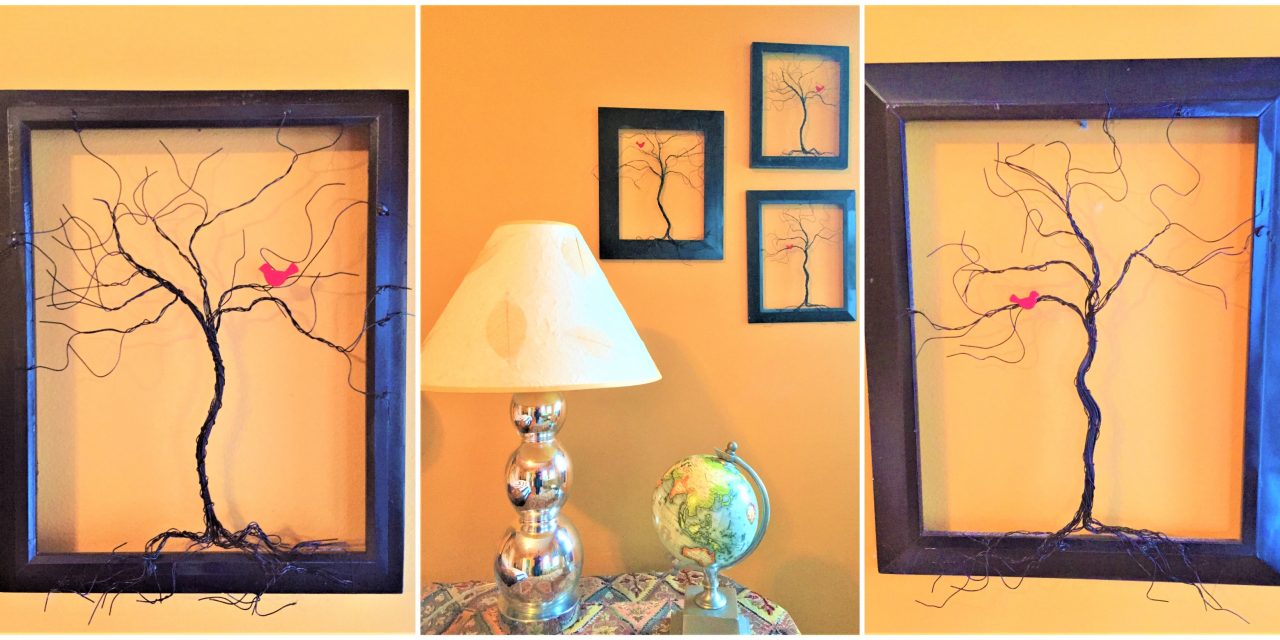
You’ll Get Wired with this DIY Project by Upcycling Frames into Tree Art!
Celebrate the changing seasons by creating tree-themed art with wire and upcycled picture frames. This eye-catching and easy project is simple as a twist to do!
Ability level: Easy to moderate
Age level: Older kids with adult supervision
Items:
1. Wooden picture frames
2. Garden or jewelry wire, 22 gauge
3. Wire cutters or scissors
4. Glue gun & sticks
5. Black spray paint
6. Felt or cardboard
7. Red craft paint
8. Small detail paint brush
Cost: $18 for set of three
- $3 per frame
- $4 for roll of wire
- $5 for spray paint
1. See art in items you find at Goodwill
In the Home Accessories Aisle of your nearby Goodwill store, you are certain to find lots of interesting and fun items that can be transformed into unique and eye-catching works of art.
All it takes is a little vision to look beyond an item’s current color or shape and imagine what it might be.
For this project, we picked up some flat, wooden picture frames as the foundation for this tree-themed DIY project.
2. Dismantle your frames
We are only using the wooden frame portion of the frames.
- Carefully take a part your frames, especially when removing the glass.
- Recycle these pieces to help protect Mother Earth!
- You will want to lightly wipe off your frames to remove any dirt or fingerprints.
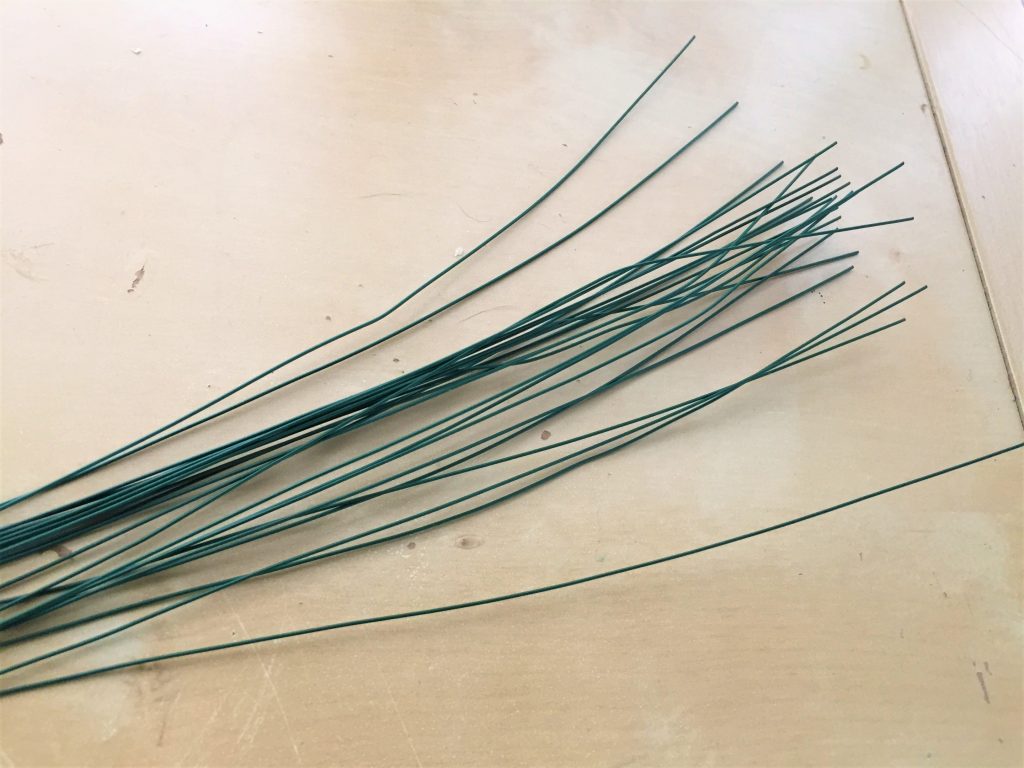
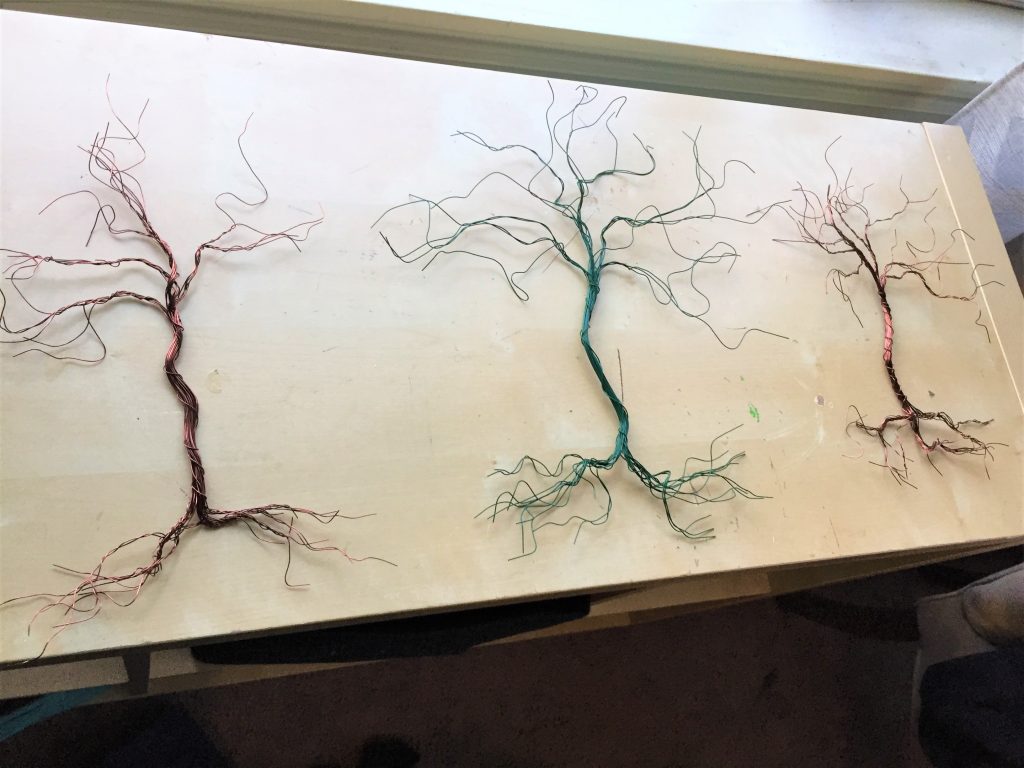
3. Get your twist on with wire
- For each “tree,” you will want to cut 15 to 20 pieces of wire about ten inches long.
- Bundle them together then take one piece of wire and wrap it around the middle portion of the group; this will become your tree’s trunk.
- You will then spread out the wires at the top and the bottom so they flair out like a fan.
- At one end, which will become the limbs and branches, start twisting two or three of the wires together.
- Repeat this step until each single wire has been twisted with another. At the ends of each twisted branch, you will want to pull the wires apart, so they make smaller branches.
- Given the organic, flowing feel of limbs and branches, make sure each wire is bent slightly and curved with no totally straight lines.
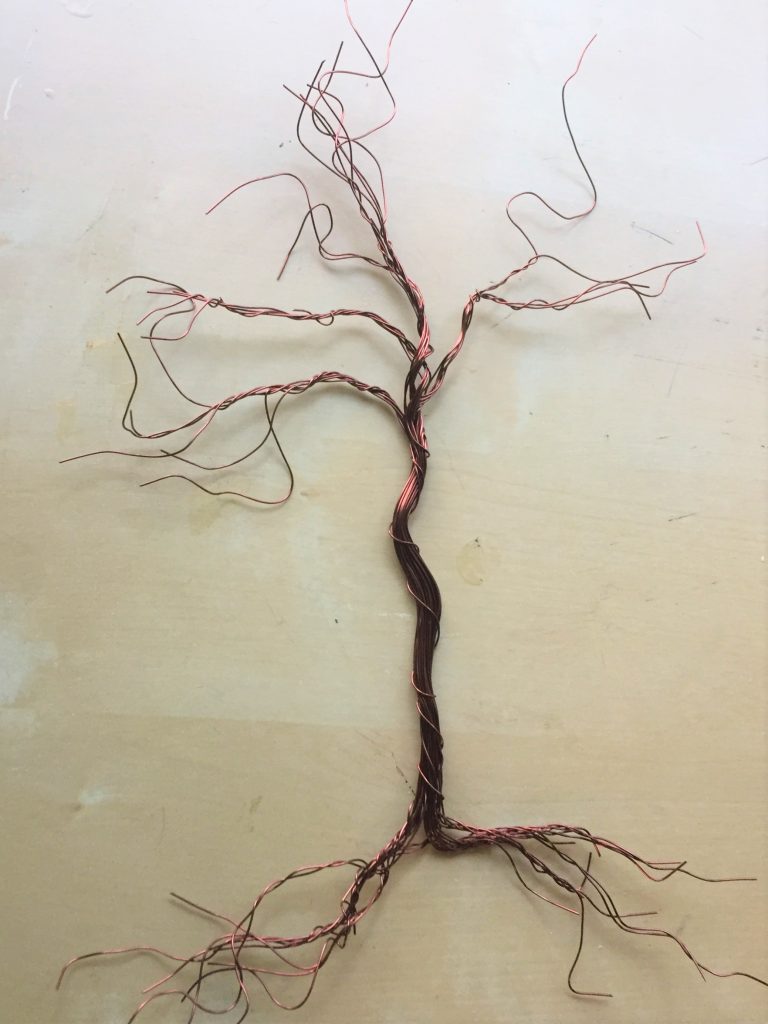
Turn your attention to the tree’s “roots” by repeating the steps above and twisting several neighboring wires together then pulling apart the ends to make smaller roots.
Keep bending and playing with each wire to ensure a natural looking feel.
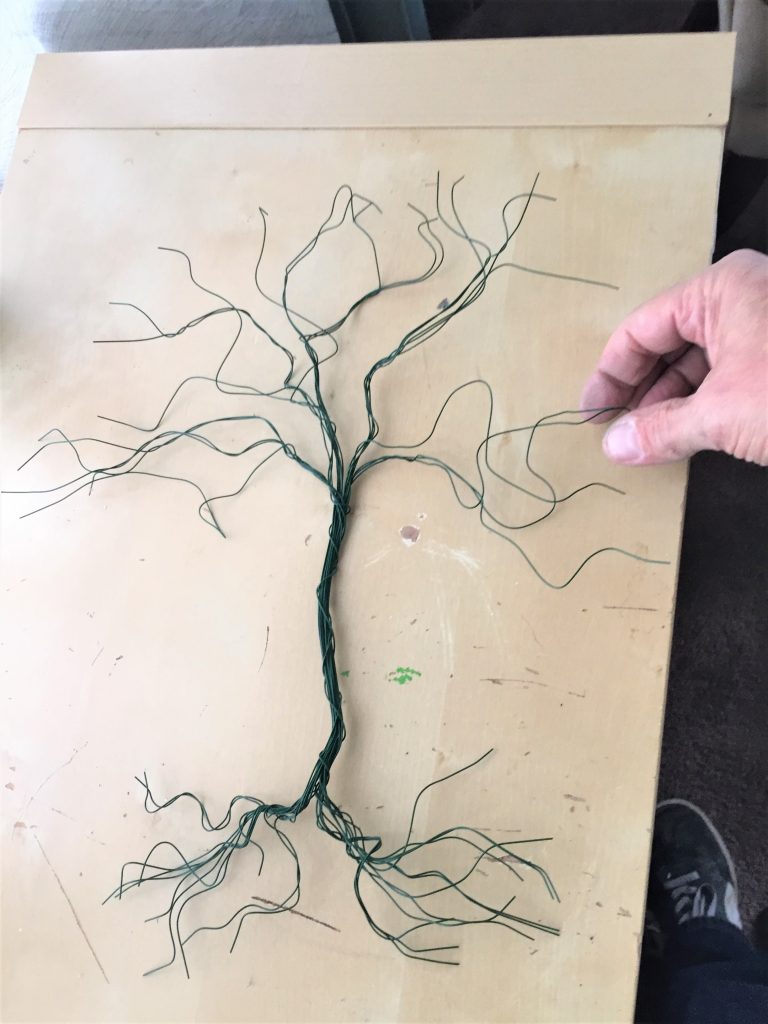
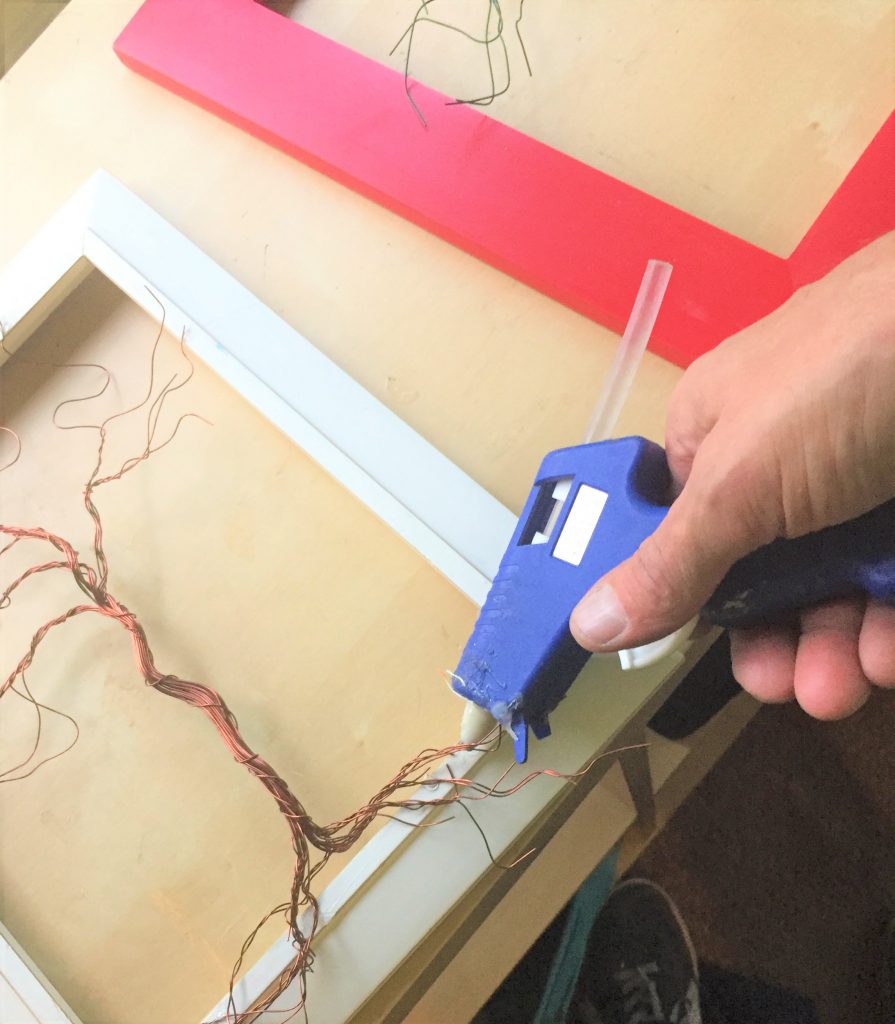
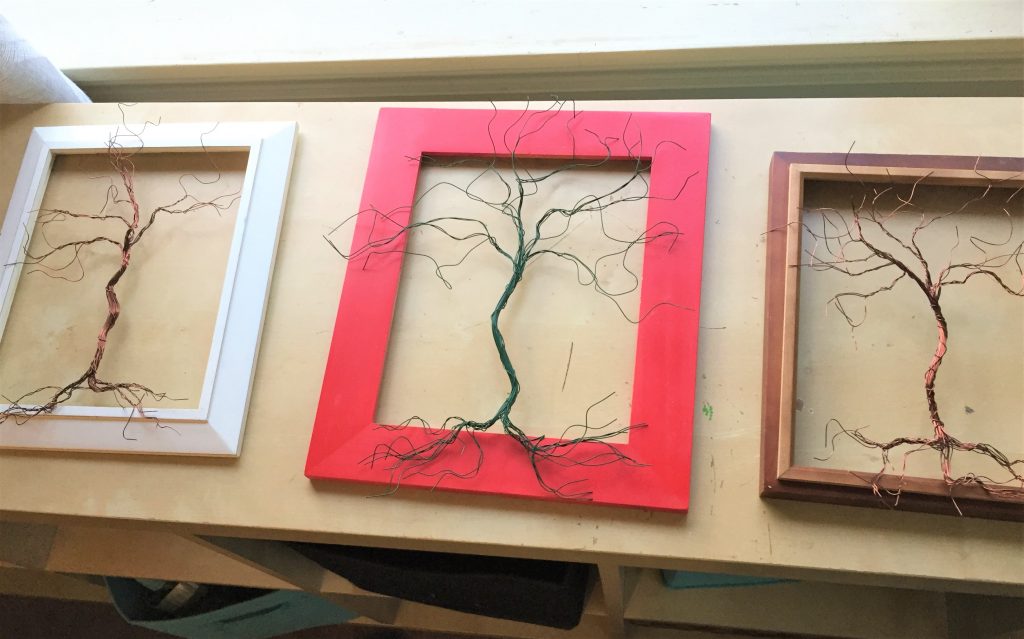
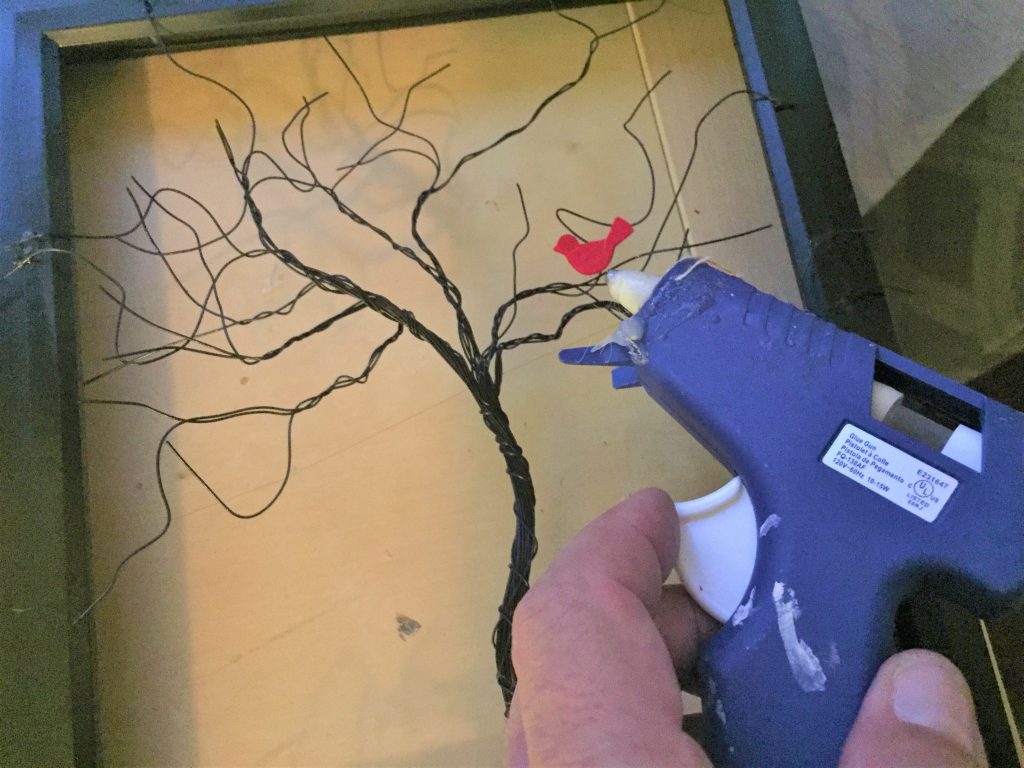
4. Plant your “tree” with a glue gun
- Place your dismantled picture frame on your work surface right side up.
- Put your wire tree on top. You will want the branches to extend over the frame so you may need to bend and shift several of them, so the tree lies on top and appears to float over the frame.
- With your glue gun, gently place a dot of hot glue under the spot where the branch touches the frame.
- Adhere several branches to the top and each side; do the same with the roots along the bottom.
- Given how lightweight the tree is, you only need to secure it in place in four or five spots.
5. Spray on paint to unify and focus
- For this step, place your frame (now with the tree glued on top) outside or in a well-ventilated space, and, of course, on a drop cloth!
- Spray on a light coat over your entire piece; you will want to come at it from several angles and directions to ensure every edge, nook and cranny are covered.
- Repeat another time or two for solid coverage.
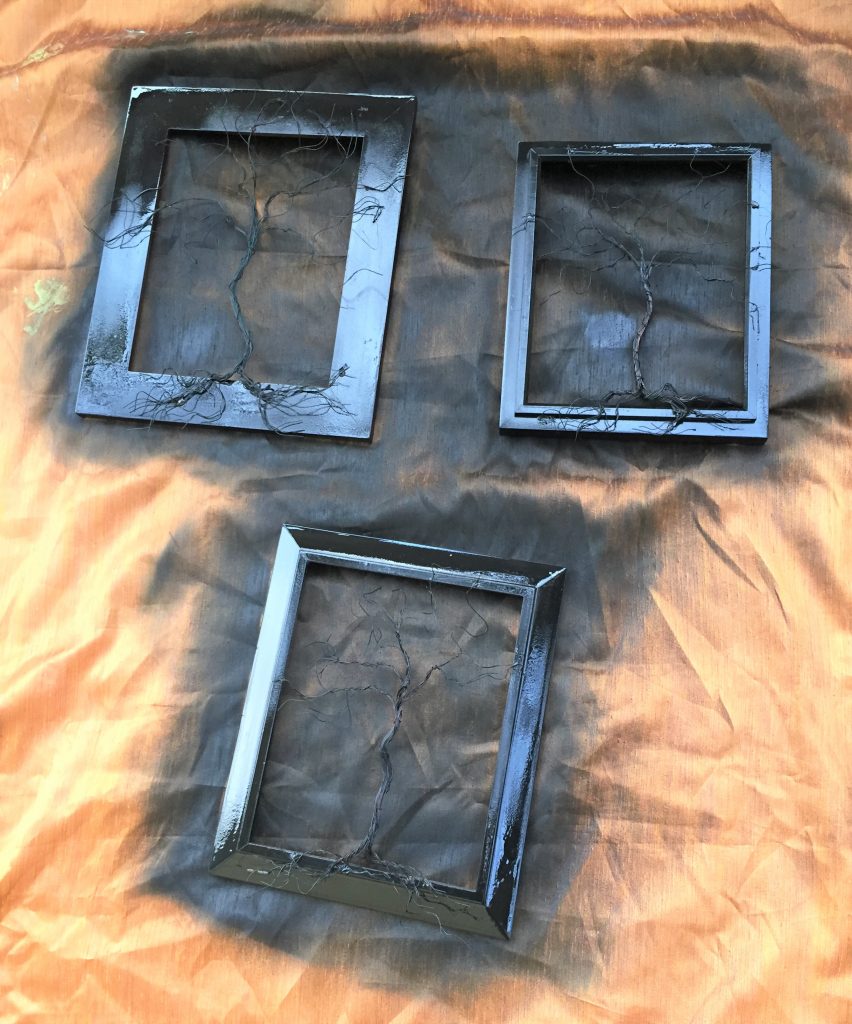
Expert insight: Even though the two trees created from the copper wire were beautiful as they were, I wanted attention to be focused on their lines and shapes and not their color and tones. I debated over which color to use and, for a minute, considered bright red! However, I caught myself and am so glad I chose black as many tree trunks and branches look very dark once their leaves fall off. Also, I wanted to take advantage of the fact that you will be able to see the color of the wall on which the art piece will hang so the tree looks like a silhouette. The next step totally confirmed that I had made the right choice!
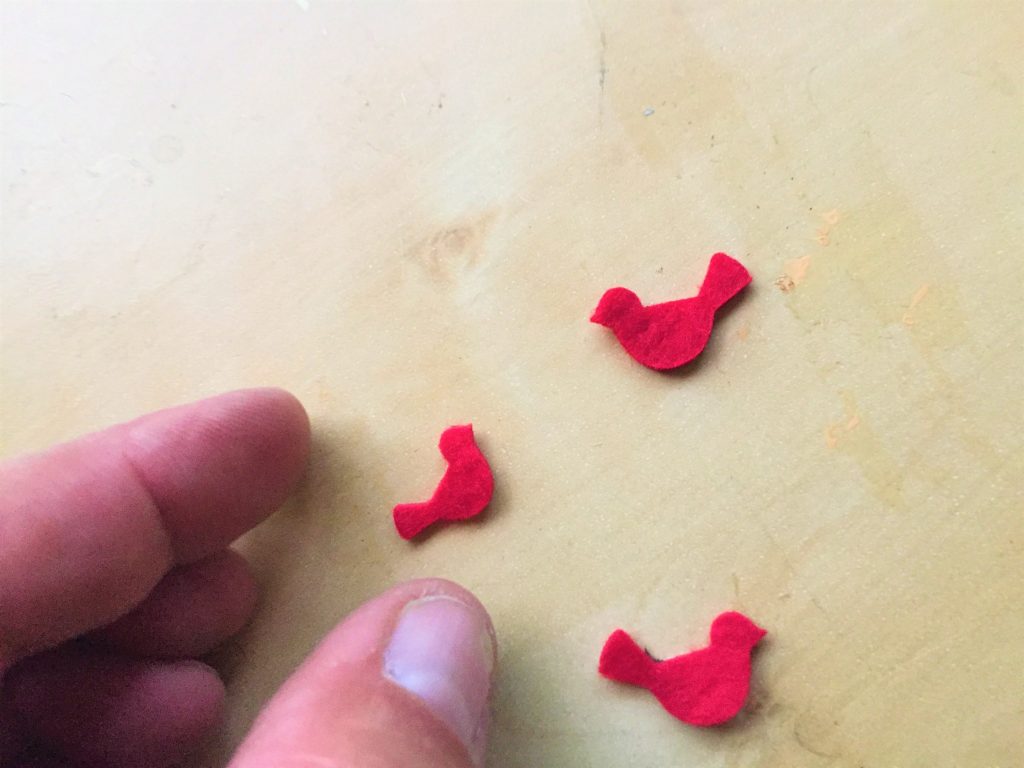
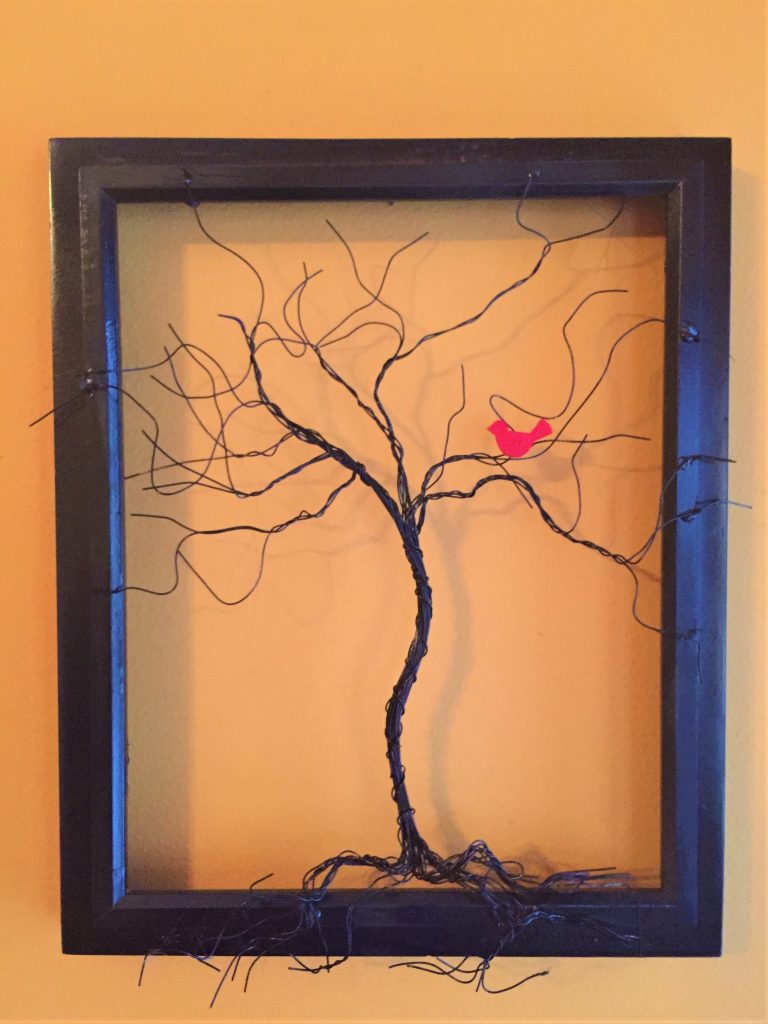
6. Call in the birds
- To give your tree a warm and welcoming touch, add a small red bird on one of its branches.
- You can cut this from red felt, fabric or even stiff paper. If you don’t have red, cut out your bird shape, then brush on some red craft paint. The bright red makes the whole piece look very hopeful to me!
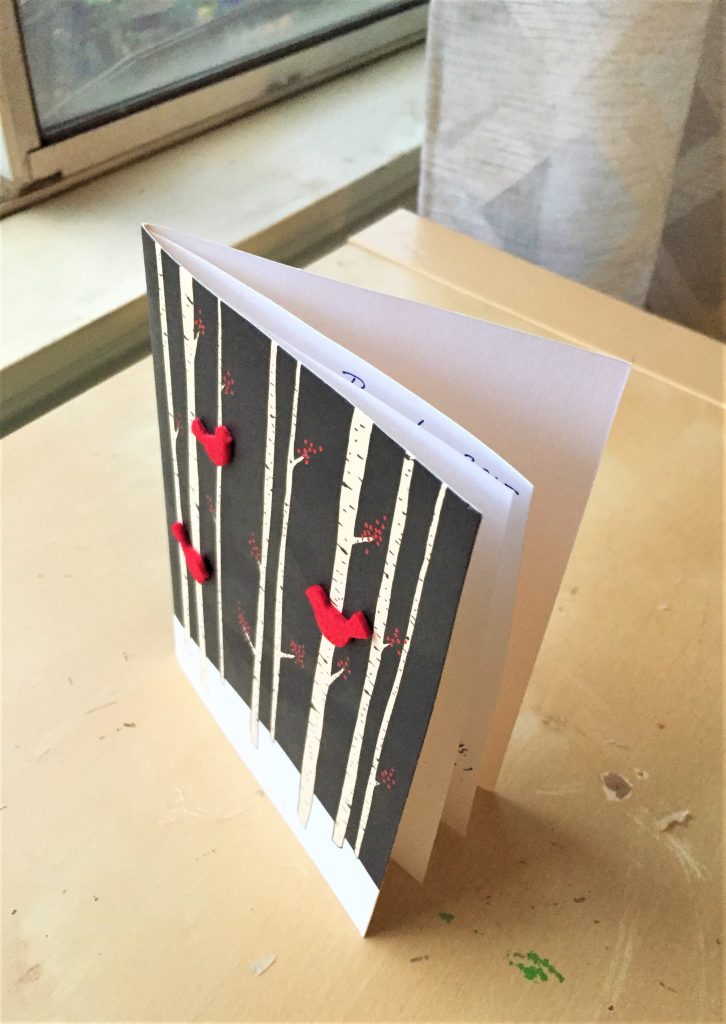
Expert insight: Sometimes you just get plain lucky! I had saved a holiday card that had the three red felt birds on it because I love cardinals and thought the card was so lovely. I gently removed these cut out creatures, added glue to their backsides then perched them on a branch. And as fate would have it, I had three birds, so each tree was blessed with a little friend. The cheerful little birds also helped to make these three pieces truly a matched set.
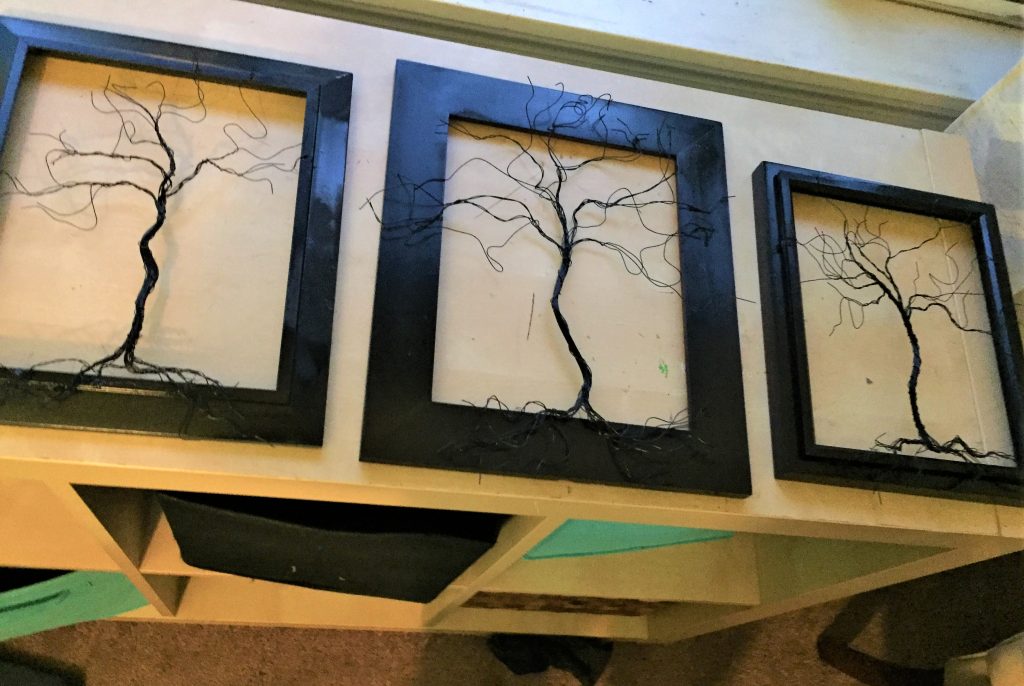
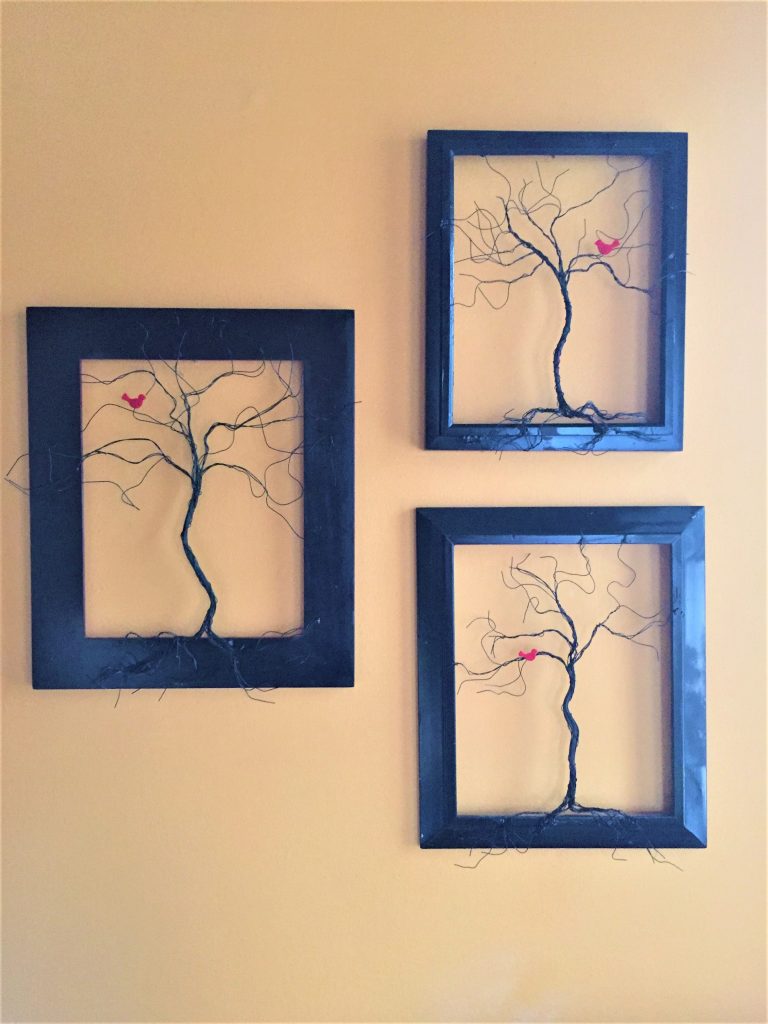
7. Hang up and stand back
Find a wall in your home or office in need of some love and attention.
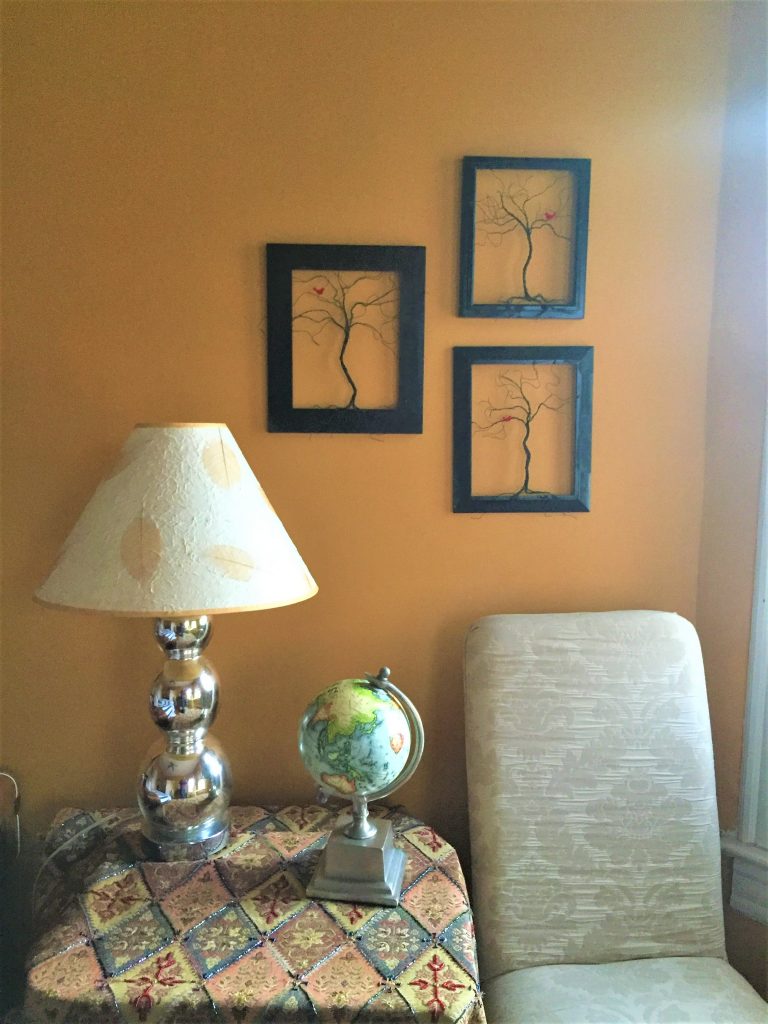
Hang this trio of tree art pieces and you are sure to never just walk by that place again.
You will be so happy that with some wire, some twisting and some gluing, you created special, seasonal art that you just might want to leave up all-year long!


